Top 10 Cheesecake Filling Recipes: Flavors & Ingredients You Need
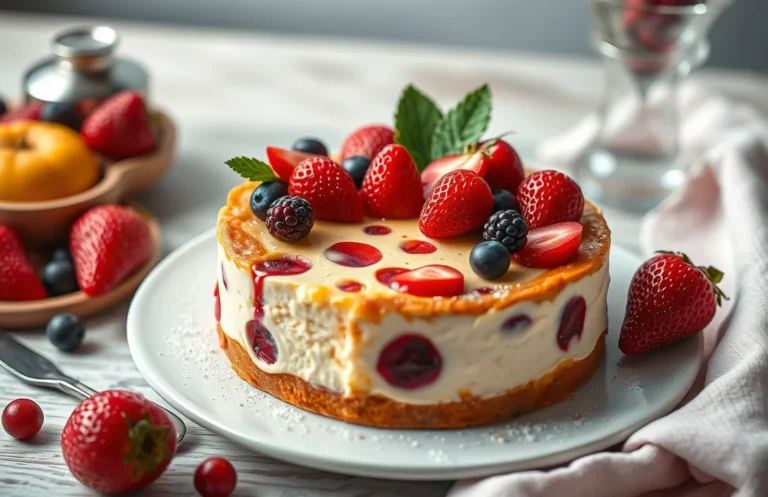
There’s something undeniably comforting about a perfectly creamy cheesecake filling that just melts in your mouth. Whether it’s a classic New York style or a fruity variation topped with fresh berries, these fillings transform any occasion into a celebration. Your friends and family will be begging for seconds!
Discover five delicious cheesecake filling recipes that are sure to impress, with exact measurements and tips for flavor variations. Total time: 30 minutes prep, no baking necessary. Difficulty level: Easy, serves 8.
| Prep Time | Cook Time | Total Time | Servings | Difficulty |
|---|---|---|---|---|
| 30 minutes | 0 minutes | 30 minutes | 8 | Easy |
Cheesecake Filling Origins
Cheesecake has a rich history that dates back to ancient Greece, where it was served to athletes during the first Olympic Games. Over the centuries, cheesecake fillings have evolved significantly, reflecting local ingredients and cultural preferences. Understanding the origins of these fillings not only enhances our appreciation of this beloved dessert but also inspires creativity in our own kitchens.
- Ancient Greece: The earliest known cheesecakes were made with simple ingredients like fresh cheese, honey, and flour. The Greeks valued these ingredients for their nutritional benefits, making cheesecake a popular dish for special occasions.
- Roman Influence: The Romans adopted Greek cheesecake recipes and introduced new elements such as eggs and additional sweeteners. This adaptation led to richer textures and flavors, setting the stage for modern cheesecake fillings.
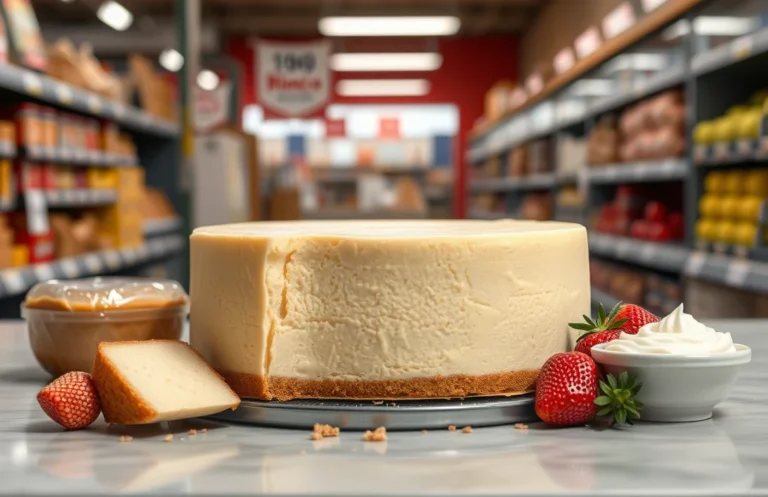
- New York Style: In the 19th century, cream cheese was invented in the United States, giving rise to the iconic New York-style cheesecake. This version features a dense and creamy filling, often made with just cream cheese, sugar, eggs, and vanilla extract.
- Flavor Variations: As cheesecake gained popularity worldwide, various regions began to experiment with unique flavor combinations. From fruity additions like strawberries and blueberries to decadent chocolate and caramel swirls, the possibilities for cheesecake fillings are virtually endless.
Each of these historical influences contributes to the diverse range of cheesecake fillings we enjoy today, allowing home cooks to customize their desserts to suit any palate or occasion.
Essential Ingredients List
This section outlines the essential ingredients you’ll need to create a variety of cheesecake fillings, from classic to decadent flavors. Each filling offers a unique taste and texture, perfect for any cheesecake lover. Let’s dive into the specifics so you can prepare the perfect filling for your next dessert.
| Item | Amount/Specification | Notes |
|---|---|---|
| Classic Cream Cheese Filling | 24 oz (680g) cream cheese | Softened at room temperature |
| Granulated Sugar | 1 cup (200g) | Adjust to taste |
| Heavy Cream | 1/2 cup (120ml) | Whipped to soft peaks |
| Vanilla Extract | 2 teaspoons | Pure extract preferred |
| Chocolate Filling | 8 oz (225g) semi-sweet chocolate | Melted and cooled |
| Fruit Filling (e.g., Strawberry) | 2 cups (300g) fresh strawberries | Puréed or diced |
| Caramel Filling | 1 cup (240ml) caramel sauce | Store-bought or homemade |
| Nut Filling (e.g., Pecan) | 1 cup (150g) pecans | Chopped |
- For a lighter filling, consider using low-fat cream cheese.
- Substitute almond or coconut extract for a unique flavor twist.
- Always taste your fillings and adjust sweetness as needed.
- If using frozen fruit, thaw and drain excess moisture before adding.
Required Kitchen Tools
Gathering the right kitchen tools is essential for making creamy and delicious cheesecake fillings. Each piece of equipment plays a unique role in ensuring your filling turns out perfectly smooth and flavorful. Here’s a comprehensive list of what you’ll need:
| Item | Amount/Specification | Notes |
|---|---|---|
| Mixing Bowls | 2 large | One for mixing the filling, another for combining flavors. |
| Electric Mixer | 1 | A hand mixer or stand mixer for achieving a smooth texture. |
| Measuring Cups | 1 set | For accurate measurements of ingredients like cream cheese and sugar. |
| Spatula | 1 | For folding ingredients and scraping the bowl. |
- Tip: Use glass or stainless steel bowls for mixing to avoid any reactions with acidic ingredients.
- Ensure your cream cheese is at room temperature for easier blending.
- Keep your electric mixer on low speed when first combining ingredients to prevent splatter.
- A silicone spatula is ideal for scraping down the sides of the bowl to incorporate all ingredients evenly.
Step-by-Step Preparation
This section will guide you through the precise steps to prepare various cheesecake filling ingredients, ensuring a creamy and delicious result. Understanding these steps is essential for achieving the perfect texture and flavor in your cheesecake.
- Mixing Ingredients: Begin by gathering your ingredients: 16 ounces (450g) cream cheese, softened to room temperature; ½ cup (100g) granulated sugar; 2 large eggs; 1 teaspoon vanilla extract; and ½ cup (120ml) sour cream. In a large mixing bowl, beat the softened cream cheese with an electric mixer on medium speed for 2-3 minutes until it’s smooth and creamy. Scrape down the sides of the bowl to ensure even mixing.
- Incorporating Sweeteners and Flavorings: Gradually add the sugar to the cream cheese mixture, beating for another minute until fully combined. Add the eggs one at a time, mixing on low speed after each addition until just blended. Then, fold in the vanilla extract and sour cream using a spatula, ensuring not to overmix, which could incorporate too much air.
- Chilling Time: Once your filling is combined, cover the bowl with plastic wrap and refrigerate it for at least 30 minutes. This chilling time helps the flavors meld together and allows the mixture to thicken slightly, making it easier to spread into the crust.
- Filling the Crust: Preheat your oven to 325°F (160°C). Remove the filling from the fridge and give it a gentle stir. Carefully pour the filling into your prepared crust, smoothing the top with a spatula. Make sure to leave a little space at the top to allow for any puffing during baking.
Chef’s tip: If you notice lumps in your filling, continue to beat it on low until smooth, but be careful not to overmix.
Expert Tips for Success
When crafting the perfect cheesecake filling, the right techniques can elevate your dessert from good to extraordinary. Avoiding common pitfalls like overmixing and ensuring proper chilling can significantly impact the texture and flavor of your cheesecake.
Avoid Overmixing
- Mix just until combined: Overmixing can incorporate too much air into your filling, leading to cracks during baking. Aim to mix your cream cheese, sugars, and other ingredients just until they create a smooth mixture, usually about 1-2 minutes on medium speed.
- Scrape down the bowl frequently: To ensure even blending without excessive mixing, pause to scrape down the sides of your mixing bowl. This helps incorporate all ingredients without the need for prolonged mixing.
Proper Chilling Techniques
- Chill ingredients before use: For a smoother filling, consider chilling your cream cheese and eggs before mixing. Cold ingredients blend more easily, reducing the chance of lumps.
- Cool before refrigerating: After mixing your filling, allow it to sit at room temperature for about 10-15 minutes before chilling. This helps prevent condensation from forming on the surface, which can lead to a watery filling.
- Refrigerate for at least 4 hours: Once your cheesecake is assembled, refrigerate it for a minimum of 4 hours, or ideally overnight. This helps the flavors meld together and enhances the overall texture.
Flavor Variations and Substitutions
This section highlights various flavor options and ingredient substitutions to cater to different dietary needs while making cheesecake fillings. Whether you’re looking for vegan alternatives or gluten-free options, these suggestions will help you create a delightful cheesecake that everyone can enjoy!
Vegan Options
| Item | Amount/Specification | Notes |
|---|---|---|
| Cream Cheese Substitute | 2 cups silken tofu (480g) | Blend until smooth for a creamy texture. |
| Sour Cream Substitute | ½ cup coconut cream (120g) | Use full-fat coconut milk for a richer flavor. |
| Sweetener | ¾ cup maple syrup (180ml) | Adjust sweetness to taste. |
| Egg Substitute | ½ cup unsweetened applesauce (120g) | Provides moisture and binding. |
Gluten-Free Variants
| Item | Amount/Specification | Notes |
|---|---|---|
| Crust | 1 ½ cups gluten-free graham cracker crumbs (150g) | Ensure they are labeled gluten-free. |
| Flour Substitute | 2 tablespoons cornstarch (16g) | Helps to thicken the filling. |
| Flavoring | 1 teaspoon vanilla extract | Use pure extract for best results. |
- Tip: Always taste your filling before baking to adjust flavors.
- For a richer taste, consider adding a tablespoon of lemon juice or zest.
- Experiment with various plant-based milk options for unique flavors.
Serving and Plating Ideas
Presenting your cheesecake beautifully can elevate the entire dessert experience. With the right garnishing techniques and beverage pairings, you can create a delightful showcase for your cheesecake that will impress family and friends. Here are some suggestions to enhance your serving presentation.
Garnishing Techniques
- Top your cheesecake with a fresh fruit compote, such as 1 cup of mixed berries (strawberries, blueberries, raspberries), simmered with 2 tablespoons of sugar until thickened.
- Sprinkle a dusting of powdered sugar over the cheesecake just before serving for an elegant touch.
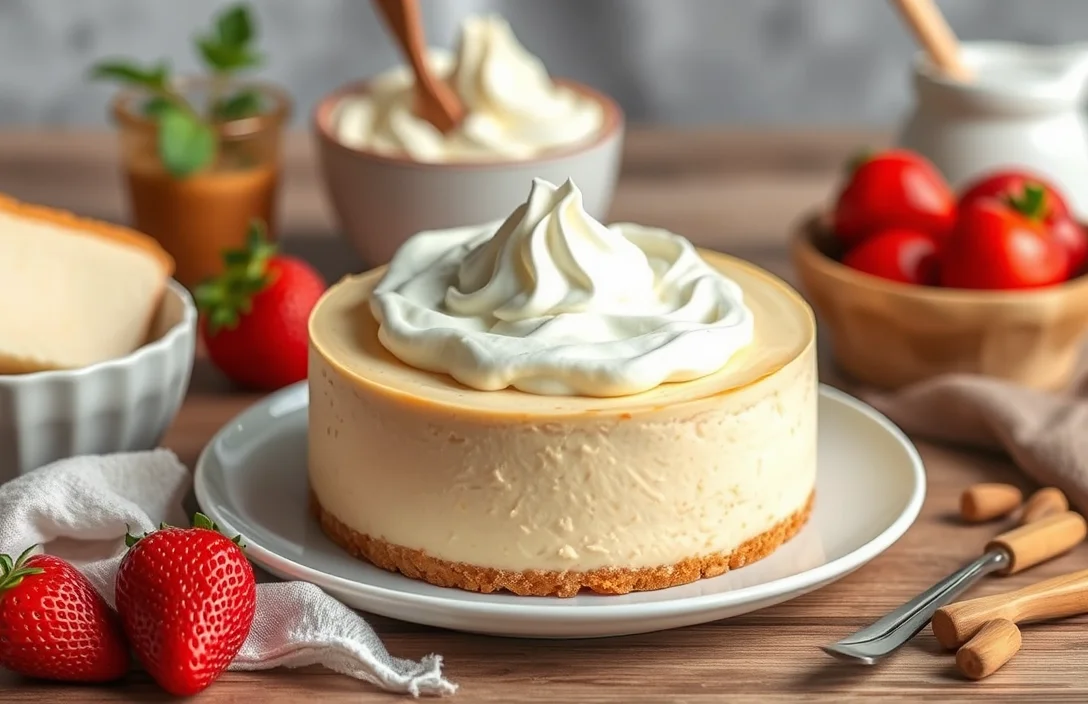
- Add a dollop of whipped cream made from 1 cup of heavy cream, whipped until soft peaks form, and sweetened with 2 tablespoons of sugar.
- For a chocolate lover’s twist, drizzle melted dark chocolate (about ½ cup) over the top for a rich finish.
Beverage Pairings
| Beverage | Pairing Notes |
|---|---|
| Coffee | The bitterness complements the sweetness of the cheesecake nicely. |
| Sweet Dessert Wine | Choose a late harvest Riesling or Moscato to enhance fruity flavors. |
| Herbal Tea | A calming chamomile or mint tea can balance the richness. |
Chef’s tip: Always serve your cheesecake chilled for the best texture and flavor. Allowing it to sit out for about 10-15 minutes before cutting makes slicing easier.
Quick Summary
| Prep Time | 15 minutes |
|---|---|
| Cook Time | 0 minutes |
| Total Time | 15 minutes |
| Servings | 8 servings |
- Use room temperature cream cheese: It blends smoothly without lumps.
- Incorporate sugar gradually: This ensures even sweetness throughout.
- Add eggs one at a time: Prevents overmixing and maintains a light texture.
- Include vanilla extract: A teaspoon adds depth and enhances flavor.
- Don’t overbeat: Mix just until combined for a creamy consistency.
Frequently Asked Questions
Can I make this ahead of time? How to store and reheat?
You can definitely make cheesecake filling ahead of time! Store it in an airtight container in the fridge for up to 3 days, and simply give it a good stir before using.
What can I substitute for cream cheese?
If you’re looking for a substitute for cream cheese, you can use mascarpone cheese for a similar texture and taste, or Greek yogurt for a lighter option, though it will change the flavor slightly.
How do I know when it’s done?
Your cheesecake filling is done when it’s smooth and creamy, and there are no lumps; it should hold its shape but still be slightly soft in the center when you pour it into the crust.
Can I freeze this? How long does it last?
You can freeze cheesecake filling for up to 2 months in an airtight container, but be sure to thaw it in the refrigerator overnight before using it again.
What if I don’t have a mixer?
If you don’t have a mixer, you can use a sturdy whisk and some elbow grease to beat your ingredients together until smooth; just make sure to soften the cream cheese first to make it easier to blend.

- Top 10 Best Water For Espresso Machine 2026 - July 29, 2026
- Top 10 Best Professional Home Espresso Machine 2026 - July 29, 2026
- Top 10 Best Lever Espresso Machine 2026 - July 29, 2026