Perfect Cheesecake Baking Temperature: Tips for Creamy Texture
There’s nothing quite like a perfectly baked cheesecake to satisfy your sweet tooth and impress your guests. With its creamy texture and rich flavor, this dessert is an absolute crowd-pleaser, whether it’s for a special occasion or a cozy weeknight treat. Each bite melts in your mouth, leaving you craving more.
This guide will provide you with exact baking temperatures, timing, and troubleshooting tips to ensure your cheesecake turns out flawlessly every time. You’ll learn about the ideal methods for checking doneness and preventing cracks, making it easier than ever to achieve that perfect slice. Expect a total time of about 1 hour and 30 minutes with a moderate difficulty level, serving 8 delicious portions.
| Prep Time | 20 minutes |
|---|---|
| Cook Time | 60 minutes |
| Total Time | 1 hour 30 minutes |
| Servings | 8 |
| Difficulty | Moderate |
Cheesecake Origins and Significance
Cheesecake has a rich history that spans various cultures and occasions, making it more than just a dessert; it’s a symbol of celebration and tradition. Understanding its origins helps us appreciate the nuances of baking it, including the importance of the right temperature for achieving that perfect creamy texture.
Cultural Roots
Cheesecake dates back to ancient Greece, where it was served to athletes at the first Olympic Games in 776 B.C. It has evolved through the centuries, with different cultures adding their unique spins:
- Greek Cheesecake: Made with fresh cheese like ricotta or goat cheese, typically sweetened with honey.
- Italian Ricotta Cheesecake: This version uses ricotta instead of cream cheese, giving it a lighter texture.
- New York Style: Famous for its dense and creamy texture, this cheesecake is typically baked at a higher temperature.
Special Occasions
Cheesecake is often the centerpiece of celebrations. Here are some occasions where you might find it served:
- Birthdays: A classic choice for a sweet celebration.
- Weddings: Often featured as a tiered dessert in place of traditional cakes.
- Holidays: A favorite during festive gatherings, particularly in winter months.
Chef’s tip: Serve cheesecake chilled and garnish with fresh fruits or a drizzle of caramel sauce for an extra touch!
These cultural roots and special occasions highlight the significance of cheesecake in our culinary traditions. Understanding its history not only enriches the baking experience but also emphasizes the importance of baking it at the right temperature for that ideal texture.
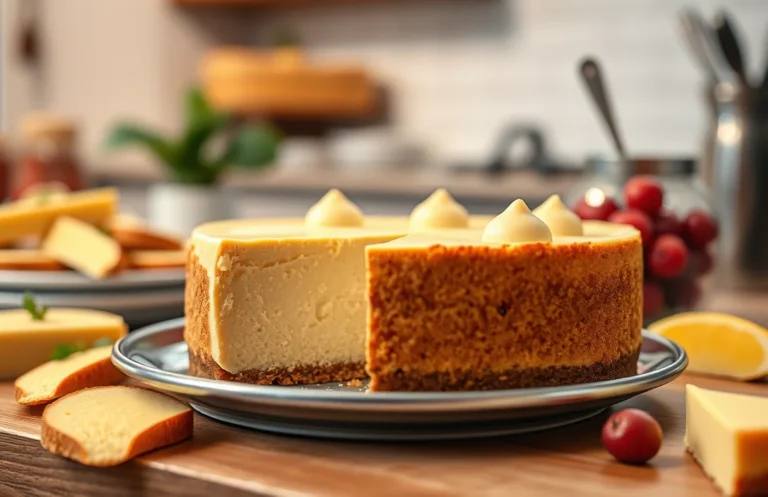
Essential Ingredients for Cheesecake
To create a perfectly baked cheesecake, you need to ensure you have the right ingredients in precise measurements. Each component plays a crucial role in achieving that creamy texture and rich flavor, and understanding how they work together will help you achieve the ideal baking temperature and doneness.
| Item | Amount/Specification | Notes |
|---|---|---|
| Cream Cheese | 24 ounces (680g) | Use full-fat for best flavor and texture |
| Sugar | 1 cup (200g) | Granulated sugar is preferred |
| Eggs | 3 large | Room temperature for better mixing |
| Graham Cracker Crust | 1½ cups (150g) crushed graham crackers | Combine with ½ cup (100g) sugar and ½ cup (115g) melted butter |
- For a gluten-free option, use crushed gluten-free cookies for the crust.
- Make sure to soften the cream cheese to room temperature to avoid lumps in your batter.
- To avoid cracking, bake your cheesecake in a water bath.
- Keep an eye on the cheesecake while it bakes; it should be set around the edges but slightly jiggly in the center when done.
Necessary Kitchen Equipment
To create a perfect cheesecake, having the right kitchen equipment is essential. Each tool plays a crucial role in achieving the ideal texture and consistency, especially when it comes to maintaining the correct baking temperature. Here’s a rundown of the essential equipment you’ll need.
| Item | Amount/Specification | Notes |
|---|---|---|
| Springform Pan | 9-inch (23 cm) | Allows for easy removal of the cheesecake without damaging it. |
| Mixing Bowls | 3 medium-sized | Use for mixing crust, filling, and for beating eggs. |
| Electric Mixer | Hand-held or stand | Ensures a smooth, lump-free batter; avoid over-mixing. |
- Tip: A springform pan with a tight seal will prevent water from leaking in if you’re using a water bath.
- Tip: Use glass or metal mixing bowls for better heat retention when mixing ingredients at room temperature.
- Tip: If you don’t have an electric mixer, a whisk can work, but it requires more effort to achieve a creamy consistency.
Step-by-Step Baking Instructions
This section will guide you through the essential steps for baking your cheesecake, focusing on the ideal temperature and timing to achieve a smooth, creamy texture. Following these instructions will help ensure your cheesecake turns out perfectly every time!
- Preparing the Crust: Preheat your oven to 325°F (163°C). In a medium mixing bowl, combine 1 ½ cups (150g) of graham cracker crumbs, ½ cup (100g) of granulated sugar, and ½ cup (115g) of melted unsalted butter. Mix until well combined. The mixture should be moist and hold together when pressed. Pour this mixture into a 9-inch (23cm) springform pan and press it firmly into the bottom and slightly up the sides. Bake for 10 minutes, then remove it from the oven and let it cool while you prepare the filling.
- Mixing the Filling: In a large bowl, beat 24 ounces (680g) of softened cream cheese using an electric mixer on medium speed until smooth and creamy, about 2-3 minutes. Gradually add 1 cup (200g) of granulated sugar, 1 teaspoon of vanilla extract, and 3 large eggs, mixing until just combined. The mixture should be smooth with no lumps. Be careful not to overmix, as this can incorporate too much air, leading to cracks.
- Baking Temperature Guidelines: Pour the filling over the cooled crust in the springform pan. Place the pan in the center of the preheated oven at 325°F (163°C). Bake for 50-60 minutes until the edges are set but the center still has a slight jiggle. Do not open the oven door during the first 30 minutes to maintain consistent heat. After baking, turn off the oven and leave the cheesecake inside for an additional hour. This will help prevent cracks by allowing it to cool gradually.
Tips for Perfect Cheesecake Texture
Achieving the perfect cheesecake texture is all about controlling the baking environment and cooling process. Proper techniques can prevent cracks and ensure a silky, creamy filling. Here are some essential tips to help you succeed.
Water Bath Technique
- Use a springform pan: This allows for easy removal of the cheesecake. Make sure to wrap the outside of the pan with aluminum foil to prevent water from seeping in.
- Prepare the water bath: Place the springform pan inside a larger baking dish. Fill the outer dish with hot water until it reaches halfway up the sides of the springform pan. This gentle heat helps cook the cheesecake evenly and prevents cracking.
- Bake at the right temperature: Set your oven to 325°F (163°C). This moderate temperature helps the cheesecake to bake slowly, promoting a creamy texture without overcooking the edges.
Cooling Process
- Gradual cooling: After baking, turn off the oven and crack the door open. Let the cheesecake cool in the oven for about 1 hour. This gradual change in temperature reduces the risk of cracks.
- Chill in the refrigerator: Once cooled, transfer the cheesecake to the fridge and let it chill for at least 4 hours, preferably overnight. This allows the flavors to meld and the texture to firm up.
- Cover with plastic wrap: While chilling, cover the cheesecake lightly with plastic wrap to prevent any moisture from forming on the surface.
Cheesecake Variations and Substitutions
Exploring variations and substitutions for cheesecake is essential for accommodating different dietary needs and preferences. Whether you’re aiming for a no-bake option, a fluffy Japanese cheesecake, or need gluten-free or vegan alternatives, it’s all about achieving the right baking temperature to ensure your dessert comes out perfect.
No-Bake Cheesecake
No-bake cheesecakes require a different approach since they don’t rely on baking to set. Instead, they are chilled to achieve the right consistency. Here’s what you need to know:
- Chill the filling for at least 4 hours, or overnight for best results.
- Use a firm cream cheese (like Philadelphia) for a smooth texture.
- Be sure to whip the cream to soft peaks before folding it into the mixture for lightness.
Japanese Cheesecake
This lighter, fluffier version of cheesecake is unique and requires specific baking conditions:
- Bake at 325°F (160°C) in a water bath for about 60 minutes.
- Ensure the center is slightly jiggly when you take it out; it will firm up as it cools.
Gluten-Free Options
For a gluten-free cheesecake, substitute the regular crust with:
- 1 ½ cups gluten-free graham cracker crumbs
- ¼ cup sugar
- ½ cup unsalted butter, melted
Mix these together and press firmly into your springform pan before baking.
Vegan Substitutions
To make a vegan cheesecake, consider these ingredients:
- Substitute cream cheese with 1 ½ cups soaked cashews blended until smooth.
- Use ½ cup coconut cream instead of heavy cream for richness.
- Replace eggs with ¼ cup of unsweetened applesauce or 1 tablespoon of ground flaxseed mixed with 2.5 tablespoons of water.
Chef’s tip: Always taste your batter before setting it; you can adjust sweetness or flavorings as needed!
Serving and Plating Ideas
Presenting your cheesecake beautifully elevates the overall dessert experience. The way you serve your cheesecake can complement its rich flavors and textures, making it even more enjoyable. Here are some garnishing ideas and pairing suggestions to enhance your cheesecake.
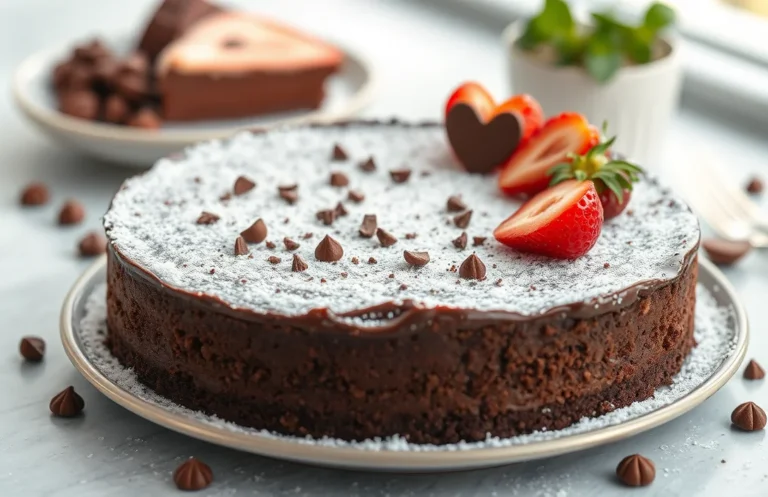
Garnishes
- Fresh Berries: Top your cheesecake with a mix of fresh strawberries, raspberries, and blueberries for a pop of color and natural sweetness.
- Chocolate Shavings: Use a vegetable peeler to create elegant curls from a chocolate bar to sprinkle on top.
- Whipped Cream: Add a dollop of freshly whipped cream (1 cup heavy cream whipped with 2 tablespoons powdered sugar) for a creamy contrast.
- Citrus Zest: Grate some lemon or orange zest over the top for a refreshing touch that cuts through the richness.
Best Pairings
| Drink | Flavor Profile |
|---|---|
| Coffee | The bitterness of coffee balances the sweetness of the cheesecake. |
| Red Wine | A light red, like Pinot Noir, complements fruit toppings well. |
| Herbal Tea | A calming chamomile or mint tea enhances the cheesecake’s creaminess. |
Chef’s tip: Serve your cheesecake chilled, ideally after letting it set in the refrigerator for at least 4 hours, or overnight for the best flavor and texture.
By choosing thoughtful garnishes and pairings, you can turn a simple cheesecake into an unforgettable dessert experience that delights both the eyes and the palate.
Quick Summary
| Prep Time | 15 minutes |
|---|---|
| Cook Time | 60 minutes |
| Total Time | 1 hour 15 minutes |
| Servings | 8 |
- Preheat oven to 325°F (163°C) for optimal baking.
- Bake for 60 minutes until the center is slightly jiggly.
- Cool gradually to prevent cracks; leave in the oven for 1 hour post-bake.
- Chill in the refrigerator for at least 4 hours before serving.
- Use a water bath for even temperature and moisture.
- Tip: Always use room temperature ingredients for a smooth batter.
- Tip: Avoid opening the oven door during baking to maintain heat.
Frequently Asked Questions
Can I make this cheesecake ahead of time? How should I store it?
You can make cheesecake up to 2 days ahead of time. Store it covered in the refrigerator at a temperature of 40°F (4°C) or lower.
What can I substitute for cream cheese?
You can substitute mascarpone cheese for cream cheese in a 1:1 ratio for a richer flavor, or use a combination of ricotta and Greek yogurt for a lighter option.
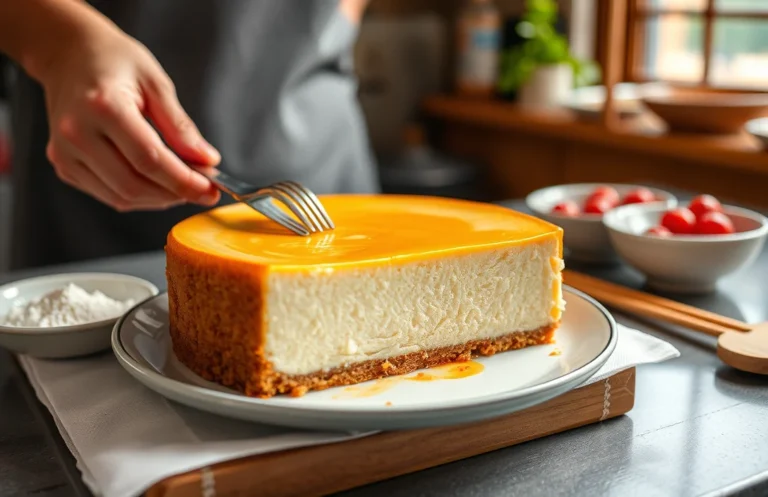
How do I know when my cheesecake is done baking?
Your cheesecake is done when the edges are set and the center has a slight jiggle, indicating it will firm up as it cools — typically around 150°F (65°C) when checked with a thermometer.
Can I freeze cheesecake? How long does it last in the freezer?
Yes, you can freeze cheesecake for up to 2 months. Make sure to wrap it tightly in plastic wrap and then in aluminum foil to prevent freezer burn.
What if I don’t have a springform pan?
If you don’t have a springform pan, you can use a regular round cake pan lined with parchment paper, but keep in mind that it may be a bit tricky to remove the cheesecake once it’s set.

- Decadent Peanut Butter No-Bake Cheesecake: Easy Recipe to Indulge - April 3, 2026
- Delicious Mango No-Bake Cheesecake: Step-by-Step Recipe - April 3, 2026
- Decadent Raspberry No-Bake Cheesecake: Easy Step-by-Step Recipe - April 3, 2026