7 Delicious Cheesecake Crust Recipes for Every Sweet Tooth
There’s something truly special about a homemade cheesecake crust that elevates your dessert from good to unforgettable. Whether it’s a classic New York-style cheesecake or a rich chocolate version, the crust sets the foundation for a delicious treat that will impress your family and friends. Imagine the crunch of a perfectly baked graham cracker or cookie crust paired with creamy, luscious filling—now that’s comfort food at its finest!
Key details: Total time: 30 minutes, Difficulty: Easy, Servings: 8-10.
| Prep Time | Cook Time | Total Time | Servings | Difficulty |
|---|---|---|---|---|
| 10 minutes | 20 minutes | 30 minutes | 8-10 | Easy |
History of Cheesecake Crust
The cheesecake crust has a rich history that reflects cultural influences and culinary evolution over centuries. Understanding its origins and traditional variants can enhance your appreciation and execution of this beloved dessert.
Cultural Background
- Ancient Greece: The earliest known cheesecake dates back to ancient Greece around 2000 B.C. It was often made with simple ingredients like cheese, flour, and honey, and served to athletes at the first Olympic Games.
- Roman Influence: The Romans adapted the Greek cheesecake, using ricotta and introducing the idea of baking it. This led to the development of cheesecake as a dessert enjoyed by the upper class.
- European Variants: As cheesecake spread across Europe, regional variations emerged. For instance, the German Käsekuchen typically features a shortcrust pastry, while Italian ricotta cheesecakes often have a lighter texture.
Traditional Variants
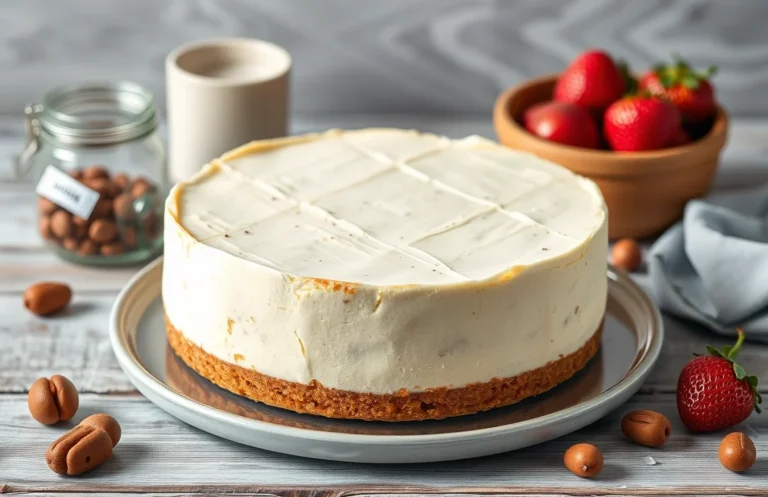
- New York-Style: This variant is perhaps the most renowned. It uses a simple graham cracker crust, which adds a delightful crunch and complements the dense, creamy filling.
- Italian Ricotta: Instead of cream cheese, this version uses ricotta for a lighter, fluffier texture. The crust is usually made of crushed cookies or sponge cake.
- No-Bake Options: No-bake cheesecakes often feature a crust made from crushed graham crackers combined with melted butter, providing an easy and quick alternative for those who want a chilled dessert without baking.
Essential Ingredients List
In this section, you’ll find the essential ingredients for three distinct cheesecake crusts: Graham Cracker, Chocolate Cookie, and Nut-Based Crusts. Choosing the right crust is crucial as it sets the foundation for your cheesecake’s flavor and texture, so let’s get started with the specifics.
| Item | Amount/Specification | Notes |
|---|---|---|
| Graham Crackers | 1 ½ cups (150g) crushed | Use plain or honey-flavored for sweetness |
| Granulated Sugar | ¼ cup (50g) | Adjust based on sweetness preference |
| Unsalted Butter | ½ cup (113g), melted | Ensure it’s fully melted for even mixing |
| Chocolate Cookies | 1 ½ cups (150g) crushed | Oreo or similar cookies work well |
| Nut Mixture (e.g., almonds, walnuts) | 1 cup (100g), finely chopped | Use unsweetened nuts for balance |
| Brown Sugar | 2 tablespoons (30g) | Adds depth to nut crusts |
| Salt | ½ teaspoon | Balances sweetness in all crusts |
- For a gluten-free option, use gluten-free cookies or nuts as the base.
- Make sure to crush the cookies or crackers thoroughly to avoid large chunks.
- Keep an eye on the crust while baking; it should be golden and fragrant.
- To prevent a soggy crust, allow it to cool completely before adding the cheesecake filling.
Necessary Kitchen Equipment
To create the perfect cheesecake crust, having the right kitchen tools is essential. These tools will help you mix, press, and bake your crust to achieve that delicious, buttery foundation for your cheesecake. Here’s a list of the equipment you’ll need to get started.
- Mixing Bowl: A large mixing bowl (at least 3 quarts) is a must for combining your crust ingredients. Choose one that is easy to clean, preferably glass or stainless steel, to avoid any lingering odors.
- Measuring Cups and Spoons: Accurate measurements are crucial for achieving the right texture and flavor. Have a set of dry measuring cups (1 cup, ½ cup, ⅓ cup, and ¼ cup) and a set of measuring spoons (1 tablespoon, 1 teaspoon) on hand.
- Food Processor (optional): If you’re using graham crackers or cookies for your crust, a food processor makes quick work of crushing them into fine crumbs. This tool will save you time and effort compared to crushing by hand.
- Rubber Spatula: A rubber spatula is great for folding ingredients together and scraping down the sides of your mixing bowl. This ensures everything is well combined without leaving any dry ingredients behind.
- 9-inch Springform Pan: A springform pan is ideal for cheesecakes, as it allows you to easily remove the cake without damaging the crust. Ensure it’s greased or lined with parchment paper for easier release.
- Rolling Pin (if needed): If you’re making a cookie crust, a rolling pin can help crush the cookies evenly in a plastic bag. Alternatively, you can also use a heavy skillet or the bottom of a glass.
Chef’s tip: Make sure your ingredients, especially butter, are at room temperature for easier mixing and better incorporation.
Step-by-Step Crust Instructions
Creating the perfect cheesecake crust is essential for an outstanding cheesecake experience. Below are detailed instructions for three popular types of cheesecake crusts: Graham Cracker, Chocolate Cookie, and Nut-Based crusts. Each type has its unique flavor and texture, making it easy to customize your cheesecake.
Graham Cracker Crust Steps
- Ingredients:
- 1 ½ cups graham cracker crumbs (150g)
- ⅓ cup granulated sugar (67g)
- ½ cup unsalted butter, melted (113g)
- Preheat your oven to 350°F (175°C). This temperature is crucial for achieving a perfectly crisp crust.
- In a medium bowl, combine 1 ½ cups of graham cracker crumbs and ⅓ cup of granulated sugar. Whisk them together until fully mixed.
- Pour in ½ cup of melted unsalted butter and stir until the mixture resembles wet sand.
- Press the mixture firmly into the bottom of a 9-inch (23cm) springform pan, ensuring an even layer. Use the bottom of a measuring cup for a smooth finish.
- Bake in the preheated oven for 8-10 minutes, or until it turns golden brown. This step enhances the flavor and texture.
- Let it cool while you prepare your cheesecake filling.
Chocolate Cookie Crust Steps
- Ingredients:
- 1 ½ cups chocolate cookie crumbs (150g)
- ⅓ cup granulated sugar (67g)
- ½ cup unsalted butter, melted (113g)
- Preheat your oven to 350°F (175°C). This temperature will help set the crust nicely.
- In a mixing bowl, combine 1 ½ cups of chocolate cookie crumbs and ⅓ cup of granulated sugar. Stir until well mixed.
- Add ½ cup of melted unsalted butter and mix until it holds together.
- Evenly press the mixture into the bottom of your springform pan, ensuring it’s compact. A flat-bottomed glass works well here.
- Bake for about 8-10 minutes until the edges are slightly firm. Allow it to cool before adding the filling.
Nut-Based Crust Steps
- Ingredients:
- 1 ½ cups almond flour (150g) or finely chopped nuts
- ⅓ cup granulated sugar (67g)
- ⅓ cup unsalted butter, melted (75g)
- Preheat your oven to 350°F (175°C) to prepare for baking the crust.
- In a bowl, mix 1 ½ cups of almond flour (or your choice of nuts) with ⅓ cup of granulated sugar until combined.
- Incorporate ⅓ cup of melted unsalted butter and stir until the mixture is moist and crumbly.
- Press the mixture into the bottom of your springform pan, ensuring it’s packed down tightly for structural integrity.
- Bake for 10-12 minutes, or until lightly browned and fragrant. Let it cool completely before filling
Pro Tips for Perfect Crust
Creating the perfect cheesecake crust involves more than just mixing ingredients. Understanding the nuances of baking time and using high-quality ingredients can elevate your crust from good to great, ensuring a delicious foundation for your cheesecake.
- Baking Time Matters: Always bake your crust until it’s lightly golden brown, which typically takes about 10-12 minutes at 350°F (175°C). This not only enhances the flavor but also helps the crust hold its shape when filled. If your crust edges start to darken too much, cover them with foil.
- Invest in Quality Ingredients: Using high-quality graham crackers or cookies makes a significant difference in flavor. Aim for fresh, organic options if possible. For butter, opt for unsalted butter to control the saltiness in your crust.
- Don’t Skip the Chilling: After baking, allow your crust to cool completely before adding the cheesecake filling. This helps set the crust and prevents it from becoming soggy when the filling is added.
- Watch for Overmixing: When combining your crust ingredients, mix just until incorporated. Overmixing can lead to a tougher texture, which is not ideal for a creamy cheesecake.
- Consider Ingredient Substitutions: For a gluten-free option, use gluten-free graham crackers or ground almonds. If you’re dairy-sensitive, try coconut oil instead of butter, but keep in mind that it may alter the flavor slightly.
Crust Variations and Modifications
This section focuses on accommodating different dietary needs by providing gluten-free and vegan options for cheesecake crusts. Whether you’re avoiding gluten or dairy, these variations ensure everyone can enjoy a delicious cheesecake without compromising on flavor or texture.
Gluten-Free Options
For those avoiding gluten, you can easily create a delicious crust using alternative flours and ingredients. Here are a couple of options:
- Almond Flour Crust: Combine 1 ½ cups almond flour (150g), ¼ cup coconut oil (60ml), and 2 tablespoons maple syrup. Press into the bottom of your pan and bake at 350°F (175°C) for 10-12 minutes until lightly golden.
- Gluten-Free Graham Cracker Crust: Use 1 ½ cups gluten-free graham cracker crumbs (150g), ⅓ cup sugar (67g), and ½ cup melted butter (115g). Bake at 350°F (175°C) for 8-10 minutes until fragrant.
Vegan Alternatives
If you’re looking for a vegan cheesecake crust, there are simple substitutions to make. Here are some ideas:
- Oat and Date Crust: Blend 1 ½ cups rolled oats (135g) and 1 cup pitted Medjool dates (150g) until crumbly. Press into your pan and chill for 30 minutes before filling.
- Nut-Based Crust: Combine 1 cup walnuts (100g), 1 cup pitted dates (150g), and a pinch of salt. Process until sticky and press into the bottom of your pan. No baking required!
Chef’s tip: For both gluten-free and vegan options, let the crust cool completely before adding your cheesecake filling to prevent it from becoming soggy.
Serving and Plating Ideas
Presenting your cheesecake crust properly can elevate your dessert experience. Whether you choose a classic graham cracker crust or a more adventurous option, knowing how to serve and pair flavors can enhance the overall enjoyment of your cheesecake.
Serving Suggestions
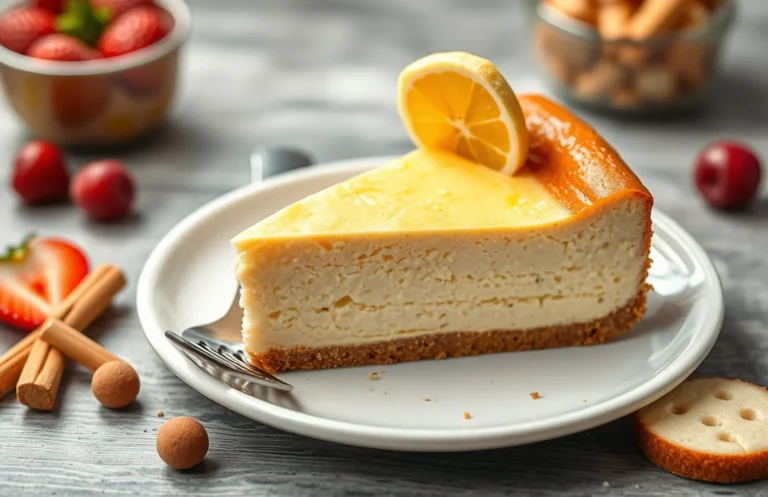
- Allow your cheesecake to cool completely before slicing; this helps maintain a clean cut. Use a sharp knife that you dip in hot water and wipe dry before each slice to achieve neat edges.
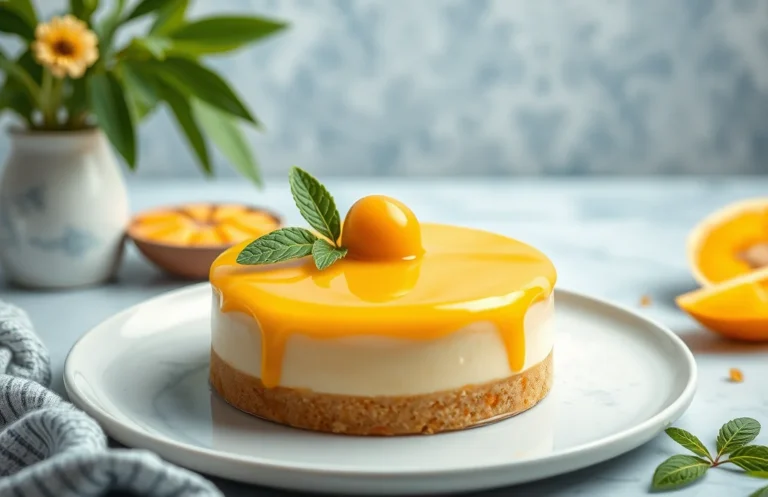
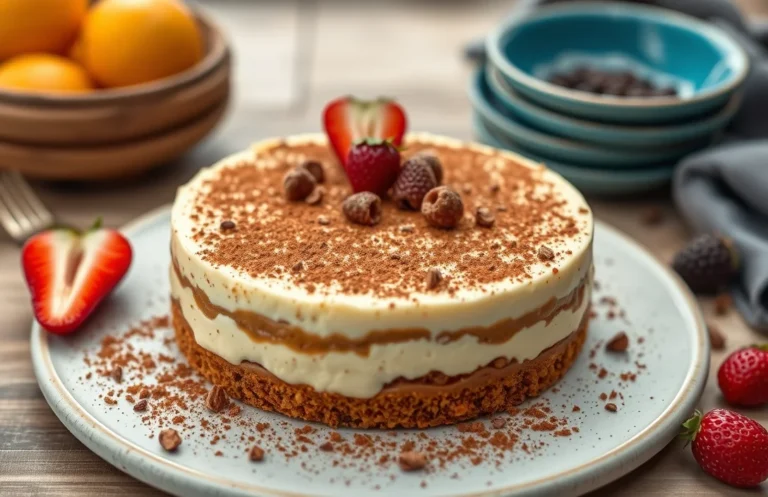
- For an elegant touch, consider placing a slice on a dessert plate with a small dollop of whipped cream or a drizzle of fruit sauce alongside it. This adds color and enhances taste without overshadowing the cheesecake.
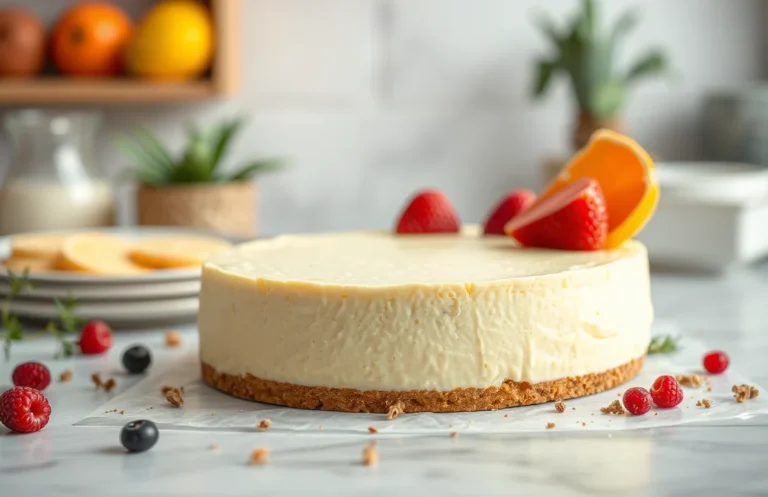
- Garnish with fresh fruits like berries or citrus slices, which not only look beautiful but also provide a refreshing contrast to the richness of the cheesecake. Sprinkle a bit of powdered sugar over the top for added sweetness and visual appeal.
Pairing Flavors
- Classic New York-style cheesecakes pair beautifully with raspberry or strawberry coulis. The tartness of the berries complements the creamy texture of the cheesecake.
- For chocolate cheesecake crusts, try serving with a rich chocolate ganache or a sprinkle of sea salt to enhance the deep flavors.
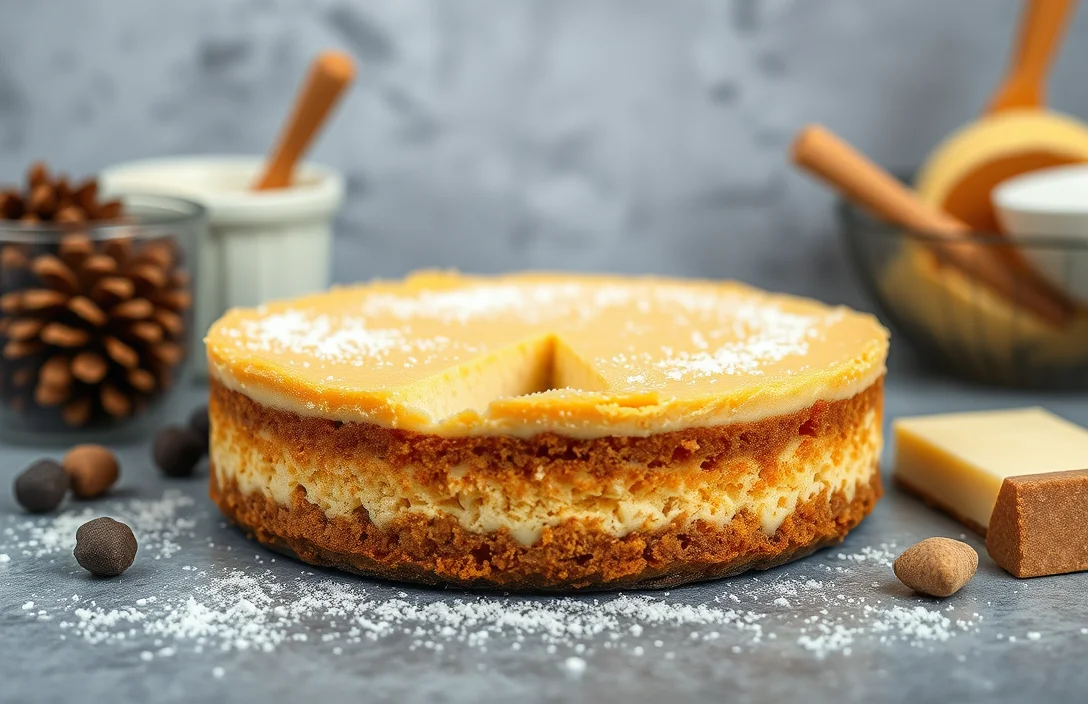
- If you opt for a pumpkin cheesecake, a sprinkling of cinnamon or nutmeg on top brings out the warm spices and adds a seasonal flair.
Quick Summary
| Prep Time | Cook Time | Total Time | Servings |
|---|---|---|---|
| 10 minutes | 10 minutes | 20 minutes | 8 |
- Preheat oven to 350°F (175°C) before mixing ingredients.
- Crush graham crackers finely for a smooth texture — about 1 ½ cups.
- Melt butter (7 tablespoons) and combine with crumbs and sugar.
- Press mixture evenly into a 9-inch springform pan.
- Bake for 10 minutes until golden, then cool completely.
- Tip: Use room temperature butter for easier mixing.
- Tip: Chill the crust for 30 minutes after baking for a firmer base.
- Tip: Add a pinch of salt to enhance flavor.
Frequently Asked Questions
Can I make this cheesecake crust ahead of time? How do I store and reheat it?
You can make the cheesecake crust up to 3 days in advance. Store it in an airtight container in the fridge, and there’s no need to reheat before filling.
What can I substitute for graham cracker crumbs?
You can use crushed digestive biscuits, vanilla wafers, or even Oreo crumbs for a chocolate twist. Just make sure to maintain the same measurement — 1 ½ cups of crumbs will be needed.
How do I know when my cheesecake crust is done?
Your cheesecake crust should be golden brown and slightly firm to the touch after baking for about 10-12 minutes at 350°F (175°C). Let it cool completely before adding the filling to ensure the best texture.
Can I freeze this cheesecake crust? How long does it last?
Yes, you can freeze the crust for up to 2 months. Just wrap it tightly in plastic wrap and aluminum foil to prevent freezer burn.
What if I don’t have a food processor to make the crust?
If you don’t have a food processor, you can place the graham crackers in a zip-top bag and crush them with a rolling pin until finely ground. Just make sure to get them as fine as possible for a smooth crust!

- Top 10 Ecm Mechanika Max Espresso Machine 2026 - July 29, 2026
- Top 10 De Longhi Espresso & Cappuccino Machine 2026 - July 29, 2026
- Top 10 Best Water For Espresso Machine 2026 - July 29, 2026