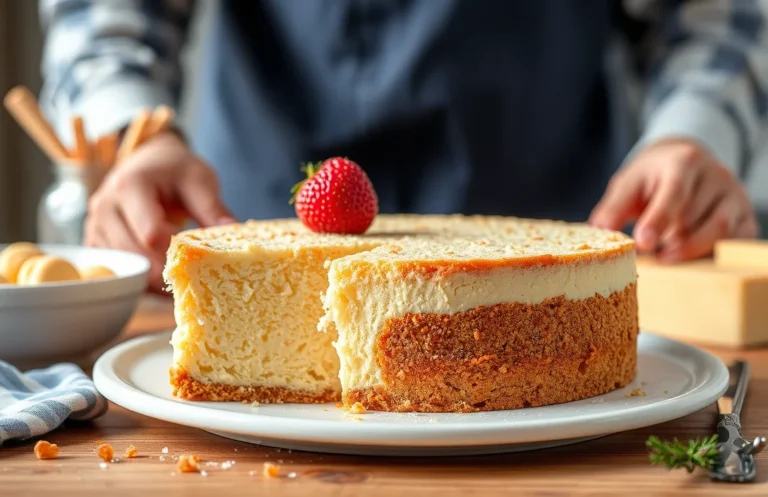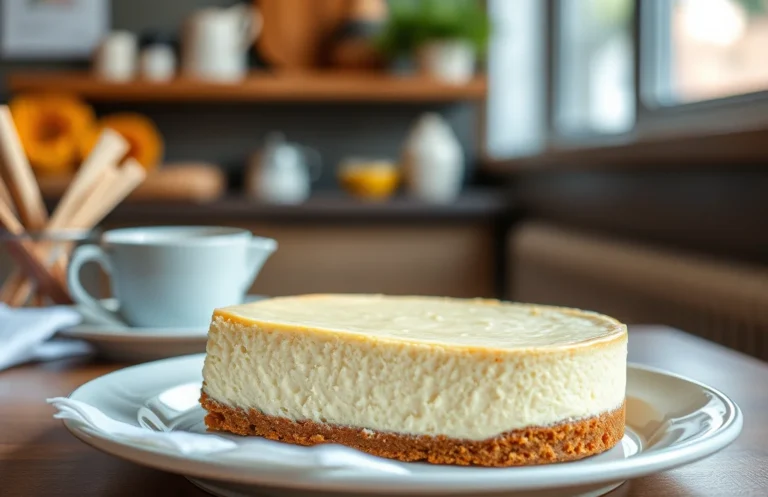
Creamy Philadelphia Cheesecake Filling: Fridge Storage Tips Included
Cheesecake filling made with Philadelphia cream cheese is the ultimate indulgence, perfect for satisfying your sweet tooth or impressing guests at any gathering. Its creamy texture and rich flavor make it a standout in desserts, whether you’re crafting a classic cheesecake or dolloping it on fresh fruit.
Get ready to make delicious cheesecake fillings with this easy-to-follow guide! You’ll find three tested recipes, each with precise measurements, cooking times, and storage tips to keep your fillings fresh in the fridge.
| Prep Time | Cook Time | Total Time | Servings | Difficulty |
|---|---|---|---|---|
| 15 minutes | 0 minutes | 15 minutes | 8 servings | Easy |
History of Cheesecake
Cheesecake has a rich history that dates back to ancient Greece, with its classic creamy texture and delightful flavor making it a beloved dessert across cultures. The introduction of Philadelphia cream cheese in the early 20th century revolutionized cheesecake making, providing a reliable and delicious base that home cooks and professional bakers alike have come to adore.
- Ancient Origins: The earliest known cheesecake recipe was recorded by the Greeks around 2000 B.C. It was made with simple ingredients like cheese, flour, and honey, which created a sweet and creamy dish enjoyed during athletic competitions.
- Roman Influence: The Romans further developed the cheesecake, incorporating eggs and more refined techniques. They also spread the dessert throughout Europe, making it a staple in various cultures.
- Philadelphia Cream Cheese: In 1872, a New York dairyman named William Lawrence accidentally created what we now know as cream cheese. By 1903, it was branded as Philadelphia cream cheese, and it quickly became the go-to ingredient for making rich, smooth cheesecakes.
- Modern Cheesecake: Today, cheesecake comes in endless variations, but the classic New York-style cheesecake, made with Philadelphia cream cheese, is particularly revered for its dense, velvety texture and rich flavor.
Understanding the history of cheesecake adds depth to our appreciation for this delicious dessert, especially when using high-quality ingredients like Philadelphia cream cheese. Properly stored in the fridge, cheesecake fillings made with this cream cheese can last up to one week, allowing you to enjoy a slice of history anytime.
Ingredients for Cheesecake Fillings
In this section, you’ll find the exact measurements for three delightful cheesecake fillings using Philadelphia cream cheese. These recipes are perfect for creating a rich and creamy cheesecake that’s sure to impress. Plus, I’ll share some storage tips to keep your fillings fresh in the fridge.
| Item | Amount/Specification | Notes |
|---|---|---|
| Classic Cheesecake Filling | 24 oz (680g) Philadelphia cream cheese | Softened at room temperature |
| 1 cup (200g) granulated sugar | For sweetness | |
| 3 large eggs | At room temperature | |
| 1 teaspoon vanilla extract | Pure vanilla recommended | |
| Chocolate Cheesecake Filling | 24 oz (680g) Philadelphia cream cheese | Softened at room temperature |
| 1 cup (200g) granulated sugar | For sweetness | |
| 3 large eggs | At room temperature | |
| 1 cup (170g) melted dark chocolate | Cool slightly before adding | |
| Fruit Swirl Cheesecake Filling | 24 oz (680g) Philadelphia cream cheese | Softened at room temperature |
| 1 cup (200g) granulated sugar | For sweetness | |
| 3 large eggs | At room temperature | |
| 1 cup (240g) fruit puree (strawberry, raspberry, or blueberry) | Homemade or store-bought |
- For best results, ensure all ingredients are at room temperature before mixing.
- Store cheesecake fillings in an airtight container in the fridge for up to 3 days.
- If using flavored extracts, be cautious with the amount; start with ½ teaspoon and adjust to taste.
- To avoid cracks in your cheesecake, avoid overmixing once the eggs are added.
Necessary Kitchen Equipment
To create a delicious cheesecake filling with Philadelphia cream cheese, you’ll need a few essential tools. These items ensure that your filling is mixed thoroughly and achieves the perfect creamy texture. Having the right equipment makes the process smoother and more enjoyable.
| Item | Amount/Specification | Notes |
|---|---|---|
| Mixing Bowls | 2 medium-sized | One for mixing ingredients, one for softening cream cheese. |
| Hand Mixer or Stand Mixer | 1 | A hand mixer is sufficient, but a stand mixer is ideal for ease. |
| Spatula | 1 | Silicone or rubber spatula for scraping down sides of the bowl. |
- Choose mixing bowls that are sturdy and large enough to hold all your ingredients without spilling.
- A hand mixer is great for smaller batches, but if you’re making multiple cheesecakes, consider a stand mixer for efficiency.
- When using the spatula, remember to scrape the bowl often to ensure even mixing and to avoid lumps in the filling.
- If you don’t have a mixer, you can use a whisk, but expect to put in more elbow grease to achieve a smooth texture.
Step-by-Step Filling Instructions
This section provides detailed step-by-step instructions for creating three delicious cheesecake fillings using Philadelphia cream cheese. Whether you’re a classic cheesecake lover, a chocolate enthusiast, or someone who enjoys fruity swirls, these recipes offer reliable guidance for perfect results every time.
Classic Filling Steps
- Gather your ingredients: 24 ounces (680g) Philadelphia cream cheese, softened; 1 cup (200g) granulated sugar; ½ teaspoon vanilla extract; 3 large eggs; and 1 cup (240ml) sour cream. Ensure the cream cheese is at room temperature for easier mixing.
- Preheat your oven to 325°F (160°C). This temperature ensures a slow bake that prevents cracks in your cheesecake.
- In a large mixing bowl, using an electric mixer, beat the softened cream cheese until smooth, about 2-3 minutes. The mixture should be creamy and free of lumps.
- Gradually add the granulated sugar and beat for another 1-2 minutes until combined. You should see a glossy texture forming.
- Add the eggs one at a time, mixing for about 30 seconds after each addition. The batter should be smooth and slightly thick.
- Finally, fold in the sour cream and vanilla extract gently until just combined. This will add richness and flavor to your filling.
Chocolate Filling Steps
- For a chocolate twist, gather 24 ounces (680g) Philadelphia cream cheese, 1 cup (200g) granulated sugar, ½ cup (50g) unsweetened cocoa powder, 3 large eggs, ½ teaspoon vanilla extract, and 1 cup (240ml) sour cream.
- Preheat your oven to 325°F (160°C), ensuring a gentle bake for the chocolate filling.
- In a large bowl, beat the softened cream cheese until creamy, about 2-3 minutes. It should feel soft and spreadable.
- Gradually mix in the granulated sugar and cocoa powder, beating for another 2 minutes until fully incorporated.
- Add the eggs one at a time, mixing well after each until the batter is smooth and rich.
- Finally, fold in the sour cream and vanilla until just combined. The filling should be velvety and chocolatey.
Fruit Swirl Filling Steps
- Gather 24 ounces (680g) Philadelphia cream cheese, 1 cup (200g) granulated sugar, 3 large eggs, 1 cup (240ml) sour cream, and 1 cup of your favorite fruit puree (like raspberry or strawberry).
- Preheat your oven to 325°F (160°C) for a consistent bake.
- In a bowl, beat the softened cream cheese until smooth for about 2-3 minutes. It should be fluffy with no lumps.
- Add the granulated sugar and mix until well combined, about another 2 minutes.
- Incorporate the eggs one at a time, blending well after each addition. The mixture should be thick yet creamy.
- Gently fold in the sour cream until just mixed. Pour half of the filling into your crust, then swirl in the fruit puree, adding the remaining filling on top. Use a knife to create a swirl pattern.
Each of these
Pro Tips for Perfect Fillings
Creating the perfect cheesecake filling requires a bit of finesse, especially when using Philadelphia cream cheese. Understanding the nuances of mixing, storage, and potential pitfalls can elevate your dessert from good to great. Here are some expert tips to ensure your cheesecake filling is creamy and delicious every time.
- Soften Your Cream Cheese: Always start with 2 (8-ounce) packages of Philadelphia cream cheese at room temperature. This makes it easier to blend smoothly without lumps. Aim for a texture that feels soft and spreadable, usually after about 30 minutes out of the fridge.
- Mixing Technique: Use a hand mixer on medium speed for about 2-3 minutes until fluffy. If you notice any lumps, continue mixing until the filling is completely smooth and creamy. The filling should have a light, airy feel, and you should not see any visible chunks of cream cheese.
- Incorporate Ingredients Gradually: Add in 1 cup of granulated sugar gradually while mixing. This helps dissolve the sugar properly, giving you a sweet and silky filling. The mixture should be glossy and slightly thick.
Chef’s tip: Allow your cheesecake filling to chill for at least 4 hours before serving. This resting time helps the flavors meld and improves the texture.
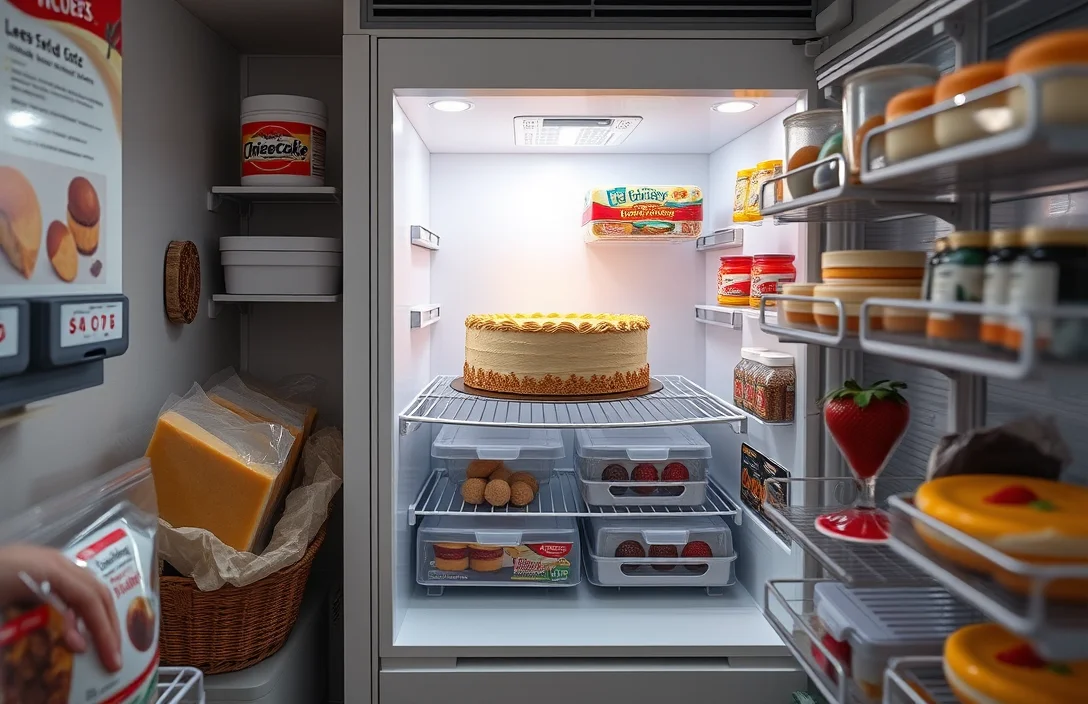
Storage Tips
To keep your cheesecake filling fresh:
- Store it in an airtight container in the fridge for up to 5 days.
- If you need to store it longer, consider freezing it for up to 3 months. Thaw in the fridge before using.
Common Mistakes to Avoid
- Don’t Overmix: Mixing too much can incorporate too much air, leading to cracks in your cheesecake as it bakes. Stop once everything is combined and smooth.
- Check for Temperature: If your filling feels too warm before baking, it may not set properly. It should feel cool to the touch.
Filling Variations and Substitutions
Exploring variations and substitutions for your cheesecake filling can elevate your dessert to new heights while accommodating different dietary needs and flavor preferences. Whether you’re looking for gluten-free options, vegan alternatives, or unique flavor twists, this guide will help you create a cheesecake that everyone can enjoy.
Gluten-Free Options
- For a gluten-free cheesecake, ensure your base is made with gluten-free graham crackers or almond flour instead. You can use 1 ½ cups of crushed gluten-free graham crackers or 2 cups of almond flour mixed with ¼ cup of melted butter for the crust.
- When preparing the filling, check that your Philadelphia cream cheese is marked gluten-free, which it generally is. Use 16 ounces (450g) of cream cheese, and combine it with ½ cup of granulated sugar and 1 teaspoon of vanilla extract. Mix until smooth and creamy.
Vegan Alternatives
- For a vegan cheesecake filling, substitute Philadelphia cream cheese with a blend of soaked cashews. Use 1 ½ cups of soaked cashews (soaked for at least 4 hours) blended with ½ cup of coconut cream and ½ cup of maple syrup until smooth.
- Add 2 tablespoons of lemon juice and 1 teaspoon of vanilla extract to enhance flavor. Ensure the mixture is creamy and thick, resembling traditional cheesecake filling. You can chill it for 2-3 hours to firm up before serving.
Flavor Variations
- To create different flavors, consider adding 1 cup of pureed fruit like strawberries or raspberries to your filling. This will not only change the taste but also give a beautiful color to your cheesecake.
- For a chocolate cheesecake, melt 4 ounces (113g) of dark chocolate and fold it into your prepared filling. The result should be a rich, velvety chocolate filling that’s sure to impress.
Chef’s tip: Always taste your filling before pouring it into the crust to adjust sweetness or flavor as needed.
Serving and Plating Ideas
Once you’ve whipped up your delicious cheesecake filling using Philadelphia cream cheese, it’s time to think about how to serve it beautifully and pair it with delightful accompaniments. A well-plated dessert not only enhances the experience but also makes your cheesecake filling more inviting and enjoyable.
- Garnish with Fresh Fruits: Top your cheesecake with a medley of fresh berries like strawberries, blueberries, and raspberries. Aim for about ½ cup of each fruit, washed and patted dry. The vibrant colors will create a stunning contrast against the creamy filling, and the fresh flavors will add a refreshing balance.
- Drizzle with Sauces: Consider drizzling your cheesecake filling with a homemade berry coulis or a rich chocolate sauce. To make a simple berry coulis, blend 1 cup of mixed berries with 2 tablespoons of sugar until smooth, then strain if desired. This adds a lovely sweetness and acidity that complements the richness of the cheesecake.
- Serve with Whipped Cream: A dollop of freshly whipped cream can elevate your cheesecake filling. Whip 1 cup of heavy cream with 2 tablespoons of powdered sugar until soft peaks form. This light and airy topping will balance the dense filling perfectly. You can also flavor the cream with a splash of vanilla extract for an extra touch.
- Pair with Cookies or Biscotti: For a crunchy texture contrast, serve your cheesecake filling with a side of graham crackers or homemade biscotti. Aim for about 4-6 pieces per serving. The crunch will complement the creaminess of the cheesecake and add another layer of flavor.
- Layer in a Glass: For a fun presentation, layer your cheesecake filling in a glass with crushed cookies and fruit. Start with a layer of crushed graham crackers (about ¼ cup), followed by cheesecake filling, then a layer of fruit. Repeat until the glass is full for a beautiful, individual dessert.
Quick Summary
| Prep Time | Cook Time | Total Time | Servings |
|---|---|---|---|
| 15 minutes | 0 minutes | 15 minutes | 8 servings |
- Gather ingredients: You’ll need 16 oz Philadelphia cream cheese, 1 cup sugar, 1 tsp vanilla, and 1 cup whipped cream.
- Soften cream cheese: Leave it at room temperature for 30 minutes for smooth mixing.
- Mix until smooth: Beat cream cheese, sugar, and vanilla on medium speed for 2-3 minutes.
- Fold in whipped cream: Gently fold in to maintain airiness.
- Chill: Refrigerate for at least 4 hours before using for best texture.
- Tip 1: Use full-fat cream cheese for the best flavor and texture.
- Tip 2: Ensure no lumps by mixing thoroughly before folding in whipped cream.
- Tip 3: Chill overnight for even better flavor development.
Frequently Asked Questions
Can I make this ahead of time? How to store and reheat?
You can definitely make the cheesecake filling ahead of time! Store it in an airtight container in the fridge for up to 3 days, and simply give it a good stir before using.
What can I substitute for Philadelphia cream cheese?
If you don’t have Philadelphia cream cheese, you can substitute it with mascarpone cheese or a combination of ricotta and sour cream for a similar creamy texture.
How do I know when it’s done?
Your cheesecake filling is done when it’s smooth and creamy, with no lumps. You should also see a slight jiggle in the center when you gently shake the bowl, which indicates it’s set but not overcooked.
Can I freeze this? How long does it last?
You can freeze the cheesecake filling for up to 2 months in an airtight container. Just make sure to thaw it in the fridge overnight before using it again!
What if I don’t have a mixer?
If you don’t have a mixer, you can use a sturdy whisk and some elbow grease to mix the filling by hand; just make sure the cream cheese is at room temperature for easier blending. It may take a bit longer, but you’ll achieve that smooth consistency!

- Decadent Peanut Butter No-Bake Cheesecake: Easy Recipe to Indulge - April 3, 2026
- Delicious Mango No-Bake Cheesecake: Step-by-Step Recipe - April 3, 2026
- Decadent Raspberry No-Bake Cheesecake: Easy Step-by-Step Recipe - April 3, 2026