10 Delicious Gluten-Free Cheesecake Recipes with Step-by-Step Tips
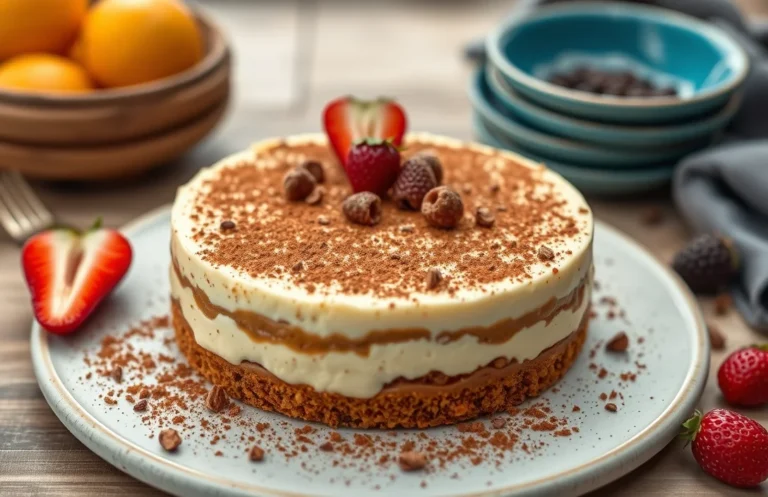
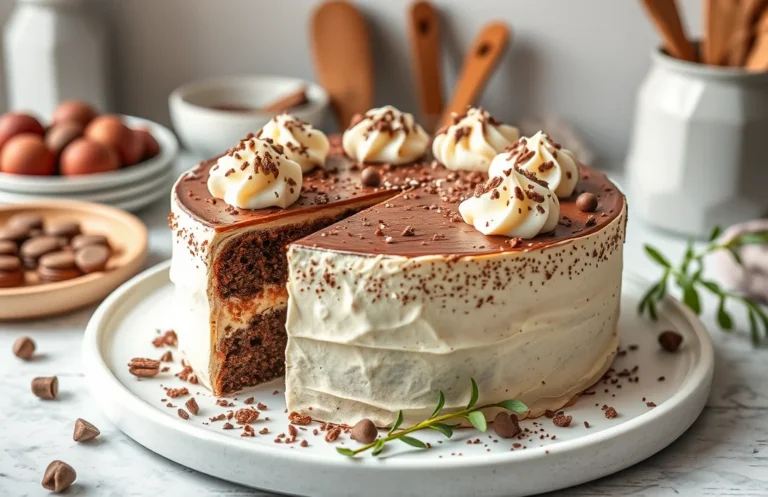
Cheesecake is one of those desserts that feels like a warm hug, perfect for any occasion. The creamy, rich filling paired with a buttery crust makes it a crowd-pleaser that never fails to impress. Imagine slicing into a velvety slice, the smooth texture melting in your mouth. It’s simply irresistible!
Get ready to whip up a delicious gluten-free cheesecake in just 1 hour, with a difficulty level of medium, serving 8 people. This recipe features simple, gluten-free ingredients that will have everyone coming back for seconds.
| Prep Time | Cook Time | Total Time | Servings | Difficulty |
|---|---|---|---|---|
| 15 minutes | 45 minutes | 1 hour | 8 | Medium |
Origin of Cheesecake
Cheesecake has a rich history that dates back to ancient times, and its evolution into a beloved dessert today highlights its cultural significance across various societies. Understanding its origins not only deepens our appreciation for this delightful treat but also emphasizes its gluten-free potential.
- Historical Background: The earliest recorded cheesecake recipes date back to ancient Greece, where it was served to athletes during the first Olympic Games in 776 B.C. The Romans later adapted the recipe, spreading it across Europe. Over centuries, various cultures have influenced its ingredients and preparation methods, leading to the many versions we enjoy today.
- Cultural Significance: Cheesecake has become a staple dessert in many cultures, from the New York-style cheesecake that’s rich and creamy to the lighter, fruit-topped varieties found in Europe. Each region adds its twist, often using local ingredients that can easily fit a gluten-free diet.
- When to Serve Cheesecake: This versatile dessert is perfect for various occasions, including birthdays, holidays, and family gatherings. Its indulgent flavor and creamy texture make it a crowd-pleaser, and with gluten-free options available, everyone can join in on the enjoyment.
Ingredients for Gluten-Free Cheesecake
Creating a delicious gluten-free cheesecake starts with the right ingredients. Understanding what to use is essential for achieving that creamy texture and rich flavor without compromising on taste. Here’s a complete list of the ingredients you’ll need along with some helpful notes.
| Item | Amount/Specification | Notes |
|---|---|---|
| Cream Cheese | 24 ounces (680g) | Softened, full-fat for best results |
| Sugar | 1 cup (200g) | Granulated sugar; adjust to taste |
| Gluten-Free Crust Option | 1 ½ cups (150g) | Crushed gluten-free graham crackers or almond flour |
| Butter | ½ cup (113g) | Melted, unsalted |
| Vanilla Extract | 1 teaspoon | Pure vanilla extract for flavor |
| Eggs | 3 large | Room temperature for better incorporation |
- Substitution Tip: For dairy-free options, use vegan cream cheese and coconut oil.
- Make sure the cream cheese is fully softened to prevent lumps in your batter.
- For a flavored cheesecake, consider adding lemon zest or cocoa powder to the batter.
- Watch for common mistakes: Do not overmix the batter once you add eggs, as this can result in cracks during baking.
Essential Kitchen Equipment
Gathering the right kitchen equipment is crucial for making a delicious gluten-free cheesecake. With the proper tools, you’ll ensure a smooth preparation process and achieve the best results. Here’s a comprehensive list of the essential equipment you’ll need for your cheesecake adventure.
- Mixing Bowls: Use a set of mixing bowls in various sizes, preferably glass or stainless steel. A large bowl (at least 4 quarts) is perfect for mixing the cheesecake batter, while smaller bowls can help with preparing ingredients like eggs and vanilla extract.
- Electric Mixer: A stand mixer or hand mixer will make whipping the cream cheese and sugar easier and more efficient. Beat until the mixture is creamy and smooth, which usually takes about 2-3 minutes on medium speed.
- Measuring Cups and Spoons: Accurate measurements are essential for baking. Use dry measuring cups for flour and sugar and liquid measuring cups for ingredients like milk or cream.
- Spatula: A silicone spatula is perfect for scraping the sides of your mixing bowl and folding in ingredients gently without deflating the air you’ve incorporated.
- Springform Pan: A 9-inch springform pan is ideal for cheesecakes. Its removable sides will allow you to easily release the cheesecake without damaging it. Make sure to line the bottom with parchment paper for easier removal.
- Baking Sheet: You’ll want to place your springform pan on a baking sheet to catch any drips during baking. This keeps your oven clean and saves you from a messy cleanup.
- Cooling Rack: Once your cheesecake is done baking, place it on a cooling rack to allow it to cool slowly without condensation forming on the surface.
Step-by-Step Instructions
In this section, you’ll find detailed instructions for preparing your gluten-free cheesecake, including how to make the crust, mix the filling, and bake it to perfection. Following these steps will help ensure a creamy, delicious cheesecake that will impress everyone.
- Prepare the Crust: Preheat your oven to 350°F (175°C). In a medium bowl, combine 1 ½ cups gluten-free graham cracker crumbs and ½ cup granulated sugar. Melt 6 tablespoons of unsalted butter and pour it into the mixture, stirring until it resembles wet sand. Press this mixture firmly into the bottom of a 9-inch springform pan. Bake for 10 minutes until golden brown, then remove from the oven and allow it to cool.
- Mix the Filling: While the crust cools, reduce the oven temperature to 325°F (163°C). In a large mixing bowl, beat 24 ounces (3 packages) of softened cream cheese with an electric mixer until smooth and creamy, about 2-3 minutes. Gradually add 1 cup granulated sugar, 1 teaspoon vanilla extract, and 3 large eggs, one at a time, mixing just until combined. The mixture should be smooth and glossy with no lumps.
- Bake and Cool: Pour the cream cheese filling over the cooled crust and smooth the top. Bake in the preheated oven for 55-60 minutes, or until the edges are set but the center still has a slight jiggle. Do not open the oven door during the first 40 minutes to prevent cracking. Once baked, turn off the oven and leave the cheesecake inside for 1 hour to cool gradually. Afterward, remove it from the oven and chill in the refrigerator for at least 4 hours, or overnight for best results.
Pro Tips for Perfect Cheesecake
Perfecting a gluten-free cheesecake requires attention to detail and a few insider tips to avoid common pitfalls. Here are some essential strategies to ensure your cheesecake turns out creamy, crack-free, and utterly delicious.
- Avoiding cracks: To prevent unsightly cracks on the surface of your cheesecake, bake it in a water bath. Wrap the outside of your springform pan with aluminum foil to keep water out, then place it in a larger pan filled with hot water. This gentle heat helps the cheesecake cook evenly.
- Achieving the right texture: Make sure your cream cheese is at room temperature before mixing. This allows for a smooth and creamy batter without lumps. Beat the cream cheese on medium speed until fluffy, about 2-3 minutes, then gradually add in sugar and other ingredients.
- Cooling tips: Once baked, turn off the oven and crack the door open slightly to let the cheesecake cool slowly inside. This helps to prevent sudden temperature changes, which can lead to cracks. After 1 hour, remove the cheesecake and let it cool to room temperature before chilling it in the refrigerator for at least 4 hours or overnight.
Chef’s tip: If you notice cracks forming during baking, don’t panic! You can cover them with a layer of fruit topping or whipped cream to disguise any imperfections.
Flavor Variations and Substitutions
Creating a gluten-free cheesecake opens the door to a variety of delicious flavor combinations and dietary adaptations. Whether you’re looking to add a fruity twist, a rich chocolate flavor, or cater to dairy-free diets, these variations keep your cheesecake exciting and inclusive.
Fruit Toppings
Fresh fruit toppings not only add a burst of flavor but also enhance the visual appeal of your cheesecake. Here are some popular options:
- 1 cup fresh strawberries, hulled and sliced
- 1 cup blueberries
- 1 cup raspberries
- ½ cup peach slices
To prepare, simply toss the fruit in a tablespoon of honey or maple syrup for sweetness and let it sit for about 10 minutes before spooning it over your chilled cheesecake. The fruit should look glossy and slightly syrupy.
Chocolate Variations
If you’re a chocolate lover, consider these variations:
- For a chocolate crust, substitute ½ cup of the gluten-free graham crackers with ½ cup of cocoa powder.
- For a chocolate filling, melt 8 ounces of gluten-free dark chocolate and fold it into your cheesecake batter before baking.
Chef’s tip: Ensure the melted chocolate has cooled slightly before incorporating it into the batter to maintain a creamy texture.
Dairy-Free Options
To make a dairy-free cheesecake, swap out the cream cheese for a combination of:
- 2 cups soaked cashews (soaked for at least 4 hours)
- ½ cup coconut cream for richness
- ½ cup maple syrup for sweetness
Blend these ingredients until smooth and creamy, and pour into your prepared crust. The texture should be velvety, and it will firm up as it chills in the refrigerator for at least 4 hours.
| Ingredient | Standard | Gluten-Free |
|---|---|---|
| Graham Crackers | 1 ½ cups crushed | 1 ½ cups gluten-free graham crackers |
| Butter | ½ cup | ½ cup dairy-free butter |
With these flavor variations and substitutions, your gluten-free cheesecake can cater to different tastes and dietary needs, ensuring everyone can enjoy a slice!
Serving and Plating Suggestions
Presenting your gluten-free cheesecake beautifully enhances the overall experience and makes it even more inviting. Here are some garnishing techniques, beverage pairings, and serving temperature tips to ensure your cheesecake is the star of the dessert table.
Garnishing Techniques
- Fresh Berries: Top your cheesecake with a mixture of fresh raspberries, strawberries, and blueberries for a vibrant contrast and a burst of flavor.
- Chocolate Drizzle: Melt ½ cup of gluten-free dark chocolate and drizzle it over the top for a rich, indulgent touch.
- Whipped Cream: Add a dollop of freshly whipped cream (1 cup heavy cream whipped with 2 tablespoons powdered sugar) on each slice for a classic finish.
- Mint Leaves: Garnish with fresh mint leaves to add a pop of color and a refreshing aroma.
Beverage Pairings
Choosing the right beverage can elevate your cheesecake’s flavor profile:
- Coffee: A rich espresso or a smooth latte pairs wonderfully with the creamy texture of cheesecake.
- Tea: A delicate green or herbal tea enhances the dessert without overpowering it.
- Wine: A light dessert wine like Moscato or a fruity Riesling complements the sweetness beautifully.
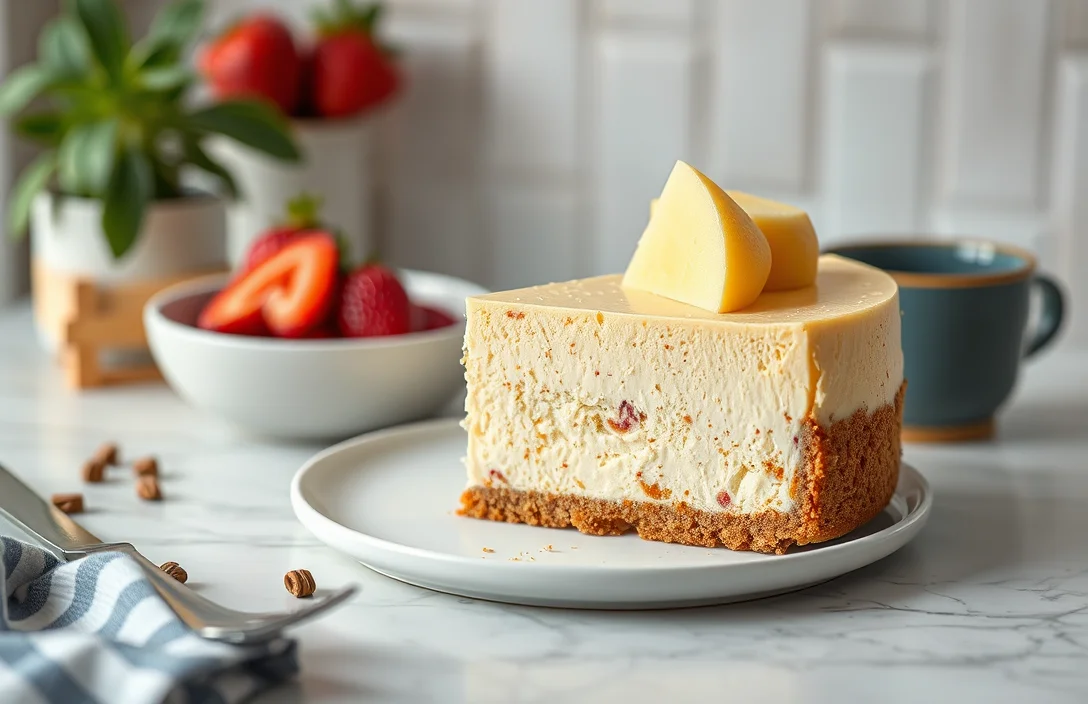
Serving Temperature
Cheesecake is best served chilled. Aim for a serving temperature of about 50°F (10°C) for the perfect creamy texture. Allow the cheesecake to sit at room temperature for about 10-15 minutes before slicing. This softens the texture slightly, making it easier to cut and serve.
Chef’s tip: Always use a hot knife to slice through the cheesecake for clean edges. Just dip it in hot water and wipe it dry before each cut!
Quick Summary
| Prep Time | Cook Time | Total Time | Servings |
|---|---|---|---|
| 15 minutes | 60 minutes | 1 hour 15 minutes | 8 |
- Use gluten-free graham crackers: Ensure all ingredients are certified gluten-free.
- Preheat oven to 325°F (163°C): This is crucial for even baking.
- Beat cream cheese until smooth: Avoid lumps for a creamy texture.
- Bake in a water bath: This prevents cracks on the surface.
- Chill for at least 4 hours: Overnight is best for flavor development.
- Tip 1: Room temperature ingredients mix better, preventing lumps.
- Tip 2: Don’t overmix once eggs are added to maintain a light texture.
Frequently Asked Questions
Can I make this ahead of time? How to store and reheat?
You can definitely make the cheesecake a day in advance. Store it covered in the refrigerator for up to 5 days; there’s no need to reheat, just serve chilled!
What can I substitute for cream cheese?
If you need a substitute for cream cheese, you can use mascarpone cheese in equal amounts for a similar creamy texture. Alternatively, for a lighter option, try using Greek yogurt mixed with a bit of sour cream.
How do I know when it’s done?
Your cheesecake is done when the edges are set and the center still has a slight jiggle; it will firm up as it cools. A good test is to gently shake the pan; if it wobbles like a jelly, it needs more time.
Can I freeze this? How long does it last?
You can freeze cheesecake for up to 3 months, but make sure to wrap it tightly in plastic wrap and then foil to prevent freezer burn. Thaw it overnight in the refrigerator before serving for the best texture.
What if I don’t have a springform pan?
If you don’t have a springform pan, you can use a regular round cake pan lined with parchment paper for easy removal. Just be sure to let the cheesecake cool completely before trying to take it out of the pan.

- Decadent Peanut Butter No-Bake Cheesecake: Easy Recipe to Indulge - April 3, 2026
- Delicious Mango No-Bake Cheesecake: Step-by-Step Recipe - April 3, 2026
- Decadent Raspberry No-Bake Cheesecake: Easy Step-by-Step Recipe - April 3, 2026