Cheesecake Baking Time Chart: Perfect Timing for Every Style
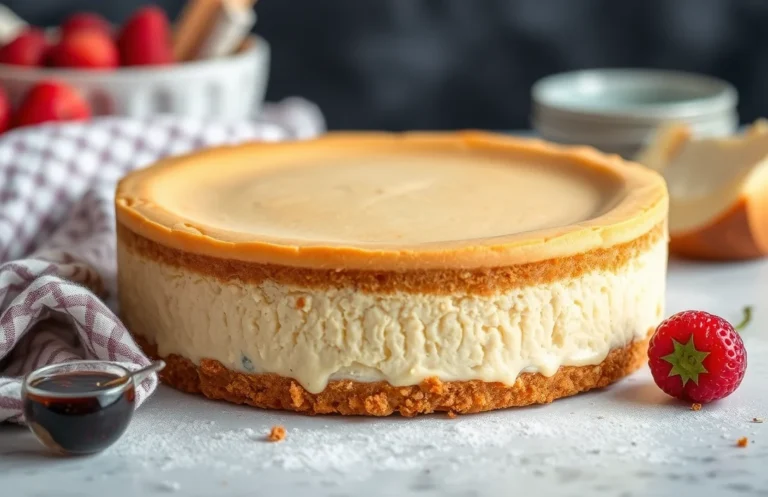
Cheesecake is that luscious dessert that turns any ordinary day into a special occasion. With its creamy filling, buttery crust, and endless flavor possibilities, it’s no wonder people gather around the table for a slice. Imagine the rich aroma wafting through your kitchen as it bakes, making everyone’s mouth water!
Here’s what you can expect: a detailed baking time chart for various cheesecake types, including New York-style and no-bake variations. You’ll know exactly when your cheesecake is done and get tips on common baking mishaps.
| Prep Time | Cook Time | Total Time | Servings | Difficulty |
|---|---|---|---|---|
| 20 minutes | 45-60 minutes | 1 hour 20 minutes | 8-10 servings | Medium |
Cheesecake Origins
Understanding the origins of cheesecake not only enriches our appreciation for this beloved dessert but also helps us grasp the variations that exist today. From its roots in ancient Greece to the modern adaptations we enjoy, cheesecake has evolved greatly over time.
Ancient Greece
- First references: The earliest known mention of cheesecake dates back to ancient Greece, where it was served to athletes at the first Olympic Games around 776 B.C. This early version was made with simple ingredients like cheese, flour, and honey.
- Greek cheese: The Greeks used a cheese called ‘labneh,’ which is a strained yogurt cheese, giving their cheesecakes a distinct tangy flavor that set the stage for future variations.
Modern Variations
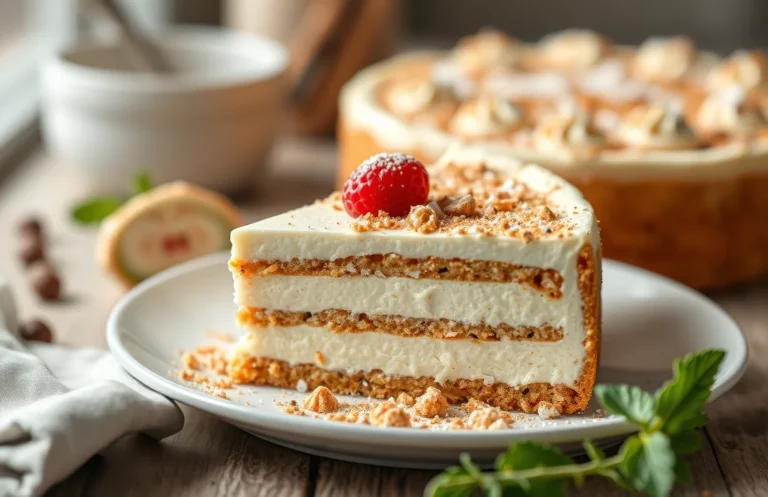
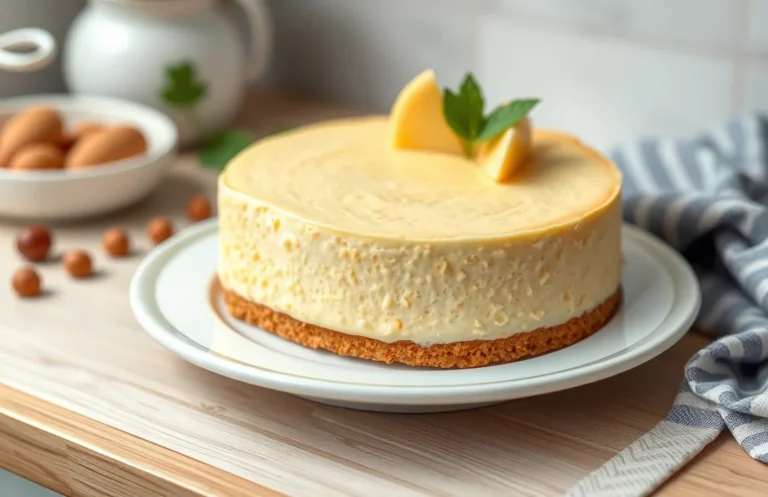
- New York-style cheesecake: This rich and creamy version, made primarily with cream cheese, sour cream, and eggs, has become a staple in American cuisine. It is characterized by its dense texture and is often baked at a high temperature to achieve a perfect crust.
- No-bake cheesecake: A more contemporary twist, this variation utilizes gelatin or whipped cream to set the filling without baking. Perfect for warm climates, it is lighter and often features fruit toppings for added freshness.
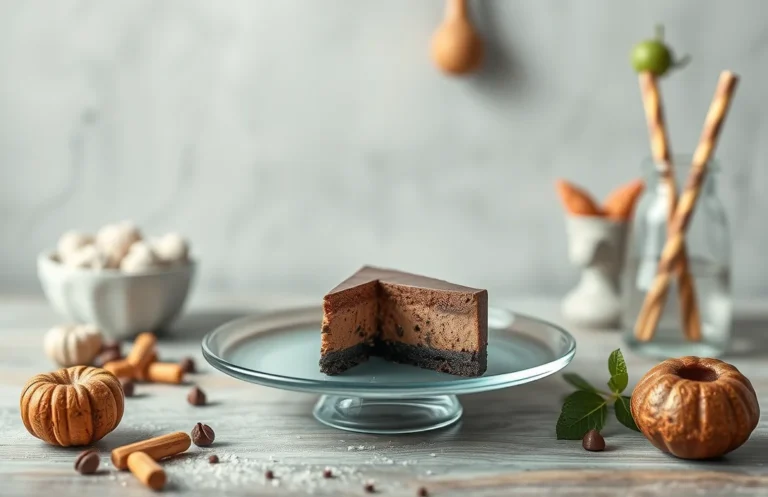
- Flavored variations: Today’s cheesecakes come in a myriad of flavors, including chocolate, pumpkin, and key lime. Each variation often requires specific baking times and techniques to ensure the ideal texture and flavor profile.
Ingredients Breakdown
This section outlines the essential ingredients needed for various cheesecakes, including cream cheese and crust components. Understanding these ingredients and their measurements is crucial for achieving the perfect texture and flavor in your cheesecake, ensuring reliable results every time you bake.
| Item | Amount/Specification | Notes |
|---|---|---|
| Cream Cheese | 16 ounces (450g) | Use full-fat for best flavor and texture. |
| Sugar | 1 cup (200g) | Granulated sugar works best; adjust for sweetness preference. |
| Sour Cream | ½ cup (120ml) | Adds tanginess and creaminess. |
| Vanilla Extract | 1 teaspoon (5ml) | Pure vanilla extract enhances flavor. |
| Eggs | 3 large | Room temperature for better mixing. |
| Graham Cracker Crumbs | 1½ cups (150g) | For a traditional crust; can substitute with cookie crumbs. |
| Butter | ½ cup (113g) | Melted for binding the crust. |
| Salt | ¼ teaspoon | Enhances overall flavor. |
- For cream cheese: Ensure it’s softened to room temperature for easy mixing.
- For crust: Mix graham cracker crumbs and melted butter thoroughly to avoid a crumbly texture.
- Substitutions: Use dairy-free cream cheese and coconut oil for a vegan option.
- Common mistake: Don’t skip the sour cream; it balances the sweetness and adds moisture.
Essential Equipment
Having the right tools at your disposal is crucial for baking the perfect cheesecake. This section details the essential kitchen equipment you’ll need, ensuring your cheesecake comes out flawlessly every time.
- Springform Pan: A high-quality springform pan is essential for cheesecake baking. Look for one that’s 9 inches (23 cm) in diameter and at least 2.5 inches (6.5 cm) deep. This design allows you to remove the sides easily without damaging the delicate cheesecake. Ensure the pan is tightly sealed to prevent any water from seeping in during a water bath, which can ruin your cheesecake.
- Mixer Types: Depending on your preference, you can use either a stand mixer or a hand mixer for this process. A stand mixer allows for a more hands-free experience, making it easier to combine ingredients smoothly. If using a hand mixer, beat the cream cheese and sugar until creamy and free of lumps, which should take about 2-3 minutes on medium speed. This is crucial for achieving a smooth texture in your cheesecake.
Chef’s tip: Always ensure your cream cheese is at room temperature before mixing to avoid lumps. This makes a significant difference in the final texture.
With these essential tools in hand, you’ll be well-prepared to tackle any cheesecake recipe with confidence!
Baking Instructions
This section provides detailed baking times for different types of cheesecakes, including New York-Style and No-Bake variations. Understanding these times is crucial for achieving that perfect, creamy texture that makes cheesecakes irresistible.
- New York-Style Cheesecake: Preheat your oven to 325°F (160°C). For a standard 9-inch cheesecake, bake for 60-70 minutes. The edges should look set but the center will still slightly jiggle when you gently shake the pan.
- Mini New York-Style Cheesecakes: If you’re using a muffin tin for mini cheesecakes, bake at the same temperature for about 20-25 minutes. They should be firm to the touch and no longer glossy on top.
- No-Bake Cheesecake: For a no-bake cheesecake, the process is different. After mixing your ingredients, pour the filling into a prepared crust and refrigerate for at least 4 hours, preferably overnight. The cheesecake should be set and hold its shape when sliced.
- Flavored Variations: If you’re making flavored cheesecakes (like chocolate or fruit), keep the same baking times as the New York-style. Adjust for smaller sizes accordingly, for example, a chocolate cheesecake in a 9-inch pan will also take about 60-70 minutes at 325°F (160°C).
Chef’s tip: To prevent cracks in your cheesecake, bake it in a water bath. This helps maintain moisture and regulates temperature.
Testing for Doneness
Knowing when your cheesecake is perfectly baked is crucial to achieving that creamy, smooth texture we all love. This section will guide you through visual cues and temperature checks to ensure your cheesecake is just right.
- Visual Cues: Look for a slight jiggle in the center of your cheesecake. The outer edges should appear set and firm, while the middle retains a gentle wobble. If the top is browning too much, consider covering it with foil to prevent over-baking.
- Temperature Check: The best way to ensure your cheesecake is done is by using an instant-read thermometer. Insert it into the center of the cheesecake; it should read between 150°F (65°C) and 160°F (71°C). If it’s below that, give it an additional 5-10 minutes in the oven.
- Cooling Time: Once out of the oven, let your cheesecake cool in the pan on a wire rack for at least 1 hour. This cooling process helps prevent cracking. Afterward, refrigerate for a minimum of 4 hours or overnight for the best flavor and texture.
- Common Mistakes: Do not open the oven door during the first 20 minutes of baking; this can cause the cheesecake to collapse. Additionally, avoid over-mixing your batter to prevent air bubbles that can lead to cracks.
Common Baking Issues
Baking a cheesecake can sometimes feel like walking a tightrope; small missteps can lead to common issues like cracks or sinking centers. Understanding these problems and their solutions can help ensure your cheesecake turns out perfectly smooth and delicious.
Cracking
Symptom: Cracks appear on the surface of your cheesecake.
Cause: Rapid temperature changes or overmixing the batter can cause the cheesecake to rise too quickly and crack as it cools.
Fix: To prevent cracking, make sure to bake your cheesecake in a water bath. Wrap your springform pan in aluminum foil to prevent water from seeping in, and place it in a larger pan filled with hot water. Additionally, mix your batter just until smooth, and avoid overbeating. Keep the oven temperature steady at 325°F (163°C) and avoid opening the oven door during baking. If cracks do occur, you can hide them with a layer of sour cream or whipped cream topping.
Sinking Center
Symptom: The center of your cheesecake sinks or appears undercooked after cooling.
Cause: This often happens when the cheesecake is removed from the oven too soon or if the batter has too much air incorporated.
Fix: To ensure your cheesecake is fully cooked, check for doneness by gently shaking the pan; the center should have a slight jiggle but not appear liquid. Bake at 325°F (163°C) for the appropriate time based on your recipe, and allow the cheesecake to cool gradually in the oven with the door ajar for about 1 hour after baking. This gradual cooling helps stabilize the cheesecake and prevents sinking.
Variations and Modifications
When it comes to cheesecakes, there are plenty of ways to accommodate different dietary needs without sacrificing flavor or texture. Below, you’ll find some options for gluten-free and vegan cheesecakes, along with tips for ensuring they turn out beautifully.
Gluten-Free Options
- Crust: Substitute graham crackers with gluten-free alternatives like almond flour or gluten-free cookie crumbs. For a simple crust, combine 1 ½ cups almond flour with 2 tablespoons melted coconut oil and 2 tablespoons sugar. Press it firmly into your baking pan.
- Baking Time: Gluten-free cheesecakes may require an additional 5-10 minutes of baking time. Always check for doneness by gently shaking the pan; the center should slightly jiggle but not be liquid.
Vegan Substitutes
- Filling: Replace cream cheese with 2 cups soaked cashews (soaked in water for 4 hours, then drained) blended with ½ cup coconut cream and ½ cup maple syrup. Add 1 tablespoon lemon juice for tang.
- Baking Time: No-bake vegan cheesecakes typically require chilling for at least 4 hours in the refrigerator. If baking, follow the same time chart but monitor closely as they can firm up quicker than traditional recipes.
Chef’s tip: Always taste your filling before setting, as vegan ingredients can vary in sweetness.
| Type | Recommendation |
|---|---|
| Gluten-Free | Use gluten-free crust options and adjust baking time accordingly. |
| Vegan | Opt for cashew-based filling and chill for proper setting. |
Serving and Pairing
Serving your cheesecake is just as important as perfecting the baking process. A well-paired garnish and beverage can elevate this classic dessert, making it an unforgettable treat. Here are some ideas to complement your cheesecake creations.
Garnishes
- Fresh Berries: Top with ½ cup mixed berries (strawberries, blueberries, raspberries) for a pop of color and tartness.
- Chocolate Drizzle: Melt 4 ounces of semi-sweet chocolate and drizzle over the top for a rich finish.
- Whipped Cream: Whip 1 cup of heavy cream with 2 tablespoons of powdered sugar until soft peaks form for a light, airy addition.
- Citrus Zest: Grate the zest of one lemon or orange over the cheesecake for a refreshing kick.
Beverage Pairings
Choosing the right drink can enhance your cheesecake experience:
- Coffee: A rich espresso or a creamy latte pairs wonderfully with the creamy texture of cheesecake.
- Tea: Opt for a fragrant Earl Grey or a calming chamomile to balance the sweetness of the dessert.
- Wine: A sweet dessert wine, such as Riesling or Moscato, complements fruity cheesecakes perfectly.
Chef’s tip: Always serve your cheesecake chilled and allow it to sit at room temperature for about 10-15 minutes before slicing for cleaner cuts.
Experiment with these garnishes and beverage pairings to find your perfect match, and enjoy every delicious bite of your cheesecake!
Quick Summary
| Prep Time | Cook Time | Total Time | Servings |
|---|---|---|---|
| 20 minutes | 50-70 minutes | 1 hour 30 minutes | 8-10 servings |
- Preheat oven to 325°F (163°C) for even baking.
- Prepare crust by mixing crumbs with melted butter and pressing into the pan.
- Beat cream cheese until smooth before adding sugar and eggs for a creamy texture.
- Bake in a water bath to prevent cracking and ensure even cooking.
- Cool gradually to room temperature before refrigerating for at least 4 hours.
- Tip: Use room temperature ingredients for a smoother batter.
- Tip: Avoid overmixing to keep the cheesecake from becoming dense.
- Tip: Check doneness by gently shaking; the center should slightly jiggle.
Frequently Asked Questions
Can I make this cheesecake ahead of time? How to store and reheat?
You can definitely make cheesecake ahead of time; it refrigerates well for up to 5 days. Store it in an airtight container in the fridge and reheat it gently in a warm oven at 250°F for about 10-15 minutes if desired.
What can I substitute for cream cheese?
If you need a substitute, you can use mascarpone cheese or a combination of Greek yogurt and cream cheese for a similar texture. Keep in mind that the flavor may vary slightly.
How do I know when my cheesecake is done?
Your cheesecake is done when the edges are set but the center still has a slight jiggle, which usually takes about 50-60 minutes at 325°F. It will continue to firm up as it cools, so don’t worry if it looks a bit undercooked!
Can I freeze this cheesecake? How long does it last?
You can freeze cheesecake for up to 3 months; just wrap it tightly in plastic wrap and aluminum foil. Thaw it in the refrigerator overnight before serving for the best texture.
What if I don’t have a springform pan?
If you don’t have a springform pan, you can use a regular cake pan lined with parchment paper, but make sure to allow it to cool completely before removing it. For best results, use a knife to gently loosen the edges before inverting it onto a plate.

- Top 10 Best Espresso Machine Under 2000 2026 - July 29, 2026
- Top 10 Best Espresso Latte Machine 2026 - July 29, 2026
- Top 10 58mm Electric Portable Espresso Machine 2026 - July 29, 2026