Stylish Strawberry Cheesecake Recipe: Preppy Presentation Tips
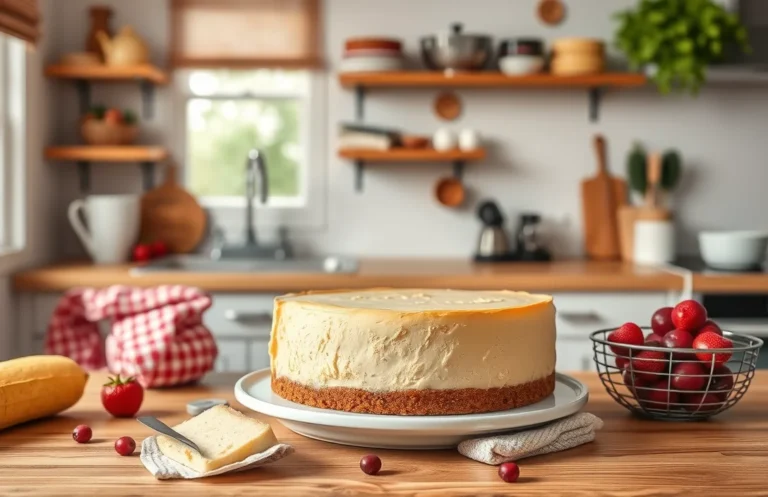
If you’re looking for a dessert that wows every time, this strawberry cheesecake is your answer. Creamy, rich, and bursting with fresh strawberry flavor, it’s the kind of treat that turns any gathering into a celebration. Picture a slice nestled on a plate, the vibrant pink hue catching everyone’s eye—just irresistible!
Key details: Total time: 4 hours (includes chilling), Difficulty level: Easy, Servings: 8.
| Prep Time | Cook Time | Total Time | Servings | Difficulty |
|---|---|---|---|---|
| 30 minutes | 1 hour | 4 hours | 8 | Easy |
Story Behind Strawberry Cheesecake
Strawberry cheesecake is not just a dessert; it’s a celebration of flavors that brings joy to any gathering. This section dives into the rich origins of cheesecake and highlights the special role strawberries play in making this treat a favorite for many.
Origin of Cheesecake
Cheesecake has ancient roots, dating back to the Greeks around 2000 B.C. They made a simple version using cheese, flour, and honey. Over the centuries, variations emerged across cultures, particularly in Europe, where the rich, creamy texture we know today took shape. The modern American cheesecake, typically made with cream cheese, became popular in the 19th century, leading to countless delightful variations, including the star of our show: strawberry cheesecake.
Why Strawberries Matter
Strawberries add a burst of freshness and vibrant color that elevates the classic cheesecake experience. Their natural sweetness contrasts beautifully with the rich, creamy filling, creating a harmonious balance. Here are a few reasons why strawberries are essential:
- Flavor: The sweet-tart profile of strawberries complements the richness of the cheesecake.
- Color: Bright red strawberries make for an appealing presentation, perfect for gatherings.
- Seasonal Treat: Strawberries are in peak season during spring and early summer, making them a delightful choice for warm-weather events.
Chef’s tip: Use fresh strawberries for the best flavor and presentation. If they’re out of season, frozen strawberries can work in a pinch but may require additional sugar.
Ingredients List
In this section, we’ll detail all the ingredients you’ll need to create a stunning strawberry cheesecake that embodies a preppy kitchen aesthetic. Each ingredient is crucial for achieving the perfect balance of flavor and presentation, ensuring your cheesecake not only tastes delicious but looks fabulous, too!
For the Crust
| Item | Amount/Specification | Notes |
|---|---|---|
| Graham cracker crumbs | 1 ½ cups (150g) | Finely crushed for a smooth texture |
| Granulated sugar | ¼ cup (50g) | Adds sweetness to the crust |
| Unsalted butter | ½ cup (115g), melted | Helps bind the crust together |
For the Filling
| Item | Amount/Specification | Notes |
|---|---|---|
| Cream cheese | 24 ounces (680g), softened | Ensure it’s at room temperature for easy mixing |
| Granulated sugar | 1 cup (200g) | For sweetness and smooth texture |
| Sour cream | 1 cup (240ml) | Adds creaminess and tang |
| Vanilla extract | 2 teaspoons | For flavor depth |
| Eggs | 3 large | Bring to room temperature for even mixing |
For the Topping
| Item | Amount/Specification | Notes |
|---|---|---|
| Fresh strawberries | 1 pound (450g), hulled and sliced | For a fresh, vibrant topping |
| Granulated sugar | 2 tablespoons (25g) | To macerate the strawberries |
- For a gluten-free option, substitute graham cracker crumbs with gluten-free cookies.
- To make this cheesecake lighter, you can use low-fat cream cheese and sour cream.
- If using frozen strawberries, thaw and drain excess liquid before topping.
Essential Kitchen Equipment
Before diving into the delicious world of strawberry cheesecake, it’s crucial to gather the right tools for the job. Having the appropriate kitchen equipment not only makes the process smoother but also enhances the presentation of your preppy kitchen creation.
- Springform Pan (9-inch): This is essential for creating the perfect cheesecake. The removable sides allow for easy release, giving your cheesecake a beautiful, intact shape once it’s set.
- Mixing Bowls: A set of various sizes, including a large bowl for mixing the cream cheese filling and a smaller one for the crust. Glass or stainless steel bowls are preferred as they’re easy to clean and won’t absorb odors.
- Electric Mixer: A hand mixer or stand mixer will make whipping the cream cheese easy and ensure a smooth, lump-free filling. Aim for medium speed to avoid overmixing, which can lead to cracks.
- Rubber Spatula: Perfect for folding in ingredients gently, especially when incorporating whipped cream into your filling. Look for one with a sturdy handle for better control.
- Offset Spatula: Ideal for smoothing the top of your cheesecake before it goes into the oven. This tool helps create that polished, preppy look that impresses everyone.
- Food Processor: Great for crushing graham crackers for the crust. If you don’t have one, you can place the crackers in a zip-top bag and crush them with a rolling pin.
- Measuring Cups and Spoons: Accurate measurements are critical for baking. Ensure you have both dry and liquid measuring cups to get the quantities right.
- Cooling Rack: Once baked, your cheesecake needs to cool slowly. A cooling rack allows air to circulate, preventing sogginess on the bottom.
Step-by-Step Instructions
In this section, we’ll walk through the essential steps to create a stunning strawberry cheesecake, from making the perfect crust to preparing and baking the filling. Each step is designed to ensure you achieve a smooth, creamy texture and a beautiful presentation that’s sure to impress.
- Make the Crust: Preheat your oven to 350°F (175°C). In a mixing bowl, combine 1 ½ cups (150g) of crushed graham crackers, ½ cup (100g) granulated sugar, and ½ cup (115g) of melted unsalted butter. Mix until the texture resembles wet sand. Press the mixture firmly into the bottom of a 9-inch (23 cm) springform pan, spreading it evenly. Bake in the preheated oven for 10 minutes until lightly golden and fragrant. Remove from the oven and let it cool.
- Prepare the Filling: In a large mixing bowl, beat together 24 ounces (680g) of softened cream cheese and 1 cup (200g) of granulated sugar using an electric mixer on medium speed until smooth and creamy, about 3-4 minutes. Scrape down the sides of the bowl to ensure even mixing. Add 1 teaspoon of vanilla extract and 3 large eggs, one at a time, mixing just until combined. The mixture should be smooth with no lumps.
- Bake and Cool: Pour the cheesecake filling over the cooled crust in the springform pan. Smooth the top with a spatula. Bake in the oven for 55-60 minutes until the edges are set, but the center should still have a slight jiggle. Once baked, turn off the oven and crack the oven door open, letting the cheesecake cool in the oven for about 1 hour. This helps prevent cracks. Afterward, refrigerate for at least 4 hours, preferably overnight, to set fully.
Pro Tips for Success
Making a strawberry cheesecake can be a delightful experience, but achieving that perfect texture and avoiding cracks is crucial for a stunning presentation. Here are some expert tips to help you create a beautifully smooth and crack-free cheesecake.
Perfecting the Texture
- Use room temperature ingredients: Ensure that your cream cheese, eggs, and sour cream are at room temperature. This helps them blend smoothly, resulting in a creamy texture that’s free from lumps.
- Mix gently: When combining your ingredients, mix at a low speed to avoid incorporating too much air. Overmixing can lead to a cheesecake that rises too quickly and then collapses.
- Add a touch of flour: Incorporating 1-2 tablespoons of all-purpose flour into your cheesecake batter can help stabilize it, giving you a firmer texture that holds its shape better.
Avoiding Cracks
- Water bath method: Baking your cheesecake in a water bath (bain-marie) can help regulate the temperature and cook it evenly. Wrap the bottom of your springform pan in aluminum foil and place it in a larger pan filled with hot water.
- Don’t overbake: Your cheesecake should be slightly jiggly in the center when you take it out of the oven. It will continue to set as it cools. Aim for an internal temperature of around 150°F (65°C) for perfect doneness.
- Cool gradually: Once baked, turn off the oven and crack the door open. Let the cheesecake cool in the oven for an hour before transferring it to the fridge. This gradual cooling helps prevent cracks caused by sudden temperature changes.
Variations and Substitutions
When making a strawberry cheesecake, it’s essential to consider dietary preferences and restrictions. Here are some variations and substitutions to accommodate gluten-free and vegan options while still achieving that delightful preppy aesthetic.
Gluten-Free Options
- For the crust, substitute the graham cracker crumbs with 1 ½ cups of gluten-free cookie crumbs or ground almonds. Make sure to combine them with 6 tablespoons of melted butter.
- Ensure that your cream cheese and other dairy products are labeled gluten-free if you have severe allergies.
- To thicken the cheesecake without flour, consider using 2 tablespoons of cornstarch mixed into the filling.
Vegan Alternatives
- Replace the cream cheese with a vegan cream cheese option or use 1 ½ cups of soaked and blended raw cashews for a creamy texture.
- For the crust, use 1 ½ cups of vegan digestive biscuits or date and nut mixture, combined with 6 tablespoons of melted coconut oil.
- For sweetness, substitute granulated sugar with ½ cup of maple syrup or agave nectar, adjusting the consistency of the filling with a little extra plant-based milk if needed.
Chef’s tip: Let the vegan cheesecake chill for at least 4 hours for the best texture and flavor. It will set beautifully and slice perfectly!
| Ingredient | Traditional | Gluten-Free | Vegan |
|---|---|---|---|
| Crust | 1 ½ cups graham cracker crumbs | 1 ½ cups gluten-free cookie crumbs | 1 ½ cups vegan digestive biscuits |
| Cream Cheese | 16 oz cream cheese | 16 oz gluten-free cream cheese | 1 ½ cups soaked cashews |
| Sugar | ¾ cup granulated sugar | ¾ cup granulated sugar | ½ cup maple syrup |
Serving and Plating Tips
Presenting your strawberry cheesecake with style not only enhances the overall experience but also makes it more inviting. Here are some plating techniques and pairing suggestions to elevate your cheesecake to preppy perfection!
Plating Techniques
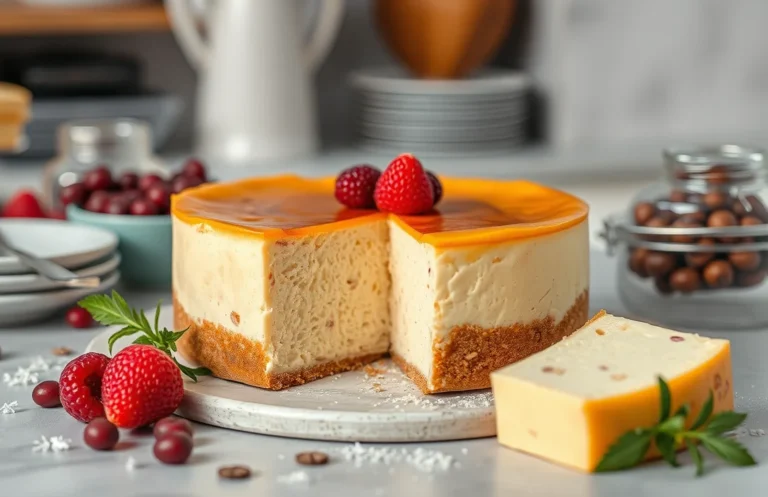
- Use a cake stand: Elevating your cheesecake on a decorative cake stand adds elegance. Opt for white or pastel colors to enhance the fresh strawberry aesthetic.
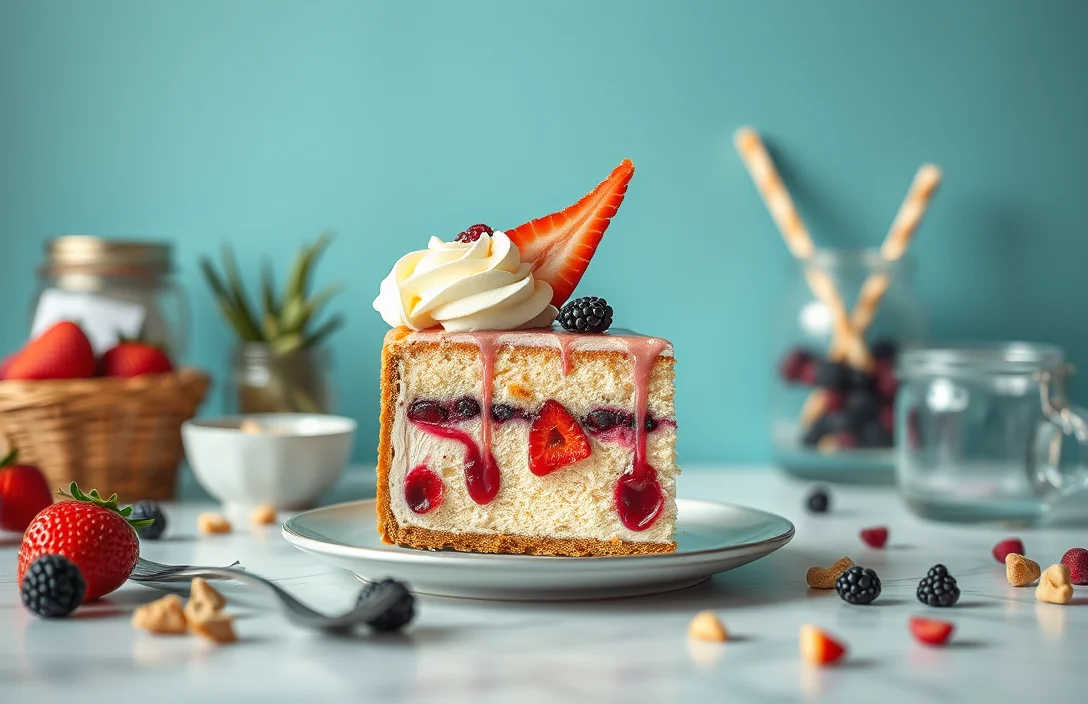
- Garnish: Top each slice with a dollop of whipped cream, fresh mint leaves, and a few extra strawberries for a pop of color.
- Drizzle: Create a visually pleasing drizzle of strawberry sauce or a berry compote around the cheesecake on the plate. This adds color and a fruity flavor burst.
- Slice presentation: Use a hot knife for slicing; dip it in hot water, wipe it dry, and then cut. This ensures clean edges and a professional look.
Pairing Suggestions
Complement your strawberry cheesecake with these delightful pairings:
| Drink Pairing | Flavor Profile |
|---|---|
| Sparkling Wine | Bright, fruity notes enhance the cheesecake’s sweetness. |
| Mint Iced Tea | Refreshing and contrasts nicely with the richness of the cheesecake. |
| Coffee | The bitterness of coffee balances the sweetness of the dessert. |
Chef’s tip: Serve the cheesecake chilled for the best texture and flavor. If you have leftovers, cover them tightly and refrigerate for up to 3 days.
Quick Summary
| Prep Time | Cook Time | Total Time | Servings |
|---|---|---|---|
| 20 minutes | 60 minutes | 1 hour 20 minutes | 8 |
- Preheat oven to 325°F (163°C) for even baking.
- Prepare crust by mixing 1 ½ cups crushed graham crackers with ½ cup melted butter.
- Beat cream cheese until smooth, adding 1 cup sugar gradually.
- Add eggs one at a time, mixing well after each addition.
- Layer strawberries on top before baking for fresh flavor.
- Chill the cheesecake for at least 4 hours before serving to set properly.
- Tip: Use room temperature cream cheese for a lump-free filling.
- Tip: Bake with a water bath to prevent cracking.
- Tip: Let the cheesecake cool in the oven with the door ajar for a smooth top.
Frequently Asked Questions
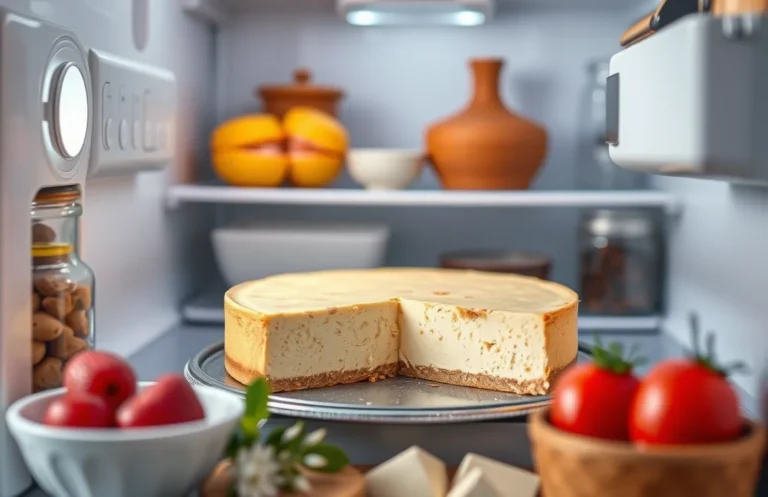
Can I make this ahead of time? How to store and reheat?
You can absolutely make this cheesecake up to 2 days in advance. Store it in the refrigerator, covered with plastic wrap, and enjoy it cold—no reheating needed!
What can I substitute for cream cheese?
If you’re looking for a substitute, you can use ricotta cheese blended until smooth for a lighter texture. Alternatively, mascarpone can also provide a rich and creamy flavor.
How do I know when it’s done?
Your cheesecake is done when the edges are set but the center still has a slight jiggle, about 60-65 minutes at 325°F (160°C). It will firm up as it cools!
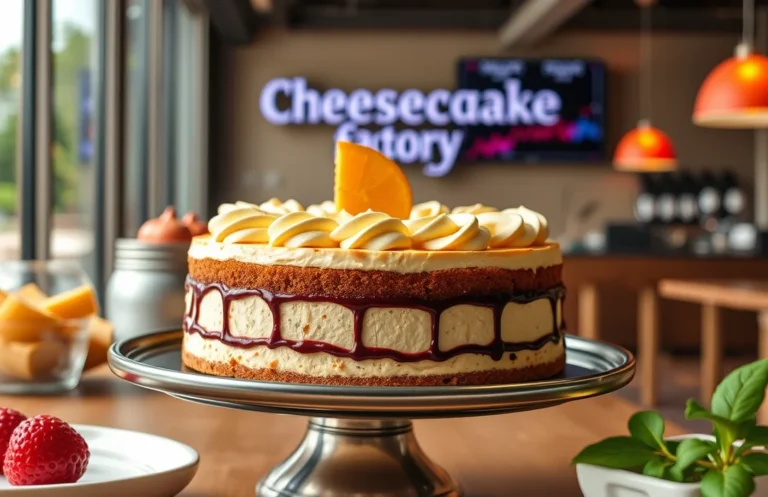
Can I freeze this? How long does it last?
You can freeze the cheesecake for up to 3 months if wrapped tightly in plastic wrap and then aluminum foil. Thaw it overnight in the refrigerator before serving for the best texture.
What if I don’t have a springform pan?
If you don’t have a springform pan, you can use a regular pie dish or a deep-dish cake pan, but be sure to line it with parchment paper for easy removal. Just keep an eye on the baking time, as it may vary slightly!

- Decadent Peanut Butter No-Bake Cheesecake: Easy Recipe to Indulge - April 3, 2026
- Delicious Mango No-Bake Cheesecake: Step-by-Step Recipe - April 3, 2026
- Decadent Raspberry No-Bake Cheesecake: Easy Step-by-Step Recipe - April 3, 2026