Classic Cheesecake Recipe: Step-by-Step with Tips & Variations
Cheesecake is one of those desserts that never fails to impress and satisfy, whether it’s a special occasion or just a cozy night in. The creamy, dreamy filling paired with a buttery crust creates a delightful balance that leaves everyone asking for seconds. You’ll love how simple it is to make this classic treat!
This easy cheesecake recipe takes just 15 minutes of prep time and 1 hour of baking, yielding 8 servings of pure indulgence. With clear, step-by-step instructions, you’ll feel confident creating a cheesecake that looks and tastes like it came from a bakery.
| Prep Time | Cook Time | Total Time | Servings | Difficulty |
|---|---|---|---|---|
| 15 minutes | 1 hour | 1 hour 15 minutes | 8 | Easy |
Cheesecake Story
Cheesecake has a rich history that dates back to ancient Greece, where it was served to athletes during the first Olympic Games. Over the centuries, this creamy dessert has evolved into countless variations, but the essence of its delightful texture and taste remains unchanged. This particular cheesecake recipe, inspired by the Preppy Kitchen style, stands out for its perfect balance of richness and lightness, making it a favorite at gatherings.
- Origin of Cheesecake: The earliest known cheesecake recipe can be traced back to ancient Greece, where it was made with simple ingredients like cheese, flour, and honey. As time passed, variations emerged in different cultures, with the Romans adding eggs and the Europeans incorporating cream cheese, leading to the cheesecake we know today.
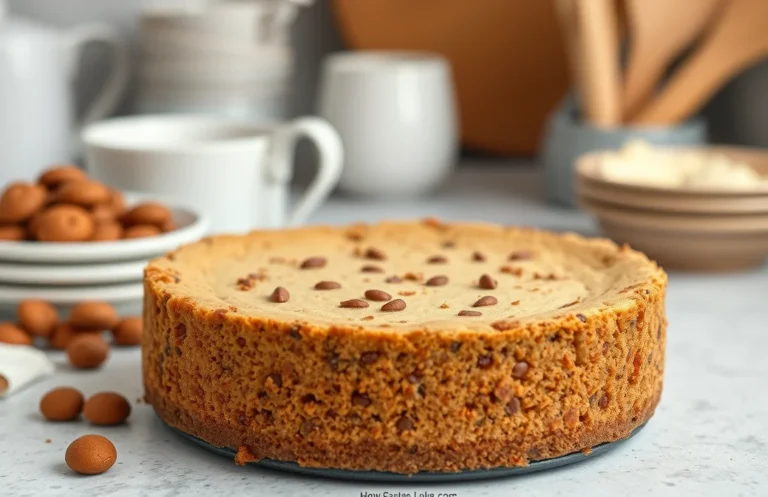
- Why This Cheesecake Stands Out: What makes this cheesecake special is its smooth, creamy texture combined with a buttery, crumbly crust. The Preppy Kitchen approach emphasizes quality ingredients and precise techniques, ensuring that every bite is indulgently satisfying. Plus, it’s versatile enough to allow for different flavorings and toppings, making it perfect for any occasion.
Ingredients List
This section provides a detailed list of ingredients you will need to create a delicious cheesecake inspired by the Preppy Kitchen style. Having exact measurements and specifications is crucial for achieving the perfect texture and flavor in your cheesecake.
| Item | Amount/Specification | Notes |
|---|---|---|
| Cream Cheese | 24 ounces (680g) | Softened to room temperature for easy mixing |
| Granulated Sugar | 1 cup (200g) | Adjust based on sweetness preference |
| Sour Cream | 1 cup (240g) | For creaminess and tang |
| Vanilla Extract | 2 teaspoons | Pure vanilla extract is recommended |
| Large Eggs | 4 | Room temperature for even mixing |
| Graham Cracker Crumbs | 1 ½ cups (150g) | For the crust |
| Unsalted Butter | ½ cup (113g) | Melted for the crust |
- For a gluten-free version, substitute graham cracker crumbs with crushed gluten-free cookies.
- Make sure the cream cheese is softened to avoid lumps in your batter.
- If you’re sensitive to dairy, try using a dairy-free cream cheese substitute.
Essential Kitchen Tools
To create a delicious cheesecake that captures the essence of the Preppy Kitchen style, you’ll need some essential tools. These tools not only make the process smoother but also help achieve that perfect texture and flavor balance. Let’s dive into what you’ll need to get started.
- Baking Pan: A 9-inch (23 cm) springform pan is ideal for cheesecake. The removable sides allow for easy removal without damaging the delicate cake. If you don’t have a springform pan, a regular 9-inch round cake pan will work, but be careful when removing the cheesecake.
- Mixer: A stand mixer or a handheld electric mixer will make mixing the cream cheese, sugar, and eggs a breeze. The goal is to achieve a smooth, creamy texture with no lumps. If you don’t have a mixer, you can use a whisk, but it will require more elbow grease!
- Mixing Bowls: You’ll need at least two mixing bowls: one for the crust ingredients and another for the filling. Opt for glass or stainless steel bowls, as they are easy to clean and won’t retain odors.
- Rubber Spatula: A sturdy rubber spatula is essential for scraping down the sides of the bowl and folding in ingredients gently. This ensures everything is well combined, especially when incorporating whipped cream or egg whites.
- Measuring Cups and Spoons: Precision is key in baking. Make sure you have a set of dry measuring cups, liquid measuring cups, and measuring spoons to get accurate ingredient amounts.
- Cooling Rack: After baking, let your cheesecake cool properly on a cooling rack. This prevents condensation from forming at the bottom of the pan, which can create a soggy crust.
Step-by-Step Instructions
In this section, we will break down the detailed steps to create a delicious cheesecake, inspired by the Preppy Kitchen style. From preparing the crust to mixing the filling and baking, each step is designed to ensure your cheesecake turns out perfectly smooth and creamy.
- Preparing the Crust: Preheat your oven to 350°F (175°C). In a medium bowl, combine 1 ½ cups (150g) of graham cracker crumbs, ⅓ cup (40g) of granulated sugar, and ½ teaspoon of salt. Pour in 6 tablespoons (85g) of melted unsalted butter and mix until the crumbs are evenly moistened. It should resemble wet sand. Press this mixture firmly into the bottom of a 9-inch (23cm) springform pan, creating an even layer. Bake for 8-10 minutes until lightly golden, then let it cool while you prepare the filling.
- Mixing the Filling: In a large mixing bowl, beat 4 (8-ounce) packages of cream cheese at room temperature until smooth and creamy, about 2-3 minutes. Gradually add in 1 cup (200g) of granulated sugar, mixing until well combined. Scrape down the sides of the bowl as needed. Add in 1 teaspoon of vanilla extract and 4 large eggs, one at a time, mixing on low speed to avoid incorporating too much air. The batter should be thick and smooth, with no lumps remaining.
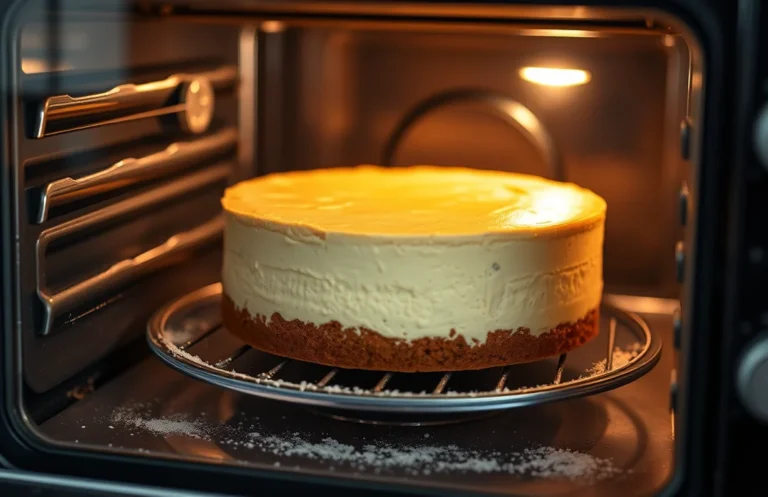
- Baking Process: Pour the cheesecake filling over the cooled crust. To prevent cracks, prepare a water bath by wrapping the bottom of the springform pan with aluminum foil and placing it in a larger baking dish filled with hot water. Bake at 325°F (163°C) for 55-65 minutes until the edges are set but the center still slightly jiggles. Do not open the oven door during the first 30 minutes. Once baked, turn off the oven and let the cheesecake cool inside for 1 hour. This gradual cooling helps prevent cracks on the surface.
Pro Tips and Mistakes
Creating a perfect cheesecake requires attention to detail and a few insider tips to ensure a creamy texture without cracks. Here are some essential strategies to help you achieve that dreamy cheesecake inspired by Preppy Kitchen.
Achieving Creamy Texture
- Use room temperature ingredients: Allow your cream cheese, sour cream, and eggs to sit at room temperature for at least 30 minutes before mixing. This step ensures a smoother batter, helping to prevent lumps.
- Mix on low speed: When combining the ingredients, use a hand mixer or stand mixer on low speed. This prevents too much air from being incorporated, which can lead to cracks while baking.
- Don’t overmix: Once you add the eggs, mix just until combined. Overmixing can lead to a dense texture instead of the light, airy cheesecake you desire.
Avoiding Cracks
- Use a water bath: Place your cheesecake pan inside a larger pan filled with hot water. This gentle cooking method helps maintain even heat, reducing the chance of cracks.
- Cool slowly: After baking, turn off the oven and crack the door open, allowing the cheesecake to cool gradually inside for about an hour. This reduces temperature shock that can cause cracks.
- Don’t open the oven door: Avoid peeking during the first 30 minutes of baking. Opening the door can cause temperature fluctuations, leading to unsightly cracks.
Flavor Variations
Exploring different flavors and dietary modifications for your cheesecake not only enhances its appeal but also allows you to cater to various tastes and dietary needs. Here, I’ll share some delicious fruit flavors and gluten-free options that can be easily incorporated into your cheesecake recipe.
Fruit Flavors
Adding fruit to your cheesecake can elevate its flavor profile and add a beautiful color. Here are some popular fruit variations:
- Strawberry Cheesecake: Puree 1 cup strawberries and fold into the batter before baking. Top with fresh strawberries for garnish.
- Blueberry Cheesecake: Mix in 1 cup of fresh or frozen blueberries into the batter. For a topping, cook 1 cup blueberries with 2 tablespoons sugar over medium heat until bubbly.
- Lemon Cheesecake: Add the zest of 1 lemon and ¼ cup of fresh lemon juice to the batter for a refreshing twist.
- Chocolate Cheesecake: Fold in ½ cup melted dark chocolate into the batter, and consider topping with chocolate shavings.
Gluten-Free Options
If you’re looking to make a gluten-free cheesecake, here are some substitutions you can use:
- Crust: Substitute the graham cracker crumbs with 1 ½ cups of gluten-free cookie crumbs or ground almonds.
- Flour: If your cheesecake recipe includes flour, replace it with ¼ cup of cornstarch or almond flour to maintain a smooth texture.
Chef’s tip: Always check the labels on packaged ingredients to ensure they are gluten-free, as cross-contamination can occur.
| Flavor Variation | Fruit Amount | Notes |
|---|---|---|
| Strawberry | 1 cup pureed | Fresh strawberries for garnish |
| Blueberry | 1 cup | Top with cooked blueberries |
| Lemon | Zest of 1 lemon | Add lemon juice for tanginess |
| Chocolate | ½ cup melted | Use dark chocolate for richness |
Serving Suggestions
Now that your cheesecake is perfectly baked and cooled, it’s time to think about how to serve and enjoy it! Presenting your cheesecake beautifully can elevate the dessert experience, and pairing it with the right garnishes and beverages can enhance its flavors wonderfully.
Garnishing Tips
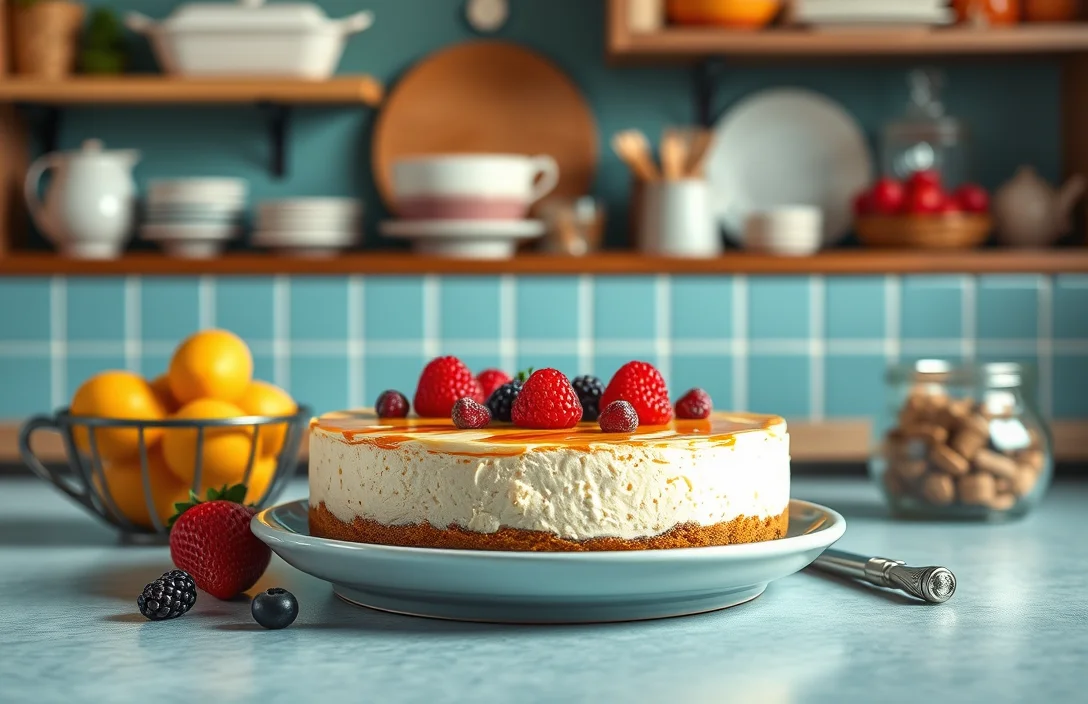
Here are some delightful garnishing ideas to make your cheesecake visually appealing:
- Drizzle with 1/4 cup (60ml) of raspberry sauce for a pop of color and tartness.
- Top with 1 cup (150g) of fresh berries like strawberries, blueberries, or blackberries.
- Sprinkle with 2 tablespoons of powdered sugar for a touch of sweetness and elegance.
- Add a dollop of freshly whipped cream on each slice for a creamy finish.
- For a touch of sophistication, garnish with fresh mint leaves.
Beverage Pairings
Choosing the right beverage can complement your cheesecake beautifully. Consider these pairings:
| Beverage | Tasting Notes |
|---|---|
| Coffee | The richness of coffee balances the creaminess of the cheesecake. |
| Sweet White Wine | A dessert wine enhances the sweetness and flavor of the cheesecake. |
| Herbal Tea | Chamomile or mint tea offers a soothing contrast to the dessert. |
Pro tip: Serve your cheesecake chilled for the best texture and flavor experience!
Quick Summary
| Prep Time | Cook Time | Total Time | Servings |
|---|---|---|---|
| 20 minutes | 60 minutes | 4 hours | 8 servings |
- Prepare the crust: Mix graham cracker crumbs, sugar, and melted butter.
- Beat cream cheese: Ensure it’s room temperature for a smooth texture.
- Add eggs gradually: Mix each egg in fully before adding the next.
- Bake in a water bath: Prevents cracking and ensures even baking.
- Chill thoroughly: Refrigerate for at least 4 hours before serving.
- Room temperature ingredients: This is key for a creamy consistency.
- Don’t overmix: Overmixing can incorporate too much air and cause cracks.
- Use a springform pan: Makes it easier to remove the cheesecake without damage.
Frequently Asked Questions
Can I make this cheesecake ahead of time? How to store and reheat?
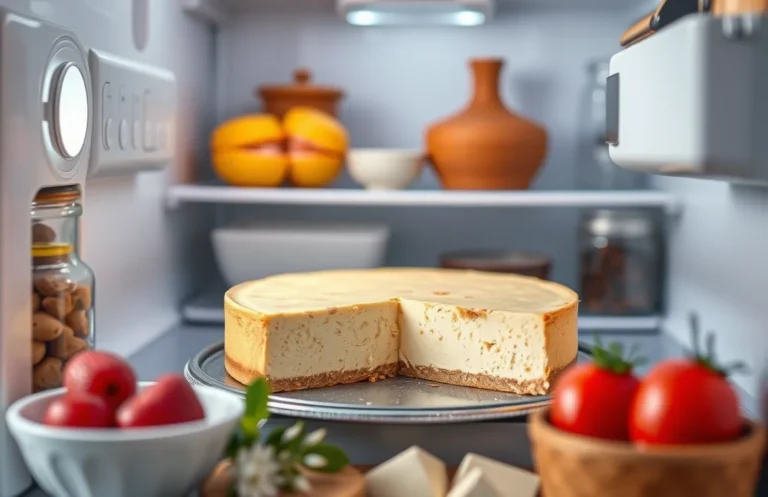
You can absolutely make this cheesecake up to 2 days ahead of time and store it in the refrigerator, covered tightly with plastic wrap. Just let it sit at room temperature for about 30 minutes before serving for the best texture.
What can I substitute for cream cheese?
If you need a substitute, you can use mascarpone cheese for a similar texture and flavor, or a combination of Greek yogurt and sour cream for a lighter version.
How do I know when the cheesecake is done?
Your cheesecake is done when the edges are set but the center still has a slight jiggle, which should take about 55-70 minutes at 325°F (163°C). It will continue to set as it cools, so don’t overbake!
Can I freeze this cheesecake? How long does it last?
You can freeze the cheesecake for up to 3 months if it’s well-wrapped in plastic wrap and aluminum foil. Thaw it in the refrigerator overnight before serving for the best texture.
What if I don’t have a springform pan?
If you don’t have a springform pan, you can use a 9-inch round cake pan instead, but make sure to line the bottom with parchment paper for easy removal. Just run a knife around the edges before gently lifting it out.

- Decadent Peanut Butter No-Bake Cheesecake: Easy Recipe to Indulge - April 3, 2026
- Delicious Mango No-Bake Cheesecake: Step-by-Step Recipe - April 3, 2026
- Decadent Raspberry No-Bake Cheesecake: Easy Step-by-Step Recipe - April 3, 2026