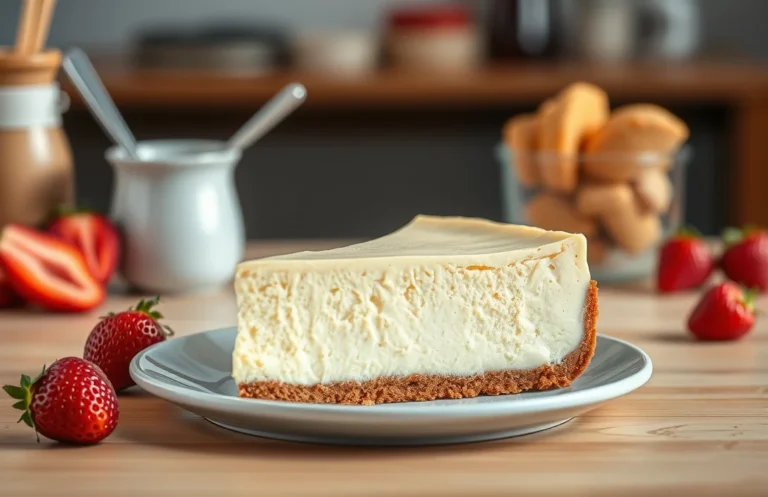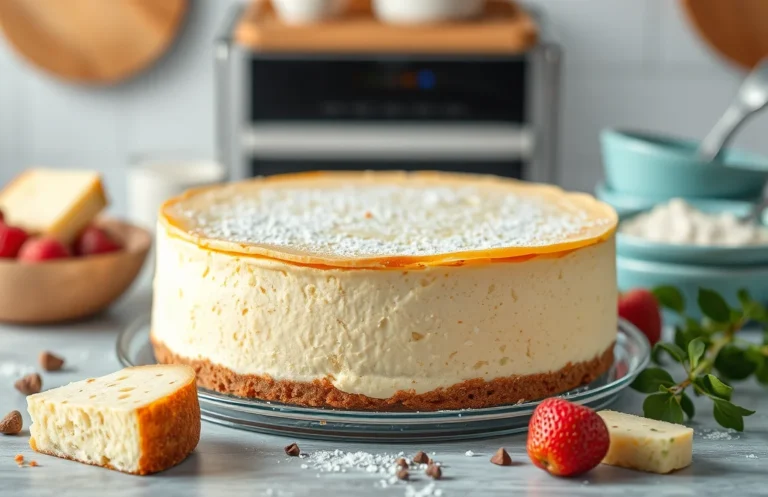
Traditional Cheesecake Recipe: Preppy Kitchen’s Step-by-Step Guide
If you’re craving a dessert that feels both indulgent and comforting, this traditional cheesecake is exactly what you need. It’s creamy, rich, and perfectly sweet, making it a beloved choice for gatherings or a sweet treat after dinner. Each slice is a slice of happiness, and you’ll want to savor every bite!
This recipe is straightforward, with prep time of 20 minutes, cook time of 1 hour, and total time of 1 hour and 20 minutes. It serves 8 people and is easy to make, perfect for home cooks of all levels.
| Prep Time | Cook Time | Total Time | Servings | Difficulty |
|---|---|---|---|---|
| 20 minutes | 1 hour | 1 hour 20 minutes | 8 | Easy |
History of Cheesecake
The history of cheesecake is as rich and layered as the dessert itself. Originating from ancient civilizations, this delectable treat has evolved over centuries and holds significant cultural importance across various occasions.
- Ancient Origins: The earliest recorded cheesecake dates back to ancient Greece, where it was served to athletes during the first Olympic Games in 776 B.C. Made with simple ingredients like cheese, honey, and flour, it was believed to provide energy and nourishment.
- Roman Influence: The Romans adopted and adapted the Greek cheesecake, adding more complex flavors and ingredients. They introduced the concept of baking the cheesecake, which laid the groundwork for the diverse styles we see today.
- Cultural Significance: In various cultures, cheesecake represents celebration and indulgence. For instance, in Jewish tradition, cheesecake is a popular dessert during Shavuot, symbolizing the harvest and the giving of the Torah. Similarly, in Italian culture, it is often featured at weddings and special gatherings.
- Modern Variations: The introduction of cream cheese in the early 20th century marked a turning point in cheesecake history, leading to the creation of the New York-style cheesecake. This version, known for its rich and creamy texture, is now a staple across many dessert menus, including those of preppy kitchen aesthetics.
Ingredients for Cheesecake
Creating a delicious traditional cheesecake requires the perfect blend of ingredients, each playing a vital role in achieving that creamy texture and rich flavor. Below, you’ll find a detailed list of the necessary ingredients for both the crust and the filling, along with precise measurements to ensure your cheesecake turns out just right.
For the Crust
| Item | Amount/Specification | Notes |
|---|---|---|
| Graham cracker crumbs | 1 ½ cups (150g) | Finely crushed for a uniform texture |
| Granulated sugar | ¼ cup (50g) | Enhances sweetness and flavor |
| Unsalted butter | ½ cup (115g) | Melted, for binding the crust |
For the Filling
| Item | Amount/Specification | Notes |
|---|---|---|
| Cream cheese | 4 (8 oz) packages (900g) | Softened for easy mixing |
| Granulated sugar | 1 cup (200g) | Adds sweetness; can substitute with coconut sugar for a different flavor |
| Sour cream | 1 cup (240ml) | Provides tanginess and creaminess |
| Vanilla extract | 1 tablespoon (15ml) | Pure vanilla for best flavor |
| Large eggs | 4 | Room temperature for smoother incorporation |
- For a gluten-free crust, consider using almond flour or gluten-free cookies.
- Make sure the cream cheese is fully softened; this helps prevent lumps in the filling.
- Don’t skip the sour cream; it adds a depth of flavor that’s essential for a perfect cheesecake.
Necessary Kitchen Equipment
To create a delicious traditional cheesecake, having the right kitchen equipment is essential. This section will outline the necessary tools you’ll need for mixing, baking, and ensuring everything comes together perfectly.
- Baking Pan: A 9-inch (23 cm) springform pan is ideal for cheesecake. The removable sides make it easy to release the cheesecake without damaging it. Make sure to line the bottom with parchment paper for an even smoother release.
- Mixer: A stand mixer or a hand mixer will make the cream cheese filling smooth and creamy. If using a stand mixer, equip it with the paddle attachment to avoid incorporating too much air. Mix on medium speed until the mixture is light and fluffy, about 3-5 minutes.
- Spatula: A rubber or silicone spatula is essential for scraping down the sides of the bowl and folding in ingredients gently. This helps achieve a uniform texture in your cheesecake without over-mixing.
- Measuring Cups and Spoons: Accurate measurements are crucial for baking. A set of dry measuring cups for ingredients like flour and sugar, and liquid measuring cups for liquids like sour cream and vanilla extract, will ensure precision.
- Mixing Bowls: Have a few mixing bowls on hand in various sizes. Use one for the crust ingredients and another for the filling. Glass or stainless steel bowls are preferred for their durability and ease of cleaning.
- Cooling Rack: Once your cheesecake is baked, allow it to cool on a wire rack to prevent moisture build-up. This step is critical for achieving the right texture and avoiding cracks in your cheesecake.
Step-by-Step Cooking Instructions
In this section, we’ll walk through the essential steps to create a traditional cheesecake that is both creamy and delicious. From preparing the crust to baking the filling, each stage is crucial for achieving that perfect texture and flavor.
- Prepare the Crust: Preheat your oven to 350°F (175°C). In a mixing bowl, combine 1 ½ cups (150g) of graham cracker crumbs, ¼ cup (50g) of granulated sugar, and ½ cup (115g) of melted unsalted butter. Mix until the crumbs are well-coated and resemble wet sand. Press this mixture firmly into the bottom of a 9-inch (23cm) springform pan, using the back of a measuring cup to ensure an even layer. Bake for 10 minutes until lightly golden, then set aside to cool.
- Make the Filling: In a large mixing bowl, beat 24 ounces (680g) of softened cream cheese with an electric mixer on medium speed until smooth and creamy, about 2-3 minutes. Gradually add 1 cup (200g) of granulated sugar, mixing until fully incorporated. Then, add 1 teaspoon of vanilla extract and 3 large eggs, one at a time, ensuring each egg is fully mixed before adding the next. The mixture should be smooth, with no lumps, and slightly thick.
- Combine and Bake: Pour the cheesecake filling over the cooled crust, smoothing the top with a spatula. To prevent cracks, place a shallow pan filled with hot water on the bottom rack of the oven to create steam. Bake for 50-60 minutes, or until the edges are set but the center still jiggles slightly when shaken. Turn off the oven and crack the door, letting the cheesecake cool for 1 hour inside. This will help prevent sudden temperature changes that can cause cracks.
Pro Tips for Perfect Cheesecake
Creating a perfect cheesecake involves more than just following a recipe; it requires attention to detail and an understanding of texture and cooling techniques. Here are some essential tips to help you achieve that creamy, luscious dessert you dream of.
Texture Tips
- Use Room Temperature Ingredients: Ensure your cream cheese, eggs, and sour cream are at room temperature for a smoother batter. This helps to create a uniform texture.
- Don’t Overmix: Mix just until combined. Overmixing can incorporate too much air, leading to cracks during baking.
- Water Bath Technique: Bake your cheesecake in a water bath to maintain moisture and even cooking. Place your cheesecake pan in a larger pan filled with hot water halfway up the sides of the cheesecake pan.
Cooling Tips
How you cool your cheesecake is crucial for preventing cracks and ensuring the right consistency.
- Gradual Cooling: Allow your cheesecake to cool in the oven with the door slightly ajar for about 1 hour. This helps to prevent sudden temperature changes that can cause cracks.
- Chill Thoroughly: Once the cheesecake is at room temperature, refrigerate for at least 4 hours, preferably overnight. This allows the flavors to meld and the texture to set properly.
- Cover Gently: Use a piece of wax paper or parchment to cover the cheesecake to avoid condensation dripping onto the surface.
Chef’s tip: If your cheesecake cracks, don’t worry! You can cover it with a fruit topping or whipped cream for a delicious disguise.
Cheesecake Variations
Cheesecake can be adapted to suit various dietary needs without sacrificing flavor or texture. Whether you’re looking for a gluten-free option or a vegan alternative, these variations will allow you to enjoy a classic cheesecake while accommodating your preferences.
Gluten-Free Options
To make a gluten-free cheesecake, simply replace the traditional graham cracker crust with a gluten-free alternative. Here’s how:
- 1 ½ cups gluten-free graham cracker crumbs (about 150g)
- ⅓ cup granulated sugar (67g)
- ⅓ cup unsalted butter, melted (75g)
Mix the crumbs, sugar, and melted butter, then press the mixture firmly into the bottom of your springform pan. Bake at 350°F (175°C) for 10 minutes or until slightly golden. Let it cool before adding the filling.
Vegan Alternatives
If you’re looking for a vegan cheesecake, you can create a delicious filling using cashews. Here’s a simple recipe:
- 1 ½ cups raw cashews, soaked for 4 hours
- ½ cup coconut cream (120ml)
- ¼ cup maple syrup (60ml)
- 2 tablespoons lemon juice (30ml)
- 1 teaspoon vanilla extract
Blend all filling ingredients until smooth, and pour it over your prepared crust. Bake at 350°F (175°C) for 45-50 minutes, or until the edges are set but the center still has a slight jiggle. Chill for at least 4 hours before serving.
Chef’s tip: For the best texture, let the cashews soak overnight for an ultra-creamy filling.
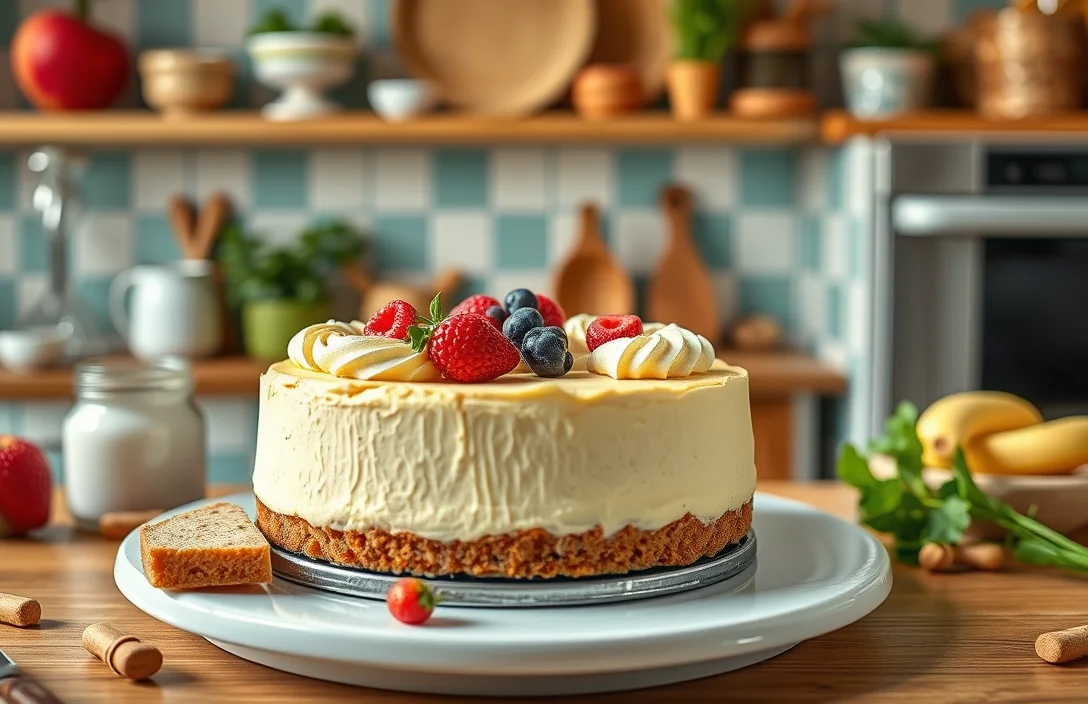
Serving and Plating Ideas
Presenting your traditional cheesecake beautifully can elevate its appeal and make your dessert feel extra special. Here are some delightful garnishing suggestions and beverage pairings to complement your cheesecake and impress your guests.
Garnishing Suggestions
- Top with fresh berries such as strawberries (1 cup), blueberries (1 cup), or raspberries (1 cup) for a burst of color and flavor.
- Drizzle with a homemade fruit coulis made from pureeing 1 cup of your favorite berries with 2 tablespoons of sugar and a splash of lemon juice.
- Add a dollop of whipped cream (1 cup heavy cream, whipped until soft peaks form) for a light, airy finish.
- Sprinkle with chocolate shavings or grated dark chocolate (2 ounces) for a rich touch.
- For a refreshing twist, garnish with a few mint leaves.
Pairing with Beverages
| Beverage | Notes |
|---|---|
| Coffee | A rich espresso or smooth cappuccino complements the creaminess of the cheesecake. |
| Tea | Consider a floral Earl Grey or a fruity herbal tea for a lighter option. |
| Sparkling Wine | A semi-sweet Prosecco or Moscato enhances the dessert’s flavors without overpowering them. |
| Milkshake | A vanilla or chocolate milkshake can bring a nostalgic element to your dessert experience. |
Chef’s tip: Serve the cheesecake chilled for the best texture, and allow it to sit at room temperature for about 15 minutes before slicing for cleaner cuts.
Quick Summary
| Prep Time | Cook Time | Total Time | Servings |
|---|---|---|---|
| 20 minutes | 1 hour | 4 hours (chill time included) | 8 |
- Prepare the crust: Mix 1 ½ cups graham cracker crumbs with ½ cup melted butter and press into the bottom of a springform pan.
- Make the filling: Blend 24 oz cream cheese, 1 cup sugar, 3 eggs, and 1 tsp vanilla until smooth.
- Bake: Preheat oven to 325°F and bake for 60 minutes or until set around the edges.
- Cool: Let the cheesecake cool in the oven with the door ajar for 1 hour.
- Chill: Refrigerate for at least 3 hours before serving for best texture.
- Tip: Use room temperature ingredients for a smoother filling.
- Tip: Avoid overmixing to prevent cracks in the cheesecake.
Frequently Asked Questions
Can I make this ahead of time? How to store and reheat?
You can absolutely make this cheesecake ahead of time! Store it covered in the refrigerator for up to 5 days, and enjoy it cold or at room temperature — no need to reheat.
What can I substitute for cream cheese?
If you don’t have cream cheese, you can use mascarpone cheese for a similar creamy texture and rich flavor, but keep in mind it may be slightly sweeter. You can also use Greek yogurt, though it may alter the texture slightly.
How do I know when it’s done?
Your cheesecake is done when the edges are set but the center still has a slight jiggle; it will firm up as it cools. You can also check with a toothpick — it should come out mostly clean but with a bit of moisture sticking to it.
Can I freeze this? How long does it last?
You can freeze your cheesecake for up to 3 months; just be sure to wrap it tightly in plastic wrap and then aluminum foil. Thaw it overnight in the refrigerator before serving for the best texture.
What if I don’t have a springform pan?
If you don’t have a springform pan, you can use a regular round cake pan, but line it with parchment paper for easier removal. Just be gentle when lifting it out since the cheesecake will be more delicate without the sides that release easily.

- Decadent Peanut Butter No-Bake Cheesecake: Easy Recipe to Indulge - April 3, 2026
- Delicious Mango No-Bake Cheesecake: Step-by-Step Recipe - April 3, 2026
- Decadent Raspberry No-Bake Cheesecake: Easy Step-by-Step Recipe - April 3, 2026