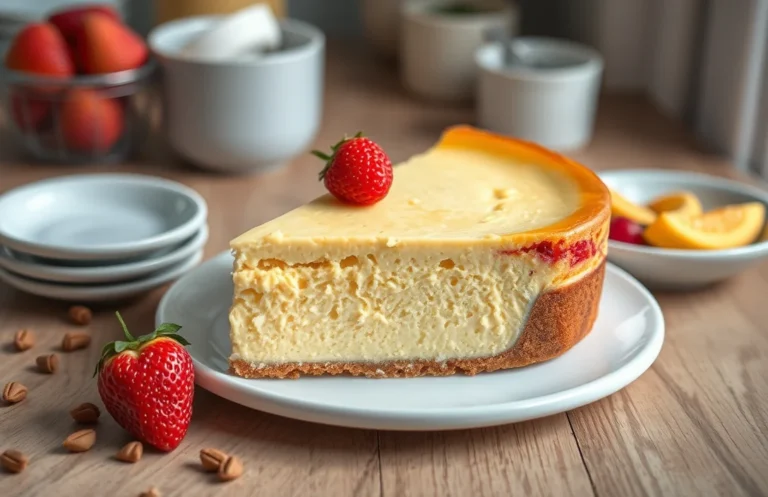
Classic Cheesecake Recipe: Step-by-Step for Preppy Kitchen Style
There’s something incredibly satisfying about a classic cheesecake — its creamy, dreamy texture and rich flavor make it an absolute showstopper for any occasion. Whether you’re celebrating a birthday or just craving a slice of comfort, this cheesecake is sure to impress your friends and family while tantalizing your taste buds.
Get ready to create a delicious dessert with this classic cheesecake recipe that takes about 1 hour and 15 minutes to prepare and bake. This recipe serves 10 people and is rated as easy for home cooks!
| Prep Time | Cook Time | Total Time | Servings | Difficulty |
|---|---|---|---|---|
| 15 minutes | 1 hour | 1 hour 15 minutes | 10 | Easy |
Origin of Classic Cheesecake
Cheesecake has a rich history that spans centuries and cultures, making it a beloved dessert in many parts of the world. Understanding its origins not only enhances our appreciation for this creamy delicacy but also highlights its significance in various special occasions.
Historical Background
- Ancient Origins: The earliest recorded cheesecake dates back to ancient Greece, where it was served to athletes during the first Olympic Games in 776 B.C. Made with simple ingredients like cheese, honey, and flour, this early version laid the foundation for many subsequent recipes.
- Roman Influence: The Romans further developed the cheesecake, incorporating more ingredients and techniques. They spread the dessert throughout Europe, where it began to evolve into different regional variations.
- American Adaptation: The classic New York-style cheesecake emerged in the late 19th century when cream cheese was introduced. This richer version became synonymous with American desserts and is now a staple in many households.
Cultural Significance
- Celebratory Occasions: Cheesecake is often a centerpiece for celebrations such as birthdays, weddings, and holidays. Its creamy texture and rich flavor make it a favorite choice for sweet indulgence.
- Regional Variations: Different cultures have adapted cheesecake to their tastes, from the light and fluffy Italian ricotta cheesecake to the dense and decadent German Käsekuchen, showcasing its versatility.
- Modern Popularity: Today, cheesecake remains a popular dessert in restaurants and homes, with variations that cater to dietary preferences, including gluten-free and vegan options, making it accessible to a wider audience.
Ingredients for Cheesecake
In this section, we’ll detail all the ingredients you need to create a delicious classic cheesecake. Each component is essential for achieving that creamy, rich texture and flavor that makes cheesecake a beloved dessert. With the right measurements and quality ingredients, you can create a cheesecake that looks as good as it tastes!
| Item | Amount/Specification | Notes |
|---|---|---|
| Cream Cheese | 24 ounces (680g) | Softened to room temperature for easy mixing |
| Sugar | 1 cup (200g) | Granulated sugar, adjust for sweetness preference |
| Eggs | 4 large | At room temperature for optimal blending |
| Sour Cream | 1 cup (240g) | Adds creaminess and tang; plain unsweetened works best |
| Vanilla Extract | 1 teaspoon (5ml) | Pure vanilla extract preferred for flavor |
| Crust Ingredients: | ||
| Graham Cracker Crumbs | 1 ½ cups (150g) | For a classic crust texture |
| Unsalted Butter | ½ cup (115g) | Melted; helps bind the crust together |
| Sugar (for Crust) | ¼ cup (50g) | Enhances sweetness in the crust |
- For a gluten-free version, use gluten-free graham crackers.
- Make sure the cream cheese is fully softened to avoid lumps.
- Room temperature eggs will help create a smoother batter.
Kitchen Equipment Needed
To achieve the perfect classic cheesecake that embodies the preppy kitchen style, having the right tools at your disposal is essential. This section outlines the essential equipment you’ll need for mixing, baking, and presenting your cheesecake, ensuring a smooth baking experience.
| Item | Amount/Specification | Notes |
|---|---|---|
| Mixing Bowl | 1 large, preferably 4-5 quart | Use for mixing the cream cheese, sugar, and eggs. |
| Electric Mixer | 1 hand or stand mixer | A hand mixer is sufficient, but a stand mixer saves time. |
| Spatula | 1 rubber or silicone | For folding ingredients and scraping down the bowl. |
| Baking Pan | 9-inch springform pan | Allows easy removal of the cheesecake after baking. |
| Aluminum Foil | 1 roll | To wrap the springform pan for a water bath. |
| Roasting Pan | 1 large | For creating a water bath to prevent cracking. |
| Oven Thermometer | 1 | To ensure accurate oven temperature. |
- Tip: Ensure your cream cheese is at room temperature for smooth mixing.
- Check your oven’s calibration with an oven thermometer for precise baking.
- Wrap the bottom of the springform pan in aluminum foil to prevent leaks.
- Have extra parchment paper on hand for easy cleanup.
Step-by-Step Baking Instructions
This section provides the detailed steps to create a classic cheesecake, focusing on preparing the crust, mixing the filling, and the baking process. Following these precise instructions will help you achieve a smooth, creamy texture and a perfectly set cheesecake.
- Prepare the Crust: Preheat your oven to 350°F (175°C). In a medium bowl, mix 1 ½ cups (150g) of graham cracker crumbs, ⅓ cup (65g) of granulated sugar, and ½ cup (113g) of melted unsalted butter until well combined. The mixture should resemble wet sand. Press this mixture firmly into the bottom of a 9-inch (23 cm) springform pan and bake for 10 minutes until lightly golden. Allow it to cool while preparing the filling.
- Mix the Filling: In a large bowl, beat 4 (8-ounce) packages of cream cheese, softened to room temperature, with an electric mixer on medium speed until smooth and creamy, about 2-3 minutes. Gradually add 1 cup (200g) of granulated sugar and beat until fully incorporated. Add 4 large eggs, one at a time, mixing on low speed just until combined to avoid overmixing. Finally, mix in 1 teaspoon of vanilla extract and 1 tablespoon of lemon juice for brightness. The filling should be silky and free of lumps.
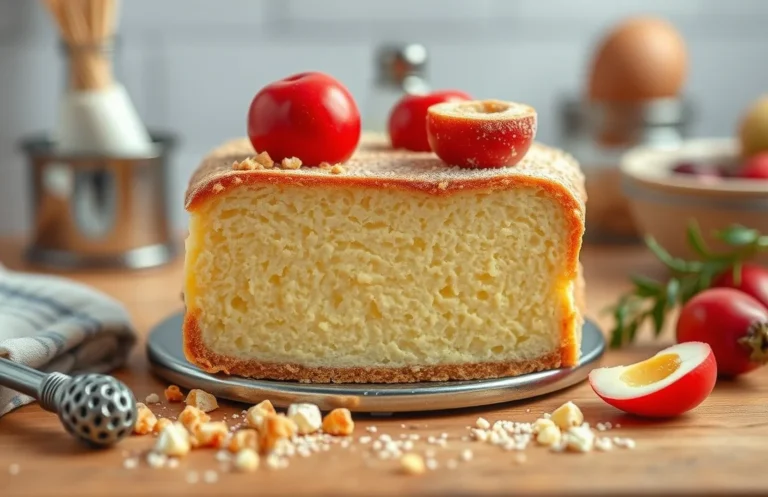
- Bake the Cheesecake: Pour the cream cheese filling over the cooled crust, smoothing the top with a spatula. Place the springform pan on a baking sheet to catch any drips and bake in the preheated oven for 55-60 minutes. The edges should be set while the center remains slightly jiggly. Turn off the oven and crack the door, allowing the cheesecake to cool in the oven for 1 hour, which helps prevent cracks.
Pro Tips for Perfect Cheesecake
Creating the perfect cheesecake is an art that hinges on a few critical techniques. By avoiding common pitfalls and following these cooling tips, you can achieve a smooth, creamy texture and a beautiful presentation that will impress everyone.
Avoiding Cracks
Cracks in your cheesecake can be disheartening, but with the right approach, they can be easily avoided:
- Use room temperature ingredients: Ensure your cream cheese, eggs, and sour cream are at room temperature before mixing. This helps create a smooth batter and minimizes air bubbles.
- Mix gently: When combining the ingredients, beat at a low speed. Overmixing incorporates too much air, which can lead to cracks as the cheesecake bakes.
- Water bath method: Place your cheesecake pan in a larger pan filled with hot water while baking. This maintains a consistent temperature and prevents the top from drying out.
Cooling Tips
Proper cooling is crucial for setting your cheesecake and preventing cracks:
- Cool gradually: After baking, turn off the oven and crack the door open for about 1 hour. This slows the temperature change and helps prevent cracking.
- Chill in the fridge: Once cooled to room temperature, refrigerate the cheesecake for at least 4 hours, preferably overnight. This allows flavors to meld and improves the texture.
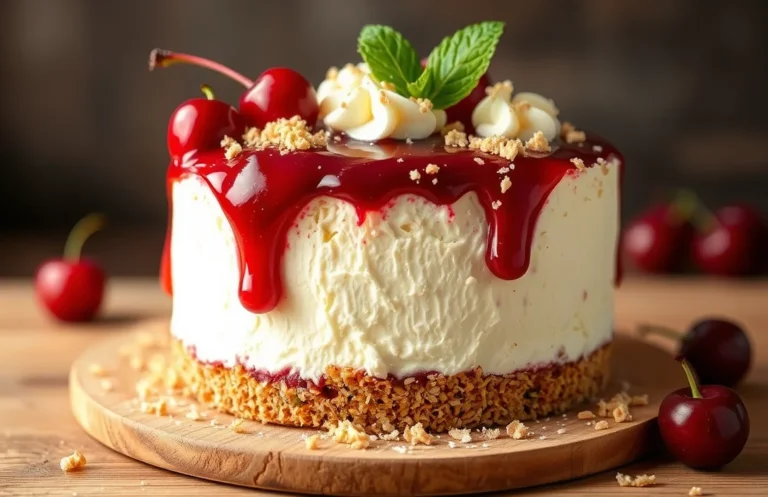
Chef’s tip: If you do find cracks in your cheesecake, cover them with a layer of sour cream or fruit topping for a beautiful finish!
| Common Mistakes | How to Avoid |
|---|---|
| Not using room temperature ingredients | Let ingredients sit out for 30-60 minutes before mixing |
| Overmixing the batter | Mix at low speed just until combined |
| Skipping the water bath | Always use a water bath for even baking |
Cheesecake Variations
Cheesecakes are wonderfully versatile, allowing for various adaptations to suit dietary needs and flavor preferences. Whether you need a gluten-free option or want to experiment with different flavors, these variations will help you create a cheesecake that fits your taste and lifestyle.
Gluten-Free Options
To make your cheesecake gluten-free, simply substitute the traditional graham cracker crust with a gluten-free alternative. Here’s a quick and easy option:
- 1 ½ cups gluten-free graham cracker crumbs (150g)
- ½ cup unsalted butter, melted (113g)
- ¼ cup sugar (50g)
Mix the crumbs, melted butter, and sugar together until fully combined. Press firmly into the bottom of your pan and bake at 350°F (175°C) for 10 minutes until slightly golden. Allow to cool before adding the filling.
Flavor Variations
Enhancing the flavor of your classic cheesecake can create delightful new experiences. Here are some suggestions:
- Chocolate Cheesecake: Add ⅔ cup (120g) melted dark chocolate to the cream cheese mixture.
- Berry Swirl: Incorporate 1 cup (150g) pureed fresh berries like strawberries or raspberries into the filling. Swirl gently before baking.
- Matcha Cheesecake: Mix in 2 tablespoons (15g) of matcha powder for a unique flavor and vibrant color.
Chef’s tip: Always taste your filling before baking and adjust sweetness or flavorings as needed.
These variations will allow you to customize your cheesecake to your liking while still enjoying the classic texture and richness that makes cheesecake so beloved.
Serving and Plating Ideas
Serving and plating your classic cheesecake can elevate its appeal and enhance the overall dining experience. With thoughtful toppings and creative presentation techniques, you can make your cheesecake not only delicious but also a feast for the eyes.
Topping Suggestions
- Fresh Berries: Top with 1 cup mixed berries (strawberries, blueberries, raspberries) for a burst of color and freshness.
- Fruit Compote: Prepare a quick compote by simmering 1 cup of your favorite fruit with ¼ cup sugar and 2 tablespoons lemon juice until thickened.
- Chocolate Ganache: Melt 4 ounces of semi-sweet chocolate with ½ cup heavy cream over low heat, stirring until smooth, and drizzle over the cheesecake.
- Caramel Sauce: Drizzle homemade or store-bought caramel sauce for a rich flavor contrast.
- Whipped Cream: Serve with a dollop of freshly whipped cream made from 1 cup heavy cream, whipped until soft peaks form.
Plating Techniques
How you plate your cheesecake can turn a simple dessert into a stunning centerpiece. Here are a few techniques:
- Use a Cake Stand: Elevate your cheesecake on a decorative cake stand for a more elegant presentation.
- Garnish with Mint: Add a sprig of fresh mint on top for a pop of green and a hint of freshness.
- Layered Presentation: Slice the cheesecake into wedges and serve on individual plates. Layer with toppings to create a beautiful stack.
Chef’s tip: For a clean slice, use a hot, wet knife to cut through the cheesecake, wiping the blade between slices.
These ideas will help you serve your classic cheesecake beautifully, making it the star of any gathering!
Quick Summary
| Prep Time | 20 minutes |
|---|---|
| Cook Time | 1 hour |
| Total Time | 1 hour 20 minutes |
| Servings | 8 slices |
- Preheat oven to 325°F: Ensure the temperature is accurate for even baking.
- Crush graham crackers: Use 1 ½ cups for a buttery crust.
- Beat cream cheese: Whip until smooth to avoid lumps in your filling.
- Add eggs one at a time: This prevents overmixing and ensures a creamy texture.
- Bake in a water bath: Helps maintain moisture and prevents cracks.
- Chill for at least 4 hours: This step is crucial for the cheesecake to set properly.
- Tip: Use room temperature ingredients for a smoother batter.
- Tip: Don’t open the oven door while baking; it can cause the cheesecake to sink.
Frequently Asked Questions
Can I make this ahead of time? How to store and reheat?
You can definitely make this cheesecake ahead of time; it stores beautifully in the refrigerator for up to 5 days. Just cover it tightly with plastic wrap or aluminum foil and serve chilled, no reheating necessary!
What can I substitute for cream cheese?
If you need a substitute for cream cheese, you can use mascarpone cheese or a mix of cottage cheese blended until smooth for a similar texture. Keep in mind that the flavor will be slightly different, but still delicious!
How do I know when it’s done?
Your cheesecake is done when the edges are set but the center still has a slight jiggle, usually at about 50-60 minutes at 325°F (160°C). It will continue to firm up as it cools, so don’t worry if it seems a bit soft initially.
Can I freeze this? How long does it last?
You can freeze the cheesecake for up to 2 months if wrapped tightly in plastic wrap and then aluminum foil. Just thaw it in the refrigerator overnight before serving for the best texture.
What if I don’t have a springform pan?
If you don’t have a springform pan, you can use a round cake pan lined with parchment paper for easy removal, but be careful when slicing. Just make sure to grease the pan well to prevent sticking!

- Decadent Peanut Butter No-Bake Cheesecake: Easy Recipe to Indulge - April 3, 2026
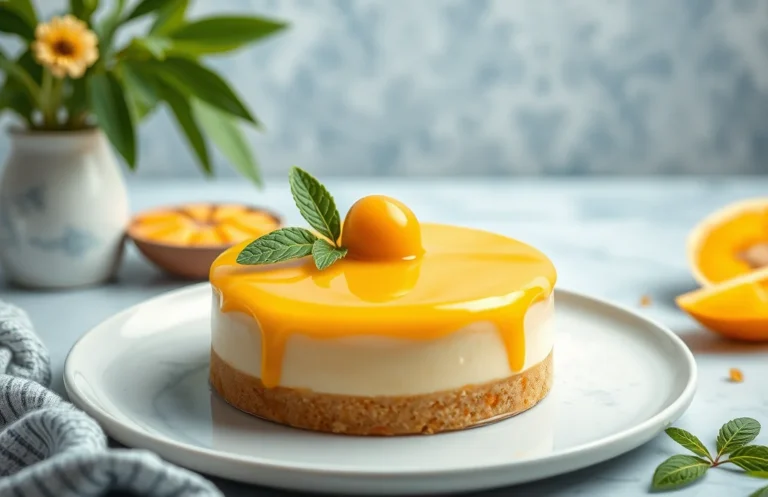
- Delicious Mango No-Bake Cheesecake: Step-by-Step Recipe - April 3, 2026
- Decadent Raspberry No-Bake Cheesecake: Easy Step-by-Step Recipe - April 3, 2026