Homemade Cheesecake Crust: 3 Easy Recipes for Perfect Results
There’s nothing quite like a homemade cheesecake crust to elevate your dessert game. Whether you’re hosting a dinner party or just indulging on a cozy night in, the buttery crunch of a freshly made crust pairs perfectly with the creamy filling, making each bite a delightful experience. Trust me, your taste buds will thank you!
Get ready to create two distinct homemade crusts: a classic graham cracker crust and a rich chocolate cookie crust. Each recipe includes clear instructions for achieving the perfect texture and flavor, all while taking about 15 minutes of prep time and resulting in 8 generous servings.
| Prep Time | Cook Time | Total Time | Servings | Difficulty |
|---|---|---|---|---|
| 15 minutes | 10 minutes | 25 minutes | 8 | Easy |
Origin of Cheesecake Crust
The cheesecake crust has a rich history that transcends cultures and showcases a delightful balance of textures and flavors. Originating from ancient Greece, the concept of cheesecake has evolved over centuries, leading to the various crust options we enjoy today. Understanding its background can enhance your appreciation for this essential component of cheesecake.
Cultural Background
Cheesecake has roots in several cultures, each contributing unique elements to its development:
- Ancient Greece: The earliest known cheesecake dates back to 2000 B.C. in Greece, where it was made with simple ingredients like cheese and honey.
- Roman Influence: Romans adopted the Greek version, adding eggs and creating a firmer texture, which laid the groundwork for modern cheesecakes.
- European Variations: Different regions introduced ingredients such as sour cream, ricotta, and various crusts, leading to distinctions like the New York-style cheesecake.
Why Crust Matters
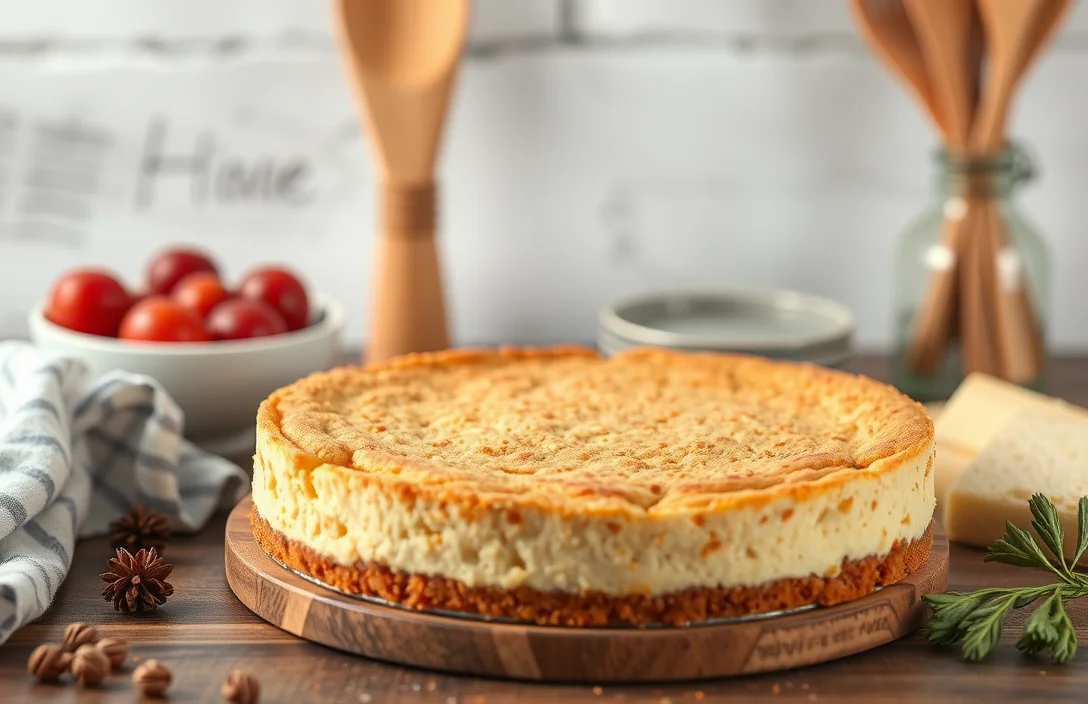
The crust is more than just a base for the cheesecake; it provides essential texture and flavor, enhancing the overall dessert experience.
- Texture: A well-made crust adds a satisfying crunch that contrasts beautifully with the creamy filling.
- Flavor: The choice of crust, whether graham cracker, chocolate, or nut-based, can significantly influence the cheesecake’s flavor profile.
- Stability: A sturdy crust helps hold the cheesecake together, making it easier to slice and serve.
Chef’s tip: Experiment with different crusts to find your perfect pairing for cheesecake flavors!
Ingredients for Cheesecake Crusts
Creating the perfect homemade crust for your cheesecake is essential to elevate its flavor and texture. In this section, we will detail the ingredients needed for three popular types of cheesecake crusts: graham cracker, chocolate, and nut-based. Each crust has its unique taste and texture, so you can choose based on your preference or what you have on hand.
| Item | Amount/Specification | Notes |
|---|---|---|
| Graham Crackers | 1 ½ cups (150g) crushed | Use plain graham crackers for a classic flavor. |
| Unsalted Butter | ½ cup (115g), melted | Ensure it’s melted for easy mixing. |
| Sugar | 2 tablespoons (25g) | Granulated sugar enhances sweetness. |
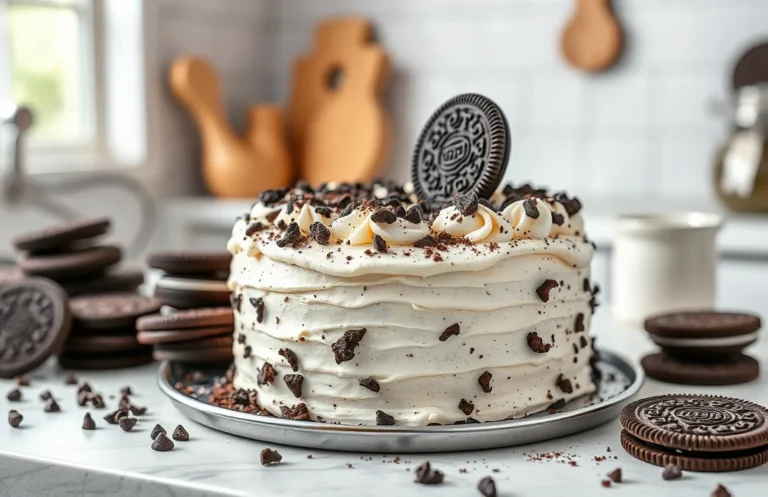
| Chocolate Cookies | 1 ½ cups (150g) crushed | For a chocolate crust, use Oreo cookies or similar. |
| Nuts (e.g., almonds or walnuts) | 1 cup (100g) finely chopped | For a nut-based crust, use unsalted nuts. |
| Maple Syrup or Honey | 2 tablespoons (30ml) | For nut-based crusts, adds flavor and binds. |
- Tip: For gluten-free options, use gluten-free graham crackers or nut-based crusts.
- Ensure your butter is fully melted to avoid clumps in the crust.
- Mix the crust ingredients until well combined; it should feel like wet sand when pressed.
Essential Kitchen Equipment
To create the perfect homemade crust for your cheesecake, having the right kitchen equipment will make all the difference. Each tool plays a crucial role in achieving the right texture and flavor, ensuring that your crust is both delicious and easy to prepare.
- Mixing Bowl: A medium to large mixing bowl (at least 3-quart capacity) is essential for combining your crust ingredients without making a mess. Choose one that is sturdy and easy to handle, preferably glass or stainless steel, as these materials allow you to see the texture of your mixture clearly.
- Measuring Cups and Spoons: Precise measurements are key to a successful crust. Use dry measuring cups for the crumb ingredients and liquid measuring cups for any melted butter or liquids. Having a set of measuring spoons will also help you accurately measure smaller quantities of sugar or spices.
- Food Processor or Rolling Pin: If you’re making a graham cracker or cookie crust, a food processor will save time by quickly grinding the crackers into fine crumbs. Alternatively, if you don’t have one, you can place the crackers in a zip-top bag and crush them with a rolling pin until finely crushed.
- Baking Pan: A 9-inch springform pan is ideal for cheesecakes, as it allows for easy removal once the dessert is set. If you’re using a standard 9-inch round cake pan, make sure to line the bottom with parchment paper for easy release.
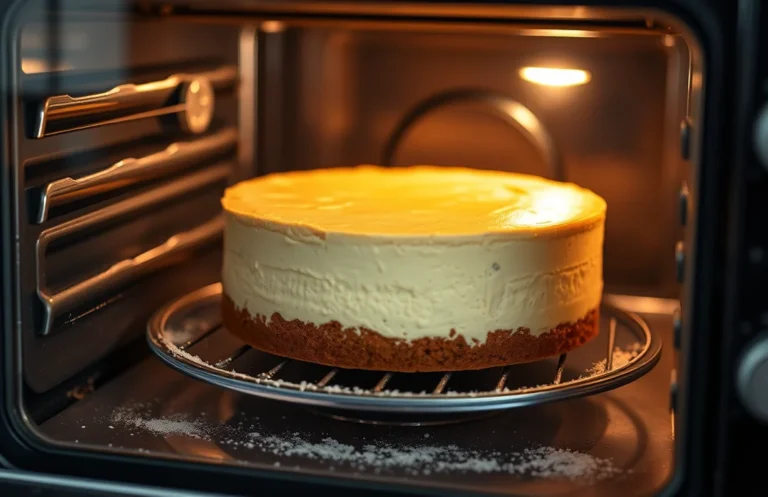
- Oven Thermometer: To ensure your crust bakes evenly, an oven thermometer is a useful tool. Ovens can vary in temperature accuracy, so having one will help you maintain the correct baking temperature of 350°F (175°C) for the crust.
Step-by-Step Crust Instructions
Creating the perfect crust for your cheesecake is essential for a well-balanced dessert. Below are detailed instructions for three delicious crust options: graham cracker, chocolate, and nut-based. Each method includes precise measurements and cooking times to ensure success.
Graham Cracker Crust Steps
- Preheat your oven to 350°F (175°C). This temperature allows the crust to become crisp and golden.
- In a mixing bowl, combine 1 ½ cups (150g) of graham cracker crumbs, ¼ cup (50g) of granulated sugar, and ½ cup (115g) of melted unsalted butter. Mix until the crumbs are evenly coated and the texture resembles wet sand.
- Press the mixture firmly into the bottom and about 1 inch up the sides of a 9-inch (23cm) springform pan. Use the bottom of a measuring cup to create an even layer. Bake for 8-10 minutes until lightly golden and fragrant.
Chocolate Crust Steps
- Preheat your oven to 350°F (175°C) if you haven’t already. This will set the crust perfectly.
- In a bowl, mix 1 ½ cups (150g) of chocolate cookie crumbs, ¼ cup (50g) of granulated sugar, and ½ cup (115g) of melted unsalted butter. Stir until the mixture is well combined.
- Evenly press the mixture into a 9-inch (23cm) springform pan, covering the bottom and sides. Bake for 10-12 minutes. The crust should be firm to the touch and slightly shine when done.
Nut-Based Crust Steps
- Preheat your oven to 350°F (175°C). This temperature is crucial for achieving the right texture.
- In a food processor, pulse 1 ½ cups (150g) of your choice of nuts (like almonds or pecans) until finely ground. Add ¼ cup (50g) of granulated sugar and ¼ cup (60ml) of melted coconut oil, then pulse until combined.
- Press the nut mixture into a 9-inch (23cm) springform pan, ensuring an even layer. Bake for 8-10 minutes. The crust should smell nutty and be slightly golden before removing it from the oven.
Pro Tips for Perfect Crusts
Creating the perfect crust for your cheesecake is crucial for both texture and flavor. Here are some expert tips to help you avoid common pitfalls and achieve a crust that is crispy, flavorful, and complements your cheesecake perfectly.
- Preventing Sogginess: To keep your crust from becoming soggy, pre-bake it at 350°F (175°C) for about 10 minutes. This helps set the crust and creates a barrier against the filling. Let it cool completely before pouring in your cheesecake batter.
- Achieving Even Texture: Make sure to crush your graham crackers or cookies into fine crumbs, ideally using a food processor. You want a consistent texture so that the crust holds together well. When mixing in your melted butter, ensure it’s thoroughly combined for even moisture distribution.
- Cooling Tips: Allow your crust to cool to room temperature before adding the cheesecake filling. This prevents the filling from melting into the crust and ensures a clean layer. If you’re in a hurry, you can pop it in the fridge for 15-20 minutes to speed up the cooling process.
Chef’s tip: If you notice your crust is too crumbly, add an extra tablespoon of melted butter to help it bind together.
Crust Variations and Substitutions
Exploring variations for your cheesecake crust can elevate your dessert to new heights while accommodating different dietary needs. Whether you’re looking for gluten-free options, vegan substitutes, or simply a flavor twist, this section will guide you through making the perfect crust for everyone to enjoy.
Gluten-Free Options
| Item | Amount/Specification | Notes |
|---|---|---|
| Gluten-free graham crackers | 1 ½ cups (150g) crushed | Ensure they’re finely crushed for a smooth texture. |
| Almond flour | 1 ½ cups (150g) | Mix with a little coconut oil for moisture. |
Vegan Substitutes
| Item | Amount/Specification | Notes |
|---|---|---|
| Vegan butter | ½ cup (115g) | Use in place of regular butter for binding. |
| Maple syrup | ½ cup (120ml) | Use instead of sugar for sweetness. |
Flavor Variations
| Item | Amount/Specification | Notes |
|---|---|---|
| Chocolate cookies | 1 ½ cups (150g) crushed | Perfect for a rich chocolate cheesecake. |
| Coconut flakes | ½ cup (50g) | Add to graham cracker crust for a tropical twist. |
- Tip: Always taste your crust mixture before pressing it into the pan. Adjust sugar or flavorings as needed.
- Common Mistake: Don’t pack the crust too tightly; you want it firm but crumbly for the perfect texture.
Serving and Plating Ideas
Presenting your cheesecake beautifully can elevate the entire dessert experience. This section will provide you with delightful garnishes, pairing suggestions, and serving temperature tips to make your homemade cheesecake truly shine.
Garnishes
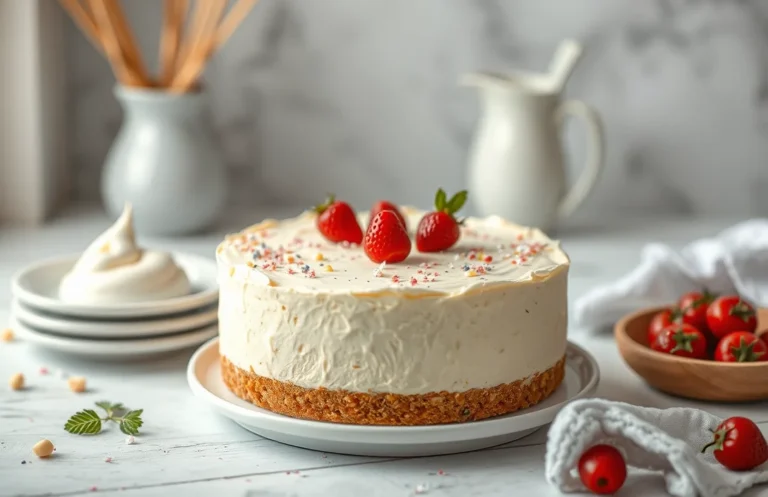
- Fresh Fruits: Add sliced strawberries, blueberries, or raspberries on top for a pop of color and freshness.
- Whipped Cream: A dollop of freshly whipped cream adds a creamy texture; consider sweetening it with a touch of vanilla extract.
- Chocolate Shavings: For a chocolate crust, sprinkle on dark or white chocolate shavings for an elegant touch.
- Mint Leaves: A few fresh mint leaves can add a refreshing contrast and make the plate look appealing.
Pairing Flavors
When serving your cheesecake, consider these flavor pairings:
| Crust Type | Pairing Flavor |
|---|---|
| Graham Crackers | Lemon Curd |
| Chocolate | Raspberry Sauce |
| Almond | Apricot Glaze |
Serving Temperature
For the best flavor and texture, serve your cheesecake chilled at about 50°F to 60°F (10°C to 15°C). Remove it from the refrigerator about 15-20 minutes before serving to allow it to soften slightly. This way, the creamy texture will be more pronounced, and the flavors will be more vibrant.
Chef’s tip: Always slice your cheesecake with a warm knife for cleaner cuts. Dip the knife in hot water, wipe it dry, and then slice.
Quick Summary
| Prep Time | Cook Time | Total Time | Servings |
|---|---|---|---|
| 15 mins | 10 mins | 25 mins | 12 |
- Choose your base: Use graham crackers or digestives for the best flavor.
- Crumb consistency: Aim for fine crumbs — use a food processor for even texture.
- Butter measurement: Melt 7 tablespoons of unsalted butter for proper binding.
- Press firmly: Compact the crust into the pan for a sturdy base.
- Bake briefly: Pre-bake at 350°F (175°C) for 10 minutes to set the crust.
- Tip 1: Cool the crust completely before adding the filling to prevent sogginess.
- Tip 2: Use parchment paper in the pan for easy removal of the cheesecake later.
Frequently Asked Questions
Can I make this crust ahead of time? How to store and reheat?
Yes, you can make the crust up to 2 days in advance. Store it in an airtight container at room temperature, and if you want to reheat it, pop it in a 350°F (175°C) oven for about 5 minutes to crisp it up.
What can I substitute for graham crackers?
You can use crushed digestive biscuits or vanilla wafer cookies as a substitute for graham crackers. Just make sure to maintain the same measurement of 1 ½ cups of crumbs for the crust.
How do I know when the crust is done?
The crust should be lightly golden and fragrant when it’s done baking, usually around 10 minutes at 350°F (175°C). Let it cool completely before adding your cheesecake filling for the best texture.
Can I freeze this crust? How long does it last?
Absolutely! You can freeze the crust for up to 3 months; just wrap it tightly in plastic wrap and then foil to prevent freezer burn.
What if I don’t have a food processor?
If you don’t have a food processor, you can place the graham crackers in a resealable plastic bag and crush them with a rolling pin until you have fine crumbs. Just make sure to get them as fine as possible for an even crust!

- Decadent Peanut Butter No-Bake Cheesecake: Easy Recipe to Indulge - April 3, 2026
- Delicious Mango No-Bake Cheesecake: Step-by-Step Recipe - April 3, 2026
- Decadent Raspberry No-Bake Cheesecake: Easy Step-by-Step Recipe - April 3, 2026