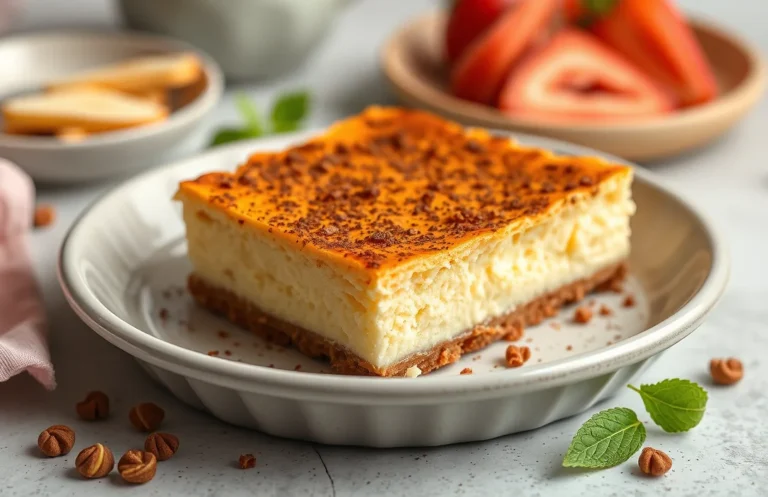
Easy 9×13 Cheesecake Bars: Quick Recipe with Tips and Variations
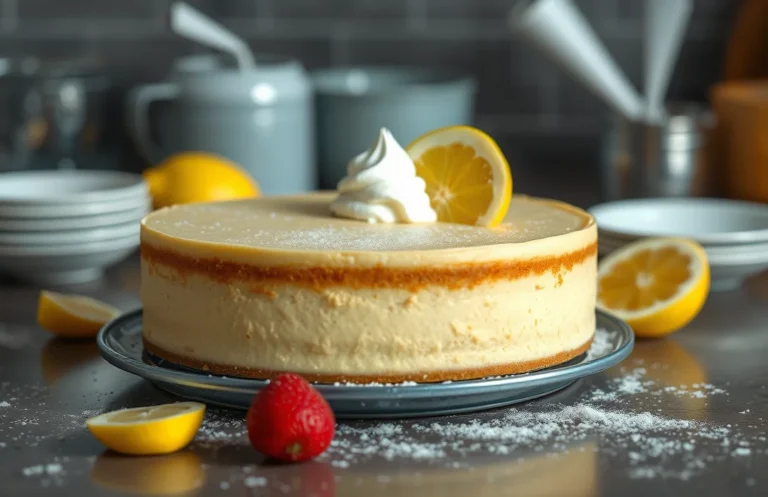
These easy cheesecake bars are the perfect blend of creamy indulgence and delightful simplicity, making them a weeknight staple or a go-to for gatherings. With a buttery graham cracker crust and a smooth, rich filling, these bars will have everyone reaching for seconds—trust me, they won’t last long!
With a total time of 45 minutes, this easy recipe yields 12 servings and is rated easy in terms of difficulty. You’ll get a delicious dessert that’s sure to impress without the fuss.
| Prep Time | Cook Time | Total Time | Servings | Difficulty |
|---|---|---|---|---|
| 15 minutes | 30 minutes | 45 minutes | 12 | Easy |
Origin of Cheesecake Bars
Cheesecake bars have a rich history that dates back to ancient Greece, where early versions of cheesecake were made with simple ingredients like cheese, honey, and flour. These delightful desserts evolved over the centuries, becoming a favorite in various cultures, particularly in the United States, where the modern cheesecake we know today took shape. Cheesecake bars, specifically, are a convenient variation, offering all the creamy goodness of traditional cheesecake in a portable, easy-to-serve form.
Historical Background
Cheesecake bars gained popularity in the mid-20th century as home bakers sought simpler dessert options that didn’t require elaborate preparation or special equipment. Their appeal lies in their versatility, making them suitable for various occasions. Here are some key points about their history:
- Ancient Greeks used simple cheese and honey mixtures for celebrations.
- American variations began to emerge in the 1920s with the introduction of cream cheese.
- Cheesecake bars became popular for potlucks and family gatherings due to their ease of serving.
Special Occasions
Cheesecake bars are perfect for a variety of celebrations, including:
- Birthdays: A crowd-pleaser that can be customized with different toppings.
- Holidays: Their creamy texture and sweet flavors make them ideal for festive gatherings.
- Picnics and BBQs: Easy to transport and serve, making them a go-to dessert for outdoor events.
Chef’s tip: Consider adding seasonal fruits or flavored extracts to your cheesecake bars for a personal touch!
Ingredients for Cheesecake Bars
Creating delicious cheesecake bars starts with gathering the right ingredients. This section provides a complete list of everything you’ll need to whip up a batch of these creamy delights in a 9×13 inch pan. Having your ingredients prepped and measured ensures a smooth baking process and perfect results.
| Item | Amount/Specification | Notes |
|---|---|---|
| Graham cracker crumbs | 1 ½ cups (150g) | Can substitute with Oreo crumbs for a chocolatey twist. |
| Granulated sugar | ½ cup (100g) | Use brown sugar for a richer flavor. |
| Unsalted butter | ½ cup (115g), melted | Ensure it’s completely melted but not hot. |
| Cream cheese | 24 oz (680g), softened | Let it sit at room temperature for at least 30 minutes. |
| Sour cream | 1 cup (240g) | Can substitute with Greek yogurt for a lighter version. |
| Granulated sugar | 1 cup (200g) | For the filling. |
| Vanilla extract | 1 teaspoon | Use pure vanilla for the best flavor. |
| Eggs | 3 large | Ensure they are at room temperature. |
- Having all ingredients at room temperature helps create a smooth filling.
- Be careful not to overmix the filling to avoid incorporating too much air, which can lead to cracks.
- For an added flavor dimension, consider adding lemon zest or a tablespoon of lemon juice to the filling.
Essential Kitchen Equipment
Making easy cheesecake bars requires a few essential tools that will streamline your baking process and ensure a delicious end result. Having the right equipment not only makes preparation easier but also helps achieve the perfect texture and flavor in your cheesecake bars.
- Baking Pan: A 9×13 inch baking pan is crucial for this recipe. It allows for even baking and provides the right thickness for your cheesecake bars. Ensure your pan is sturdy and preferably made of metal or glass for optimal heat distribution.
- Mixing Tools: You will need several mixing tools to bring the ingredients together smoothly. A large mixing bowl (at least 4 quarts) is essential for combining the cream cheese, sugar, and other ingredients without splashing. Use a handheld electric mixer for quick and efficient blending, or a whisk if you prefer a more hands-on approach. Just remember to beat the cream cheese until it’s completely smooth and free of lumps — about 2-3 minutes on medium speed will do the trick.
- Spatula: A rubber spatula is perfect for scraping down the sides of your mixing bowl and folding in ingredients gently. This is especially important when you incorporate whipped cream or eggs into the batter to maintain a light texture.
- Measuring Cups and Spoons: Precision is key in baking, so have a reliable set of measuring cups and spoons on hand. Use dry measuring cups for flour and sugar, and liquid measuring cups for any liquids like vanilla extract or melted butter.
- Cooling Rack: Once your cheesecake bars are baked, transferring them to a cooling rack will help them cool evenly. This step is crucial to avoid a soggy bottom and allows the bars to set properly before slicing.
Step-by-Step Cooking Instructions
This section will guide you through the detailed steps of preparing your easy cheesecake bars, from the crust to the filling, and finally to baking and cooling. Each step includes precise measurements and timing to ensure your cheesecake bars turn out perfectly every time.
- Prepare the Crust: Preheat your oven to 350°F (175°C). In a medium bowl, combine 1 ½ cups (150g) graham cracker crumbs, ½ cup (100g) granulated sugar, and ½ cup (113g) melted unsalted butter. Mix until the crumbs are evenly coated and the mixture resembles wet sand. Press this mixture firmly into the bottom of a greased 9×13 inch pan, ensuring an even layer. Bake for 10 minutes until slightly golden and fragrant, then remove from the oven and set aside to cool.
- Make the Filling: In a large mixing bowl, beat together 4 (8 oz) packages of cream cheese (at room temperature) and 1 cup (200g) granulated sugar until smooth and creamy, about 2-3 minutes. Scrape down the sides of the bowl, then add 1 teaspoon of vanilla extract and 4 large eggs, one at a time, mixing on low speed until just combined. The mixture should be glossy and smooth without any lumps.
- Bake and Cool: Pour the cheesecake filling over the cooled crust, spreading it evenly. Bake in the preheated oven for 30-35 minutes, or until the edges are set but the center is slightly jiggly. Turn off the oven and leave the cheesecake bars inside for another hour to cool gradually. This helps prevent cracks. After cooling, refrigerate for at least 4 hours, preferably overnight, before slicing into bars. They should be firm to the touch and chilled throughout.
Pro Tips and Common Mistakes
Creating the perfect cheesecake bars requires a bit of attention to detail, especially when it comes to achieving that creamy texture and preventing cracking. Here are some expert tips and common pitfalls to help you bake your cheesecake bars with confidence.
Achieving Creaminess
- Use room temperature ingredients: Ensure your cream cheese, eggs, and sour cream are at room temperature before mixing. This helps to create a smooth batter and prevents lumps, which can lead to a dense texture.
- Beat gently: When mixing, use a hand mixer on low speed. Over-mixing can incorporate too much air, which may cause the cheesecake to rise and then fall, resulting in cracks.
- Add a bit of cornstarch: Incorporating 1-2 tablespoons of cornstarch into your batter can help stabilize the mixture and maintain creaminess without compromising flavor.
Preventing Cracks
- Don’t overbake: Bake your cheesecake bars at 325°F (160°C) for about 30-35 minutes. The edges should be set, while the center will still be slightly jiggly. This ensures a creamy texture and minimizes the risk of cracking as it cools.
- Cool gradually: After baking, turn off the oven and leave the door slightly ajar for about 1 hour. This gradual cooling process helps to prevent sudden temperature changes that can lead to cracks.
- Use a water bath: If you want to take extra precautions, place your cheesecake pan in a larger pan filled with hot water while baking. The steam helps maintain moisture and temperature, reducing the chances of cracks.
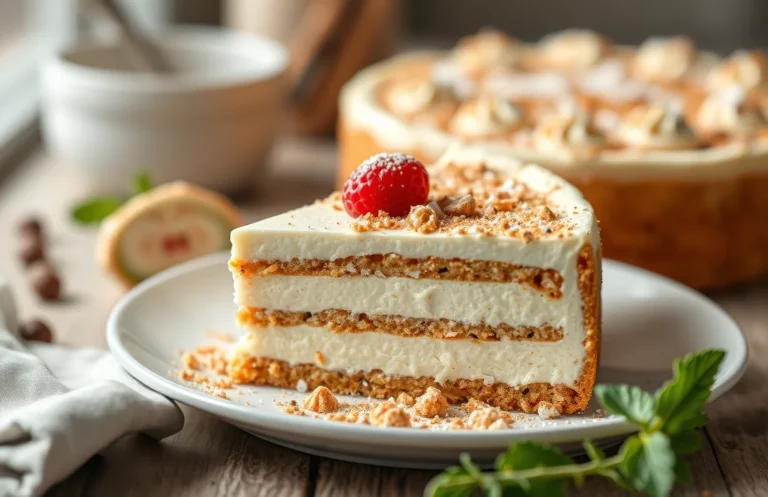
Variations and Substitutions
Cheesecake bars are wonderfully versatile, allowing you to personalize them based on your taste preferences or dietary needs. Exploring different flavors and substitutions can elevate your cheesecake experience while accommodating various diets.
Fruit Toppings
Adding fruit toppings can bring a burst of flavor and freshness to your cheesecake bars. Here are some delicious options:
- Fresh Berries: Top with 1 cup mixed fresh raspberries, blueberries, and strawberries. The tartness complements the sweetness of the cheesecake beautifully.
- Citrus Zest: Incorporate 1 tablespoon of lemon or orange zest into the filling for a bright, zesty flavor.
- Caramel or Chocolate Drizzle: Drizzle ¼ cup of caramel sauce or melted chocolate over the cooled bars for an indulgent touch.
Gluten-Free Options
If you’re looking for gluten-free alternatives, consider these substitutions:
- Crust: Use 1 ½ cups gluten-free graham cracker crumbs instead of traditional graham crackers.
- Thickener: Substitute 2 tablespoons cornstarch for the all-purpose flour in the filling for a smooth texture.
Chef’s tip: Always check the labels on your ingredients to ensure they are certified gluten-free, especially for the crust and any toppings.
| Ingredient | Gluten-Free Substitute |
|---|---|
| Graham Crackers | Gluten-Free Graham Cracker Crumbs |
| All-Purpose Flour | Cornstarch |
Serving Suggestions and Pairings
Serving your easy cheesecake bars in an inviting manner can elevate the experience, making it more enjoyable for you and your guests. Pairing them with complementary beverages can also enhance their delicious flavor, transforming a simple dessert into a delightful treat.
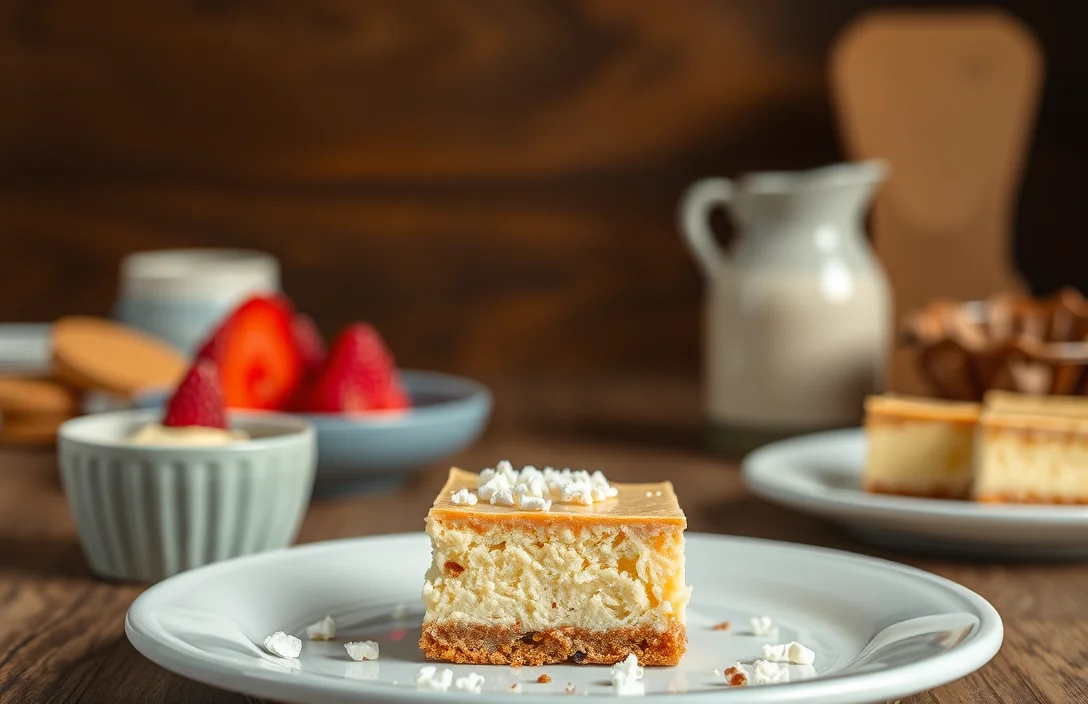
- Plating Tips: Cut the cheesecake bars into even squares, about 2 inches by 2 inches, for a neat presentation. Place each square on a small dessert plate and drizzle with a fruit sauce or chocolate ganache for added flair. A sprinkle of powdered sugar or a few fresh berries on the side can add a pop of color and freshness.
- Complementary Beverages: For a classic pairing, serve the cheesecake bars with a glass of chilled dessert wine like a late-harvest Riesling or Moscato, which balances the richness of the cheesecake. If you prefer something non-alcoholic, a light herbal tea such as chamomile or a refreshing lemonade can complement the creamy texture beautifully.
- Garnishes: Consider topping each bar with a dollop of whipped cream or a scoop of vanilla ice cream, which can provide a delightful contrast to the dense cheesecake. You can also add a few mint leaves for a refreshing garnish that brightens up the plate.
- Serving Temperature: Serve the cheesecake bars chilled, but let them sit at room temperature for about 10 minutes before serving to enhance their flavor. This allows the creamy filling to soften slightly, making each bite even more enjoyable.
Quick Summary
| Prep Time | Cook Time | Total Time | Servings |
|---|---|---|---|
| 15 minutes | 30 minutes | 45 minutes | 9 bars |
- Preheat oven to 325°F (165°C) before starting.
- Prepare crust by mixing 1 ½ cups graham cracker crumbs, ½ cup sugar, and ½ cup melted butter.
- Beat cream cheese until smooth, then add 1 cup sugar, 2 eggs, and 1 teaspoon vanilla.
- Spread filling evenly over crust and bake for 30 minutes.
- Cool completely before cutting into bars.
- Chill in the refrigerator for at least 2 hours for best texture.
- Tip: Use room temperature cream cheese to avoid lumps.
- Tip: Line the pan with parchment for easy removal.
- Tip: Adjust baking time for a firmer or creamier texture.
Frequently Asked Questions
Can I make this ahead of time? How to store and reheat?
You can definitely make these cheesecake bars up to 2 days in advance. Store them in an airtight container in the refrigerator, and serve chilled or at room temperature; no reheating is necessary!
What can I substitute for cream cheese?
You can use ricotta cheese for a lighter texture, but make sure to drain it well before mixing. Alternatively, mascarpone can also work for a creamier consistency, though it might be richer.
How do I know when it’s done?
Your cheesecake bars are done when the edges look set but the center still has a slight jiggle, about 25-30 minutes in the oven at 325°F (163°C). They will continue to firm up as they cool, so don’t overbake!
Can I freeze this? How long does it last?
Yes, you can freeze these cheesecake bars for up to 3 months. Just wrap each bar tightly in plastic wrap and aluminum foil before placing them in a freezer-safe container.
What if I don’t have a 9×13 pan?
If you don’t have a 9×13 inch pan, you can use an 8×8 inch or 9-inch round pan, but note that cooking time may vary, so check for doneness a bit earlier. Just be sure to adjust the thickness of your bars accordingly!

- Decadent Peanut Butter No-Bake Cheesecake: Easy Recipe to Indulge - April 3, 2026
- Delicious Mango No-Bake Cheesecake: Step-by-Step Recipe - April 3, 2026
- Decadent Raspberry No-Bake Cheesecake: Easy Step-by-Step Recipe - April 3, 2026