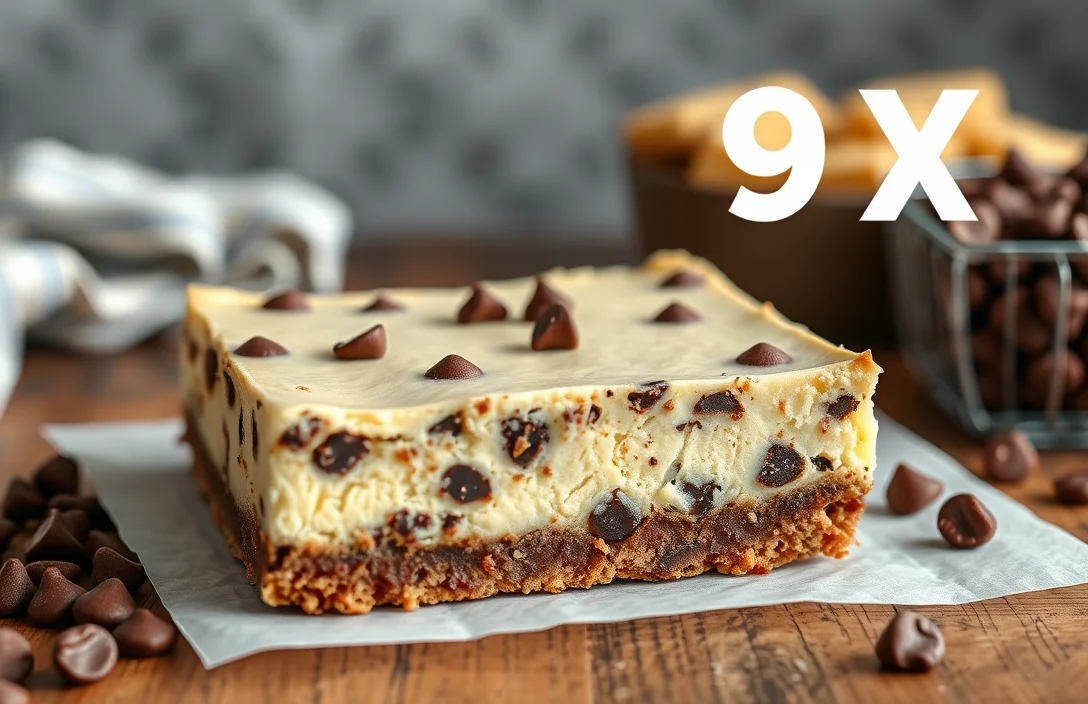
Decadent 9×13 Chocolate Chip Cheesecake Bars: Easy Recipe
If you’re looking for a dessert that perfectly balances creamy cheesecake with rich chocolate, these chocolate chip cheesecake bars will hit the spot! They’re the kind of treat that makes your kitchen smell divine and leaves everyone asking for seconds. Perfect for gatherings or a cozy night in, they’re pure comfort in every bite.
Key details: Total time: 1 hour, Difficulty level: Easy, Servings: 12.
| Prep Time | Cook Time | Total Time | Servings | Difficulty |
|---|---|---|---|---|
| 20 minutes | 40 minutes | 1 hour | 12 | Easy |
Origin of Cheesecake Bars
Cheesecake bars have their roots in the classic cheesecake, which dates back to ancient Greece. The modern version, especially chocolate chip cheesecake bars, combines the creamy richness of traditional cheesecake with the delightful texture of cookie bars, making them a beloved treat for many. Their versatility and ease of serving make them perfect for gatherings, parties, or just a cozy night in.
- Ancient Greece: The earliest known cheesecake recipes were found in Greece, where they were served to athletes during the first Olympic Games.
- New York Style: The creamy texture and dense richness of New York-style cheesecake paved the way for variations like the cheesecake bar.
- Chocolate Chip Addition: The introduction of chocolate chips, a beloved addition to many treats, elevates the cheesecake bar experience with a delightful contrast in flavor and texture.
Pro tip: These bars are great for potlucks and gatherings because they can be cut into neat squares, making them easy to serve and enjoy.
Chocolate chip cheesecake bars are often served at celebrations, holidays, and casual get-togethers. They are a delightful dessert that appeals to both cheesecake lovers and cookie enthusiasts alike. Their combination of a creamy, rich filling with a buttery crust topped with chocolate chips creates a satisfying treat that’s hard to resist.
| Key Features | Description |
|---|---|
| Texture | Creamy and rich filling with a crumbly base and a slightly crisp top. |
| Flavor | Sweet, with hints of vanilla and chocolate, balanced by the tanginess of cream cheese. |
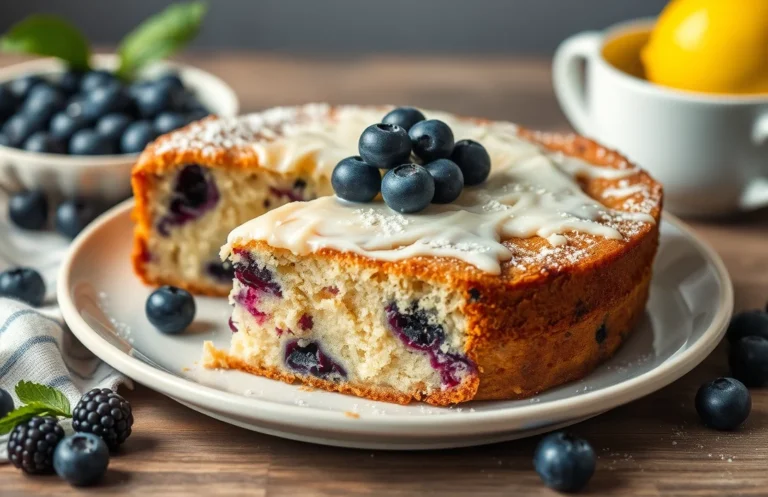
| Serving Suggestions | Great with whipped cream, fresh berries, or a drizzle of chocolate sauce. |
Ingredient List for 9×13 Pan
Here’s the complete list of ingredients you’ll need to create delicious chocolate chip cheesecake bars in a 9×13 inch pan. Each ingredient plays a crucial role in achieving the perfect balance of creamy cheesecake and rich chocolate flavors, ensuring your bars are a hit with everyone!
| Item | Amount/Specification | Notes |
|---|---|---|
| All-purpose flour | 1 ½ cups (180g) | For the crust and filling |
| Granulated sugar | 1 cup (200g) | Adjust for sweetness preference |
| Brown sugar | ½ cup (100g) | For added moisture and flavor |
| Unsalted butter | ½ cup (115g) | Melted for the crust |
| Large eggs | 3 | Room temperature for better mixing |
| Cream cheese | 2 packages (16 oz or 450g total) | Softened for easy blending |
| Vanilla extract | 2 teaspoons | Pure extract preferred |
| Chocolate chips | 1 cup (175g) | Use semi-sweet or dark chocolate |
| Salt | ½ teaspoon | Enhances flavor |
- For a gluten-free option, substitute all-purpose flour with a gluten-free flour blend.
- If you prefer a more decadent taste, consider adding a sprinkle of cocoa powder to the crust.
- Make sure your cream cheese is at room temperature to avoid lumps in the filling.
Essential Kitchen Tools
To create perfect chocolate chip cheesecake bars in a 9×13 inch baking pan, having the right kitchen tools on hand is essential. These tools will not only make the process smoother but also ensure that your bars come out deliciously every time. Here’s what you’ll need:
- 9×13 inch Baking Pan: This is crucial for achieving the right size and thickness of your cheesecake bars. Make sure it’s non-stick or line it with parchment paper for easy removal later on.
- Mixing Bowls: Use at least two medium-sized bowls: one for the cheesecake filling and one for the cookie dough layer. Glass or stainless steel bowls work best as they won’t absorb odors.
- Electric Mixer: A hand mixer or stand mixer will save you time and effort when creaming the cream cheese and sugar together. Make sure the cream cheese is softened to room temperature for smooth mixing.
- Rubber Spatula: This will help you fold the cheesecake mixture gently and scrape down the sides of your bowls, ensuring everything is well combined.
- Measuring Cups and Spoons: Precise measurements are vital for baking. Use dry measuring cups for flour and sugar, and liquid measuring cups for any wet ingredients.
- Whisk: A whisk is essential for blending the eggs into your cheesecake filling, making it light and airy.
- Cooling Rack: After baking, allow your cheesecake bars to cool properly. A cooling rack lets air circulate, preventing sogginess.
Step-by-Step Instructions
Creating chocolate chip cheesecake bars in a 9×13 inch pan is a straightforward yet rewarding process. Follow these detailed steps closely to ensure your dessert turns out perfectly creamy, decadent, and delicious.
- Preheat the oven: Set your oven to 325°F (163°C). This is crucial for even baking. As the oven heats, gather your ingredients and prepare your baking pan.
- Prepare the crust: In a medium bowl, combine 1 ½ cups (180g) of graham cracker crumbs, ½ cup (100g) of granulated sugar, and ½ cup (115g) of melted unsalted butter. Mix until the crumbs are fully coated and the mixture resembles wet sand. Press the mixture firmly into the bottom of a greased 9×13 inch baking pan. Bake for 10 minutes until set and lightly golden.
- Make the cheesecake filling: In a large bowl, beat 16 oz (450g) of cream cheese until smooth and creamy, about 2-3 minutes. Add ½ cup (100g) of granulated sugar, 2 large eggs, and 1 teaspoon of vanilla extract. Mix until fully combined and the mixture is fluffy—this should take another 2 minutes.
- Incorporate chocolate chips: Gently fold in 1 cup (170g) of semi-sweet chocolate chips into the cheesecake mixture using a spatula. Be careful not to overmix; you want to maintain the lightness of the filling.
- Assemble the bars: Pour the cheesecake filling over the pre-baked crust, spreading it evenly with a spatula. Sprinkle a few extra chocolate chips on top for decoration if desired.
- Bake the cheesecake bars: Bake in the preheated oven for 30-35 minutes. The edges should be set, while the center may still have a slight jiggle. Remove from the oven and let it cool in the pan on a wire rack.
- Chill before serving: Once cooled to room temperature, cover the pan with plastic wrap and refrigerate for at least 4 hours, or overnight for best results. This allows the flavors to meld and the bars to firm up.
Pro Tips for Success
Creating the perfect chocolate chip cheesecake bars requires attention to detail and a few insider tips to avoid common pitfalls. Whether you’re a novice baker or a seasoned pro, these pointers will help ensure your bars turn out rich, creamy, and delicious every time.
- Use room temperature ingredients: For the smoothest cheesecake filling, make sure your cream cheese, eggs, and sour cream are at room temperature. This helps achieve a lump-free batter that bakes evenly. Let them sit out for about 30 minutes before you start.
- Don’t overmix the filling: Once you combine your ingredients, mix just until smooth. Overmixing can incorporate too much air, leading to cracks in your cheesecake bars as they cool. Aim for a creamy consistency without any lumps.
- Line your pan with parchment paper: To ensure easy removal of the bars, line the bottom and sides of your 9×13 inch pan with parchment paper, leaving some overhang. This makes it easier to lift the bars out for cutting without them breaking apart.
- Check for doneness: The cheesecake bars are done when the edges are set and the center has a slight jiggle. They will continue to firm up as they cool, so avoid overbaking. This usually takes about 30-35 minutes at 325°F (160°C).
- Cool gradually: After baking, let the bars cool in the pan for about 1 hour at room temperature before transferring to the fridge. Rapid temperature changes can cause the cheesecake to crack, so avoid placing it directly in the refrigerator right after baking.
Variations and Substitutions
This section provides various options to modify the chocolate chip cheesecake bars to fit different dietary needs and flavor preferences. Whether you’re looking to make these bars gluten-free, vegan, or just want to switch up the flavors, there are plenty of ways to customize this recipe while still achieving delicious results.
Gluten-Free Option
To make these cheesecake bars gluten-free, substitute the all-purpose flour with a 1:1 gluten-free flour blend, such as Bob’s Red Mill Gluten-Free 1-to-1 Baking Flour. Ensure that all other ingredients, like the chocolate chips and graham cracker crumbs, are also gluten-free.
Vegan Modification
If you’re looking for a vegan version, you can replace the cream cheese with a vegan alternative, such as Tofutti Better Than Cream Cheese, and use a flaxseed meal as an egg substitute. To make one egg, mix 1 tablespoon of flaxseed meal with 2.5 tablespoons of water, and let it sit for 5 minutes to thicken.
Flavor Variations
- Nutty Delight: Add ½ cup chopped walnuts or pecans to the cheesecake batter for added texture and flavor.
- Fruit Infusion: Swirl in ½ cup of raspberry or strawberry puree into the cheesecake layer before baking for a fruity twist.
- Mint Chocolate: Incorporate 1 teaspoon of peppermint extract into the batter for a refreshing minty flavor.
Chef’s tip: Always taste your batter before baking. Adjust sweetness or flavorings as needed!
| Ingredient | Substitution |
|---|---|
| All-purpose flour | 1:1 gluten-free flour blend |
| Cream cheese | Vegan cream cheese alternative |
| Egg | 1 tablespoon flaxseed meal + 2.5 tablespoons water |
Serving Suggestions
These chocolate chip cheesecake bars are not only decadent but also versatile in how you serve them. Whether you’re hosting a gathering or enjoying a quiet night in, the presentation and pairings can elevate your dessert experience.
- Chill before serving: Allow the bars to cool completely in the pan, then refrigerate for at least 2 hours before cutting. This helps the bars set properly, making them easier to slice and giving them a firmer texture.
- Garnish options: Top your cheesecake bars with a dusting of powdered sugar or a drizzle of chocolate sauce for an eye-catching finish. You could also add fresh berries, like raspberries or strawberries, for a splash of color and sweetness.
- Serving size: Cut the bars into 2-inch squares for a satisfying portion. This size is perfect for sharing and allows guests to enjoy more than one without feeling too indulgent.
- Pair with beverages: Serve these bars alongside a cup of freshly brewed coffee or a glass of cold milk. The bitterness of the coffee complements the sweetness of the bars, while milk adds a classic touch.
- Plate presentation: For an elegant touch, serve the bars on a white platter with a side of whipped cream or a scoop of vanilla ice cream. This not only enhances the flavor but also makes for a beautiful presentation.
- Store leftovers properly: If you have any bars left, store them in an airtight container in the fridge for up to 5 days. They can also be frozen for up to 3 months; just wrap each bar individually in plastic wrap before placing them in a freezer bag.
Quick Summary
| Prep Time | Cook Time | Total Time | Servings |
|---|---|---|---|
| 15 minutes | 30 minutes | 45 minutes | 12 bars |
- Preheat oven to 350°F (175°C) for perfect baking.
- Mix cream cheese until smooth to avoid lumps in your cheesecake layer.
- Fold in chocolate chips gently to keep them evenly distributed.
- Use parchment paper to line the baking dish for easy removal.
- Cool completely before slicing for clean edges and easier serving.
- Chill bars in the fridge for at least 2 hours for the best texture.
- Tip: Use room temperature cream cheese for a creamier filling.
- Tip: Don’t overbake; check for a slight jiggle in the center.
Frequently Asked Questions
Can I make this ahead of time? How to store and reheat?
You can make chocolate chip cheesecake bars up to 2 days ahead of time. Store them covered in the refrigerator, and reheat individual pieces in the microwave for about 15-20 seconds.
What can I substitute for cream cheese?
If you need a substitute for cream cheese, you can use mascarpone cheese, which will provide a similar creamy texture and flavor. Alternatively, a blend of ricotta and sour cream can work in a pinch.
How do I know when it’s done?
Your cheesecake bars are done when the edges are set but the center still has a slight jiggle, about 25-30 minutes at 325°F (163°C). They will firm up as they cool, so don’t overbake!
Can I freeze this? How long does it last?
You can freeze chocolate chip cheesecake bars for up to 3 months. Make sure to wrap them tightly in plastic wrap and then in aluminum foil to prevent freezer burn.
What if I don’t have a 9×13 pan?
If you don’t have a 9×13 pan, you can use an 8×8 or 9×9 square pan, but adjust the baking time, as it may take 5-10 minutes longer to bake through. Just keep an eye on the edges for doneness!

- Decadent Peanut Butter No-Bake Cheesecake: Easy Recipe to Indulge - April 3, 2026
- Delicious Mango No-Bake Cheesecake: Step-by-Step Recipe - April 3, 2026
- Decadent Raspberry No-Bake Cheesecake: Easy Step-by-Step Recipe - April 3, 2026