Does Cheesecake Contain Gluten? Find Delicious Gluten-Free Recipes
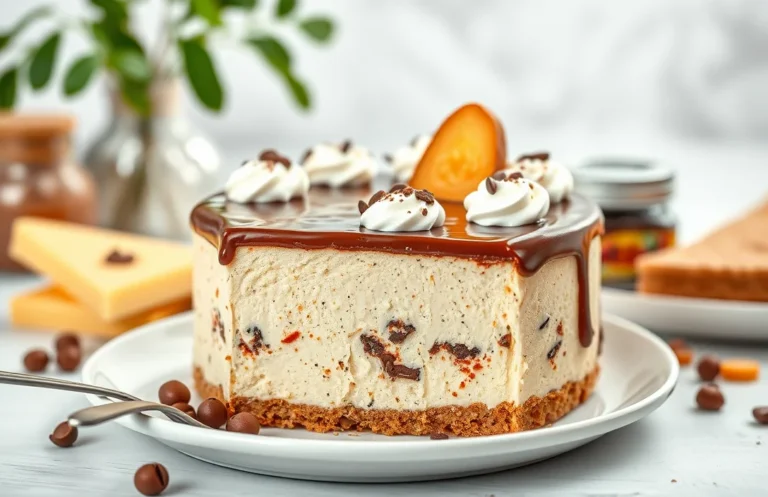
Cheesecake is the ultimate dessert that brings a smile to everyone’s face, whether it’s a creamy New York-style or a fruity berry version. Its smooth texture and rich flavor make it the perfect treat for any occasion, and trust me, once you take a bite, you’ll be hooked!
Wondering if cheesecakes contain gluten? You’ll find everything you need right here, including traditional and gluten-free cheesecake recipes with precise measurements, cooking temperatures, and timing to ensure your dessert turns out perfectly every time.
| Prep Time | 20 minutes |
|---|---|
| Cook Time | 60 minutes |
| Total Time | 80 minutes |
| Servings | 8 servings |
| Difficulty | Moderate |
Cheesecake Origin and Significance
Understanding the origin and significance of cheesecake provides valuable context for its ingredients, particularly regarding gluten content. Cheesecake has a rich history that varies across cultures, influencing how it is made and enjoyed today.
History of Cheesecake
The origins of cheesecake can be traced back to ancient Greece, where it was served to athletes during the first Olympic Games around 776 B.C. It was made from simple ingredients like cheese, flour, and honey. As it spread to Rome, modifications were made, leading to various interpretations throughout Europe.
- Ancient Greece: Used simple cheese and honey mixtures.
- Roman Empire: Introduced eggs and additional flavorings.
- European Adaptations: Different regions added local ingredients, such as cream cheese in America.
Cultural Variations
Cheesecake has evolved into numerous cultural variations, each with unique ingredients and preparation methods. Here are some notable examples:
- New York Cheesecake: Dense and creamy, typically made with cream cheese, sugar, and eggs, often with a graham cracker crust.
- Italian Ricotta Cheesecake: Lighter, made with ricotta cheese and often flavored with citrus.
- Japanese Cotton Cheesecake: Fluffy and airy, incorporating whipped egg whites for a light texture.
Chef’s tip: Always use room temperature ingredients for a smoother batter and better texture.
As we explore the gluten content in cheesecakes, it’s essential to consider these cultural influences and traditional recipes. Understanding the variations helps in making informed choices, especially for those with gluten sensitivities.
Traditional Cheesecake Ingredients
This section details the specific ingredients needed for a traditional cheesecake and highlights their gluten content. Understanding the ingredients is crucial, especially for those with dietary restrictions or preferences regarding gluten.
| Item | Amount/Specification | Notes |
|---|---|---|
| Cream Cheese | 24 ounces (680g), softened | Use full-fat for creaminess; check for gluten-free labeling. |
| Sour Cream | 1 cup (240g) | Provides a tangy flavor; ensure it’s gluten-free. |
| Granulated Sugar | 1 cup (200g) | Standard sugar is gluten-free. |
| Vanilla Extract | 1 teaspoon (5ml) | Look for gluten-free brands. |
| Eggs | 3 large | Room temperature for better mixing. |
| Graham Cracker Crumbs | 1 ½ cups (150g) | Traditional graham crackers contain gluten; opt for gluten-free alternatives. |
| Unsalted Butter | ½ cup (113g), melted | Use to bind the crust; ensure it is pure butter. |
- Common Mistake: Don’t skip softening the cream cheese; it should be creamy and smooth before mixing to avoid lumps.
- For a gluten-free cheesecake, substitute graham cracker crumbs with gluten-free cookies or nut-based crusts.
- Check labels for any hidden gluten in processed ingredients like vanilla extract or sour cream.
Essential Kitchen Tools
When crafting a delicious cheesecake, having the right tools can make all the difference in achieving the perfect texture and flavor. This section outlines the essential mixing and baking tools you’ll need to create a cheesecake that’s not only gluten-free but also incredibly satisfying.
Mixing Tools
- Mixing Bowls: A set of mixing bowls in various sizes is crucial. Use a large bowl for combining the cream cheese and sugar, and smaller bowls for mixing eggs and flavorings. Glass or stainless steel bowls are preferred as they won’t retain odors.
- Electric Mixer: A hand or stand mixer makes it easy to achieve a smooth and creamy batter. Beat the cream cheese until it’s light and fluffy, which usually takes about 2-3 minutes on medium speed. This is key for a light cheesecake.
- Spatula: A silicone spatula is perfect for folding in ingredients gently without deflating the mixture. Use it to scrape down the sides of the bowl to ensure even mixing.
Baking Tools
- Springform Pan: This is essential for cheesecakes, especially when you want to remove the cake easily after baking. A 9-inch pan is standard. Ensure it’s properly greased to prevent sticking.
- Baking Sheet: Place your springform pan on a baking sheet to catch any drips while baking. This is especially useful if your pan isn’t leak-proof.
- Food Processor: If you’re making a gluten-free crust, a food processor quickly blends gluten-free graham crackers or nuts into fine crumbs. Pulse until it resembles sand, which should take about 30 seconds.
Step-by-Step Cheesecake Recipe
This section will guide you through preparing the crust and filling of your cheesecake while addressing gluten content. Understanding which ingredients to use is essential for creating a delicious cheesecake that suits your dietary preferences.
Preparing the Crust
- Preheat your oven to 350°F (175°C). This ensures that your crust bakes evenly and becomes perfectly golden brown. The smell of butter and sugar will fill your kitchen as they begin to meld together.
- In a mixing bowl, combine 1 ½ cups (150g) of graham cracker crumbs with ½ cup (100g) of granulated sugar and ½ cup (115g) of melted unsalted butter. If you’re making a gluten-free cheesecake, substitute the graham crackers with gluten-free cookies or almond flour.
- Press the mixture firmly into the bottom of a 9-inch (23cm) springform pan. Use the bottom of a measuring cup to create a smooth, even layer. This is key for a sturdy crust that won’t crumble when you slice the cheesecake.
- Bake the crust for 10 minutes until it’s lightly browned. Let it cool to room temperature, which helps it set before adding the filling.
Filling the Cheesecake
- In a large mixing bowl, combine 24 ounces (680g) of cream cheese, softened to room temperature, with 1 cup (200g) of granulated sugar. Beat with an electric mixer on medium speed until the mixture is smooth and creamy, about 2-3 minutes.
- Add 3 large eggs, one at a time, mixing on low speed after each addition until just combined. The batter should be thick and velvety, with no lumps. Overmixing can lead to cracks in your finished cheesecake.
- Stir in 1 teaspoon of vanilla extract and ½ cup (120ml) of sour cream until fully incorporated. This will add a rich flavor and creamy texture. Make sure to scrape down the sides of the bowl to ensure everything is well mixed.
- Pour the filling over the cooled crust and smooth the top with a spatula. Bake in the preheated oven for 50-60 minutes. The edges should be set, while the center will slightly jiggle. Do not open the oven door during the first 30 minutes to prevent collapsing.
Pro Tips for Cheesecake Success
Making a delicious cheesecake can be a rewarding experience, but there are some common pitfalls to avoid. Whether you’re using gluten-containing ingredients or opting for a gluten-free version, these tips will ensure your cheesecake comes out perfectly every time.
Avoiding Cracks
- Use room temperature ingredients: Make sure your cream cheese, eggs, and sour cream are at room temperature before mixing. This helps create a smooth batter that blends easily, reducing the chances of cracks.
- Don’t overmix: While it’s tempting to ensure everything is perfectly smooth, overmixing can incorporate too much air. Mix just until combined to maintain a dense and creamy texture.
- Bake in a water bath: Placing your cheesecake pan in a larger pan filled with hot water during baking helps regulate the temperature, preventing the top from cooking too quickly. Aim for a water bath that comes halfway up the sides of the cheesecake pan.
Cooling Tips
- Gradual cooling: After baking, turn off the oven and crack the door open, allowing the cheesecake to cool slowly for at least an hour. This gradual temperature change helps prevent the surface from cracking.
- Chill before serving: After cooling at room temperature, cover your cheesecake and refrigerate it for at least 4 hours (overnight is best). This allows the flavors to meld and the texture to set properly.
- Use a sharp knife for cutting: To get clean slices, dip your knife in hot water and wipe it dry before each cut. This will help maintain that beautiful presentation.
Gluten-Free Cheesecake Options
For those with gluten sensitivities or celiac disease, enjoying cheesecake can seem daunting. However, there are plenty of delicious gluten-free options available, ensuring that everyone can indulge in this creamy dessert. Let’s explore some gluten-free crust recipes and ingredient substitutions to make your cheesecake safe and scrumptious.
Gluten-Free Crust Recipes
- Almond Flour Crust: Combine 1 ½ cups almond flour, 3 tablespoons coconut oil (melted), and 2 tablespoons maple syrup. Press into the bottom of a 9-inch springform pan and bake at 350°F (175°C) for 10-12 minutes until lightly golden.
- Oreo Crust: Use gluten-free chocolate cookies! Crush 1 ½ cups gluten-free chocolate cookies and mix with ½ cup melted butter. Press into the pan and bake at 350°F (175°C) for 8-10 minutes.
Ingredient Substitutions
When making the filling for your gluten-free cheesecake, consider these substitutions:
| Ingredient | Substitution |
|---|---|
| All-purpose flour | 1 tablespoon cornstarch or arrowroot powder |
| Regular cream cheese | Use lactose-free cream cheese for dairy-free options |
| Sour cream | Use Greek yogurt as a tangy alternative |
Chef’s tip: Always check labels to ensure all ingredients are certified gluten-free, especially when using processed items.
By following these guidelines and experimenting with these crusts and substitutions, you can create a gluten-free cheesecake that is just as delightful as traditional versions. Happy baking!
Serving and Plating Suggestions
Serving and plating your cheesecake beautifully can elevate the dessert experience, especially when considering gluten-free options. Garnishing not only enhances the visual appeal but also adds complementary flavors that can elevate your cheesecake to new heights. Here are some delightful ideas for garnishing and pairing your cheesecake.
Garnishing Ideas
- Fresh Berries: Top your cheesecake with a mix of strawberries, blueberries, and raspberries for a vibrant, fruity touch.
- Chocolate Shavings: Use a vegetable peeler to create shavings from a chocolate bar and sprinkle them over the cheesecake.
- Whipped Cream: Pipe a swirl of homemade whipped cream (1 cup heavy cream, beaten to soft peaks) on top for an elegant finish.
- Citrus Zest: Add a sprinkle of lemon or orange zest for a refreshing burst of flavor that contrasts beautifully with the creaminess.
- Nuts: Toasted nuts like pecans or almonds provide a crunchy texture that complements a smooth cheesecake.
Beverage Pairings
Choosing the right beverage can enhance your cheesecake experience. Here are some suggestions:
- Coffee: A rich espresso or a smooth latte pairs wonderfully with the creaminess of cheesecake.
- Tea: Herbal teas, like chamomile or mint, can provide a refreshing contrast.
- Wine: A glass of dessert wine, such as a late harvest Riesling, complements sweet cheesecakes beautifully.
Chef’s tip: Serve your cheesecake chilled for the best texture and flavor. If it starts to soften too much, simply pop it back in the fridge for a few minutes!
Quick Summary
| Prep Time | 20 minutes |
|---|---|
| Cook Time | 60 minutes |
| Total Time | 1 hour 20 minutes |
| Servings | 8 servings |
- Check Crust Ingredients: Use gluten-free graham crackers or nuts for a gluten-free option.
- Proper Baking Time: Bake until the edges are set but the center is slightly jiggly.
- Cool Gradually: Let the cheesecake cool in the oven to prevent cracking.
- Chill Before Serving: Refrigerate for at least 4 hours for the best texture.
- Use Room Temperature Ingredients: Ensure cream cheese and eggs are at room temperature for smooth mixing.
Frequently Asked Questions
Can I make this ahead of time? How to store and reheat?
You can absolutely make cheesecake ahead of time; it actually tastes better after sitting in the fridge for a day. Store it covered in the refrigerator for up to 5 days, and avoid reheating as it’s best served chilled.
What can I substitute for graham cracker crust?
If you want a gluten-free option, you can use gluten-free graham crackers or a mixture of crushed nuts and melted butter. Just make sure the substitutions are labeled gluten-free to ensure no cross-contamination.
How do I know when it’s done?
Your cheesecake is done when the edges are set but the center still has a slight jiggle; it will firm up as it cools. You can also check with a toothpick; it should come out mostly clean but with a little bit of creaminess.
Can I freeze this? How long does it last?
You can freeze cheesecake for up to 2-3 months if it’s well-wrapped in plastic wrap and foil. Thaw it in the refrigerator overnight before serving to maintain texture.
What if I don’t have a springform pan?
If you don’t have a springform pan, you can use a regular cake pan lined with parchment paper to help with removal. Just be careful when taking it out, as it might be a bit trickier to get out in one piece.

- Decadent Peanut Butter No-Bake Cheesecake: Easy Recipe to Indulge - April 3, 2026
- Delicious Mango No-Bake Cheesecake: Step-by-Step Recipe - April 3, 2026
- Decadent Raspberry No-Bake Cheesecake: Easy Step-by-Step Recipe - April 3, 2026