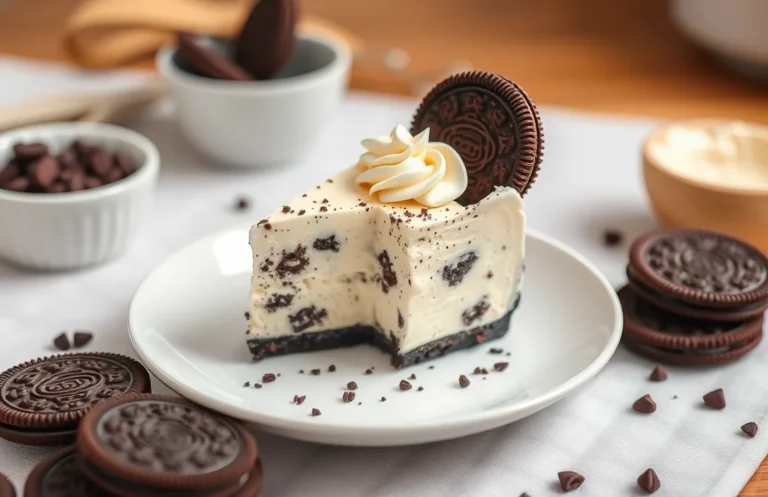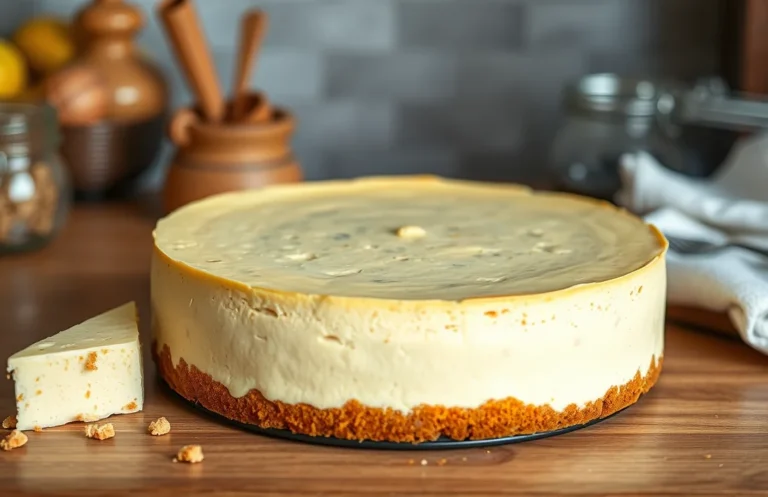
Easy 9×13 Cheesecake Bars: Simple Recipe for Creamy Perfection
If you’re craving a dessert that’s creamy, dreamy, and oh-so-easy to make, these cheesecake bars are your answer! Perfect for weeknights or gatherings, they are packed with rich flavor and a buttery crust that will have everyone coming back for seconds. Just imagine slicing into a chilled, velvety bar topped with a hint of fresh fruit or chocolate drizzle. Yum!
Key details: Total time: 1 hour, Difficulty level: Easy, Servings: 12 bars.
| Prep Time | Cook Time | Total Time | Servings | Difficulty |
|---|---|---|---|---|
| 15 minutes | 45 minutes | 1 hour | 12 bars | Easy |
Origin of Cheesecake Bars
Cheesecake bars are a delightful twist on the classic cheesecake, combining the rich, creamy filling with a convenient, portable format. Their versatility and deliciousness make them a favorite for various occasions, from casual gatherings to formal celebrations.
- Historical Roots: Cheesecake has ancient origins, dating back to ancient Greece, where it was served to athletes during the first Olympic Games. The evolution of the cheesecake led to various interpretations, including the beloved bar form we enjoy today.
- Occasions for Serving: Cheesecake bars are perfect for birthdays, potlucks, and holidays. Their easy-to-slice nature allows for quick serving, making them an ideal dessert for larger groups.
- Adaptability: One of the reasons cheesecake bars have gained popularity is their adaptability. They can be flavored with fruits, chocolate, or spices, catering to different palates and dietary needs.
- Serving Size: The 9×13-inch pan size is particularly convenient for making cheesecake bars, as it yields ample servings. This means more people can enjoy this delicious treat without much effort.
- Texture and Flavor: Cheesecake bars combine the smooth, creamy texture of traditional cheesecake with a slightly firmer structure, making them easy to eat and perfect for layering flavors.
Ingredients for Cheesecake Bars
To create delicious easy cheesecake bars, it’s essential to gather the right ingredients in precise measurements. This ensures that your bars have the perfect creamy texture and flavor. Below, you’ll find everything you need to make your cheesecake bars from scratch, including the base and filling ingredients.
| Item | Amount/Specification | Notes |
|---|---|---|
| Cream Cheese | 16 ounces (450g) | Softened to room temperature for easy mixing |
| Sugar | 1 cup (200g) | Granulated sugar works best |
| Vanilla Extract | 2 teaspoons | Pure vanilla extract enhances flavor |
| Eggs | 2 large | Room temperature for even mixing |
| All-Purpose Flour | 2 tablespoons (15g) | For slight thickening |
| Butter | ½ cup (113g) | Unsalted, melted for crust |
| Graham Cracker Crumbs | 1½ cups (150g) | For a crunchy base |
| Sugar (for Crust) | ¼ cup (50g) | Granulated |
- For a gluten-free option, consider using almond flour or gluten-free cookie crumbs for the crust.
- If you’re dairy-free, look for vegan cream cheese alternatives and use coconut oil instead of butter.
- Ensure that the cream cheese is completely softened to avoid lumps in your batter.
Necessary Kitchen Equipment
To create the perfect easy cheesecake bars in a 9×13-inch pan, you’ll need a few essential kitchen tools. Having the right equipment not only makes the process smoother but also ensures that your dessert turns out just right. Below is a list of the necessary items along with their specifications and some notes for your convenience.
| Item | Amount/Specification | Notes |
|---|---|---|
| 9×13-inch Baking Pan | 1 | Glass or metal works; ensure it’s deep enough for the cheesecake mixture. |
| Mixing Bowls | 2 (1 large, 1 medium) | One for the crust and one for the filling; glass or stainless steel is preferred. |
| Hand Mixer | 1 | For blending the filling until smooth; a stand mixer can also be used. |
- Tip: Make sure to use a non-stick baking spray or parchment paper in your baking pan to prevent the cheesecake from sticking.
- Choose mixing bowls that are easy to pour from to minimize mess when transferring mixtures.
- If you don’t have a hand mixer, a whisk can work, but it requires more effort to achieve a smooth consistency.
Step-by-Step Baking Instructions
These step-by-step instructions will guide you through the process of making delicious easy cheesecake bars in a 9×13-inch pan. Each phase, from preparing the crust to baking the filling, is crucial for achieving that creamy texture and rich flavor.
- Preparing the Crust: Preheat your oven to 350°F (175°C). In a medium bowl, mix together 1 ½ cups (150g) of graham cracker crumbs, ½ cup (100g) of granulated sugar, and ½ cup (115g) of melted unsalted butter until combined. The mixture should resemble wet sand. Press this mixture evenly into the bottom of your 9×13-inch baking pan using the back of a measuring cup for an even layer. Bake for 10 minutes until lightly golden and fragrant.
- Making the Filling: While the crust is baking, beat 16 ounces (450g) of softened cream cheese in a large mixing bowl until smooth. Gradually add 1 cup (200g) of granulated sugar and 1 teaspoon of vanilla extract, mixing until fully incorporated. Add 2 large eggs, one at a time, mixing just until blended. The filling should be creamy and slightly fluffy, with no lumps remaining.
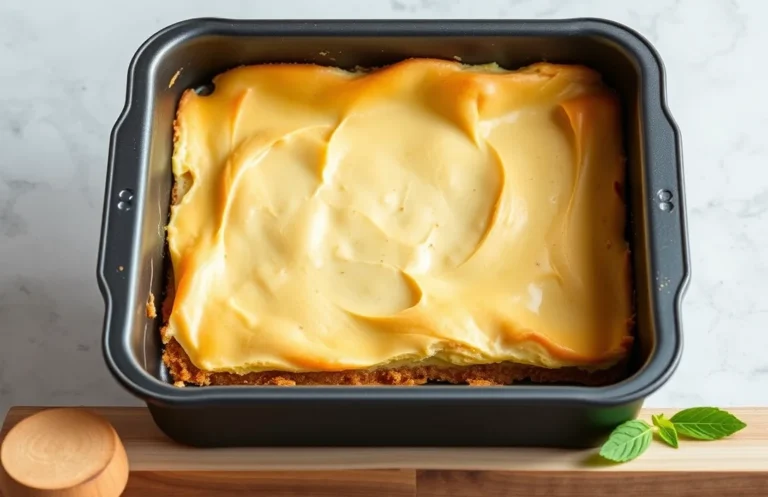
- Baking Process: Once the crust has cooled slightly, pour the cheesecake filling over it, spreading it evenly with a spatula. Bake in the preheated oven for 25-30 minutes. The edges should be set, while the center may still have a slight jiggle. Do not open the oven door during baking to maintain a consistent temperature. Allow the bars to cool in the pan for at least 1 hour before refrigerating for at least 4 hours or overnight for best results.
Pro Tips and Common Mistakes
Making delicious cheesecake bars can be a rewarding experience, but there are some important tips to keep in mind to ensure your bars turn out perfectly every time. This section covers how to avoid cracks and implement proper cooling techniques, which are crucial for achieving that smooth, creamy texture everyone loves.
Avoiding Cracks
- Use room temperature ingredients: Ensure your cream cheese, eggs, and sour cream are at room temperature before mixing. This helps create a smoother batter, reducing the risk of cracks.
- Don’t overmix: When combining the ingredients, mix just until smooth. Overmixing can incorporate too much air, leading to cracks as the cheesecake cools.
- Lower the baking temperature: Bake your cheesecake bars at 325°F (160°C) instead of a higher temperature. This gentler heat allows for even cooking and helps prevent surface cracking.
Proper Cooling Techniques
- Cool gradually: After baking, turn off the oven and crack the door open, allowing the bars to cool slowly for about 1 hour. This gradual temperature change helps prevent cracks due to sudden cooling.
- Chill in the refrigerator: Once the bars are at room temperature, refrigerate them for at least 4 hours (preferably overnight) before cutting. This helps the cheesecake firm up and enhances the flavors.
- Cover loosely: If you’re covering the cheesecake bars while they chill, use a loose cover or parchment paper to prevent moisture from collecting on the surface, which can lead to a soggy crust.
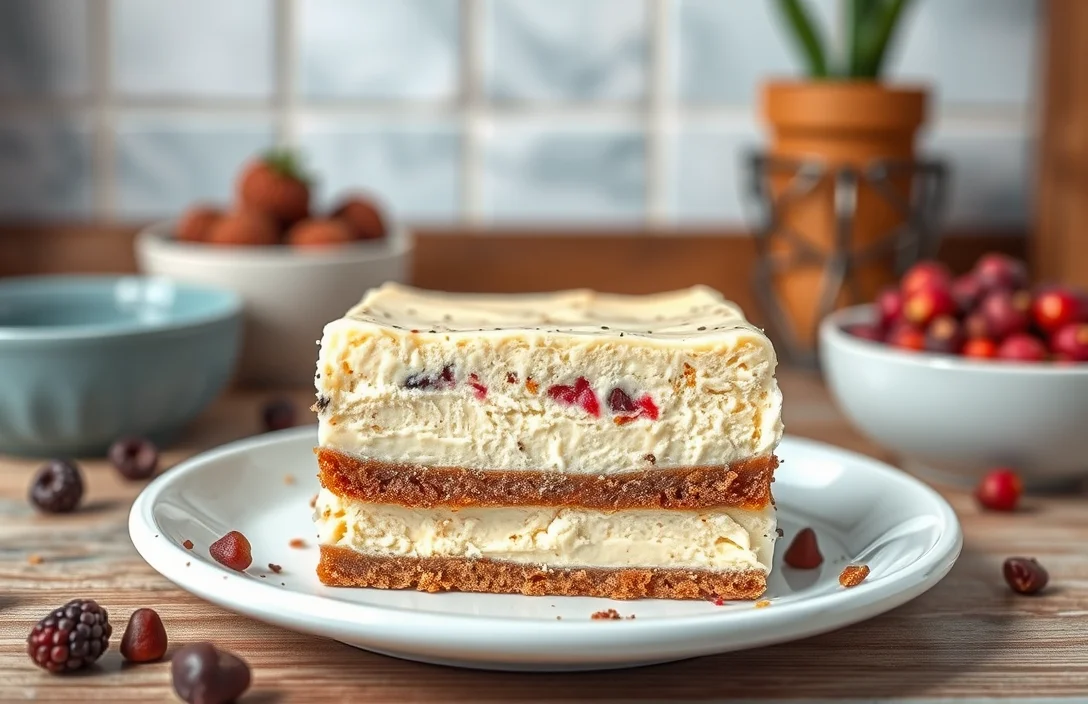
Flavor Variations and Modifications
This section explores exciting flavor variations and dietary modifications for your easy cheesecake bars, ensuring they cater to different palates and dietary needs. Whether you’re looking to add a fruity twist or make them gluten-free, these suggestions will elevate your dessert game.
Fruit Toppings
Adding a fruit topping can infuse your cheesecake bars with freshness and vibrant flavors. Here are some delicious options:
- Berry Bliss: Top with a mix of 1 cup fresh raspberries, blueberries, and sliced strawberries for a colorful, tangy topping.
- Peach Parfait: Use 1 cup of diced fresh peaches mixed with 2 tablespoons of sugar and a squeeze of lemon juice to enhance their flavor.
- Cherry Delight: Spread a layer of cherry pie filling (about 1 cup) on top for a classic combination.
Gluten-Free Options
If you or your guests are gluten-sensitive, you can still enjoy these cheesecake bars by making a few substitutions:
- Crust: Substitute 1 ¾ cups of gluten-free graham cracker crumbs for the regular graham crackers. Brands like Schär or Kinnikinnick offer great options.
- Flour: Use 2 tablespoons of cornstarch instead of all-purpose flour for the filling to maintain creaminess.
Chef’s tip: Always check your labels to ensure your ingredients are certified gluten-free to avoid cross-contamination!
| Ingredient | Measurement |
|---|---|
| Gluten-Free Graham Cracker Crumbs | 1 ¾ cups |
| Cornstarch | 2 tablespoons |
With these variations, your easy cheesecake bars will not only appeal to a wider audience but also allow you to enjoy different flavors. Don’t be afraid to experiment!
Serving and Plating Ideas
Serving your easy cheesecake bars beautifully can enhance the dessert experience for you and your guests. Here are some suggestions for the ideal serving temperature and delightful beverage pairings to elevate your cheesecake bars.
Serving Temperature
For the best taste and texture, serve your cheesecake bars chilled. After baking, let them cool at room temperature for about 30 minutes, then refrigerate for at least 4 hours, preferably overnight. This allows the flavors to meld and the bars to set properly. When ready to serve, cut them into squares and plate with a light dusting of powdered sugar or a drizzle of fruit sauce for a lovely presentation.
Beverage Pairings
Complement your cheesecake bars with the perfect beverage to balance the creamy richness. Here are a few ideas:
- Coffee: A warm cup of freshly brewed coffee enhances the creamy texture, especially if you enjoy a hint of bitterness.
- Tea: A light herbal tea or a refreshing iced tea pairs well, providing a soothing contrast.
- Wine: Consider a dessert wine like Moscato or a fruity Riesling, which matches the sweetness of the cheesecake.
- Milk: Classic and comforting, a glass of cold milk is always a crowd-pleaser.
Chef’s tip: Pair your cheesecake bars with a homemade berry compote for an extra layer of flavor and color!
Quick Summary
| Prep Time | 15 minutes |
|---|---|
| Cook Time | 30 minutes |
| Total Time | 45 minutes |
| Servings | 12 bars |
- Preheat oven to 325°F (160°C) for even baking.
- Prepare crust by mixing graham cracker crumbs, sugar, and melted butter.
- Beat cream cheese until smooth, then add sugar and eggs one at a time.
- Pour filling over the crust and smooth it out evenly.
- Bake for 30 minutes until the edges are set but center is slightly jiggly.
- Chill for at least 2 hours before cutting for clean edges.
- Tip: Use room temperature cream cheese for a lump-free filling.
- Tip: Line the baking dish with parchment for easy removal.
- Tip: Let the bars cool completely before refrigerating for best texture.
Frequently Asked Questions
Can I make this ahead of time? How to store and reheat?
You can absolutely make these cheesecake bars ahead of time! Store them in an airtight container in the refrigerator for up to 5 days, and enjoy them cold or reheat in the microwave for 10-15 seconds.
What can I substitute for cream cheese?
If you’re looking for a substitute, you can use mascarpone cheese for a similar creamy texture or Greek yogurt for a lighter option, but it may alter the flavor slightly.
How do I know when it’s done?
Your cheesecake bars are done when the edges are set and the center has a slight jiggle but isn’t liquid; it should look slightly puffed and will firm up as it cools.
Can I freeze this? How long does it last?
Yes, you can freeze the cheesecake bars wrapped tightly in plastic wrap or foil for up to 3 months. Thaw them in the refrigerator overnight before serving for the best texture.
What if I don’t have a 9×13 pan?
If you don’t have a 9×13 pan, you can use a 9×9 square pan for thicker bars or a larger baking dish, but adjust the baking time accordingly as thinner bars will bake faster.

- Decadent Peanut Butter No-Bake Cheesecake: Easy Recipe to Indulge - April 3, 2026
- Delicious Mango No-Bake Cheesecake: Step-by-Step Recipe - April 3, 2026
- Decadent Raspberry No-Bake Cheesecake: Easy Step-by-Step Recipe - April 3, 2026