Perfect Homemade Cheesecake Crust: Easy Step-by-Step Recipe
There’s something incredibly satisfying about making a cheesecake crust from scratch. The buttery crunch combined with a hint of sweetness creates a perfect foundation for any cheesecake. Whether it’s a classic New York style or a fruity variation, this crust elevates the dessert and makes every bite feel indulgent. You’ll be left craving just one more slice!
Key details: Total time: 30 minutes, Difficulty: Easy, Servings: 12.
| Prep Time | Cook Time | Total Time | Servings | Difficulty |
|---|---|---|---|---|
| 10 minutes | 20 minutes | 30 minutes | 12 | Easy |
Origin of Cheesecake Crust
The cheesecake crust has a rich history that adds depth and flavor to the beloved dessert. Understanding its origins not only enhances our appreciation for this culinary staple but also informs how we can create the perfect homemade version from scratch.
- Ancient Roots: The concept of cheesecake dates back to ancient Greece, where it was served to athletes during the first Olympic Games in 776 BC. The crust evolved over time, initially made with ground grains and honey.
- Roman Influence: As the Romans conquered Greece, they adopted and adapted the cheesecake recipe, incorporating a variety of ingredients and creating a richer version. They began using cheese, which became a staple in later European cheesecakes.
- American Adaptation: In the 19th century, American bakers made significant changes, particularly with the introduction of cream cheese. The crust transitioned from a simple grain base to the more familiar graham cracker crust we know today, enhancing flavor and texture.
- Modern Variations: Today, homemade cheesecake crusts can be crafted from various ingredients, including gluten-free options like almond flour. Each variation brings its unique character and complements the creamy filling beautifully.
Understanding the evolution of cheesecake crust helps home cooks appreciate the flavors and textures that different ingredients can contribute. This background knowledge can inspire you to experiment and create your own perfect crust at home.
Ingredients for Cheesecake Crust
To create a delicious homemade cheesecake crust, you’ll need just a few simple ingredients that come together to provide a perfect balance of flavor and texture. The combination of graham cracker crumbs, butter, and sugar creates a crust that’s both crispy and rich, enhancing your cheesecake experience.
| Item | Amount/Specification | Notes |
|---|---|---|
| Graham cracker crumbs | 1 ½ cups (150g) | Use finely crushed crumbs for a smoother texture |
| Unsalted butter | ½ cup (113g) | Melted, allows for better binding of the crumbs |
| Granulated sugar | ¼ cup (50g) | Adjust based on sweetness preference |
- For a gluten-free option: Substitute graham cracker crumbs with crushed gluten-free cookies or almond flour.
- Adjust sweetness: If you prefer a less sweet crust, reduce the sugar to 2 tablespoons (25g).
- Don’t skip the butter: It is essential for achieving that perfect crumbly texture. If the mixture feels too dry, add a little more melted butter.
Essential Kitchen Equipment
To create a delicious homemade cheesecake crust from scratch, having the right kitchen equipment is crucial. Using the right tools not only makes the process smoother but also helps achieve the perfect texture and flavor in your crust.
| Item | Amount/Specification | Notes |
|---|---|---|
| Mixing Bowl | 1 large | A sturdy bowl is essential for mixing the crust ingredients evenly. |
| Pie Dish | 9-inch | A glass or ceramic dish works best for even baking. |
| Oven | Preheated to 350°F (175°C) | Accurate temperature is crucial for achieving a golden crust. |
- Mixing Bowl: Choose a bowl that’s large enough to accommodate the mixing and prevent spills.
- Pie Dish: If you prefer a thicker crust, consider a deeper pie dish, but ensure it fits your oven.
- Oven: Always preheat your oven before baking to ensure the crust sets properly. A hot oven helps achieve the right texture.
Step-by-Step Instructions
Creating a homemade cheesecake crust from scratch is straightforward and rewarding. This section will guide you through the process step-by-step, ensuring your crust is perfectly textured and deliciously flavored.
- Preheat the Oven: Begin by preheating your oven to 350°F (175°C). This temperature is ideal for baking the crust, allowing it to set nicely while maintaining a tender texture. Preheating is crucial, as it ensures even cooking once the crust is in the oven.
- Mix Ingredients: In a medium mixing bowl, combine 1 ½ cups (150g) of graham cracker crumbs, ⅓ cup (40g) of granulated sugar, and ½ teaspoon of salt. Whisk these dry ingredients together until well combined. Next, melt ½ cup (115g) of unsalted butter and pour it into the bowl. Using a fork, stir the mixture until it resembles wet sand, and the crumbs are evenly coated with butter.
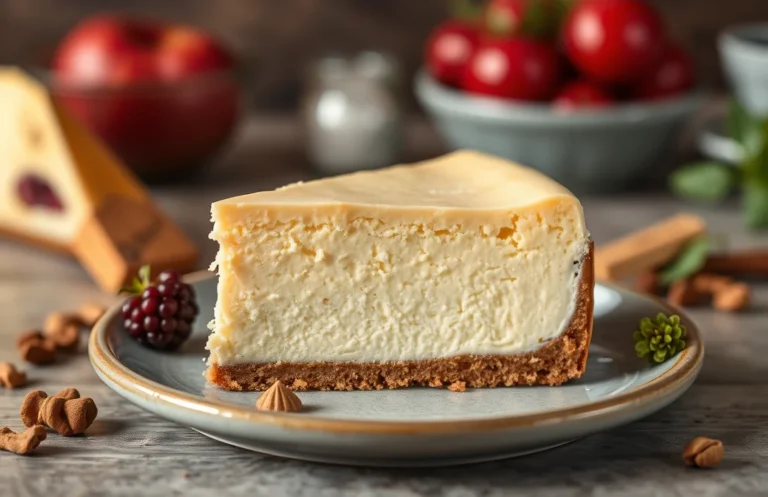
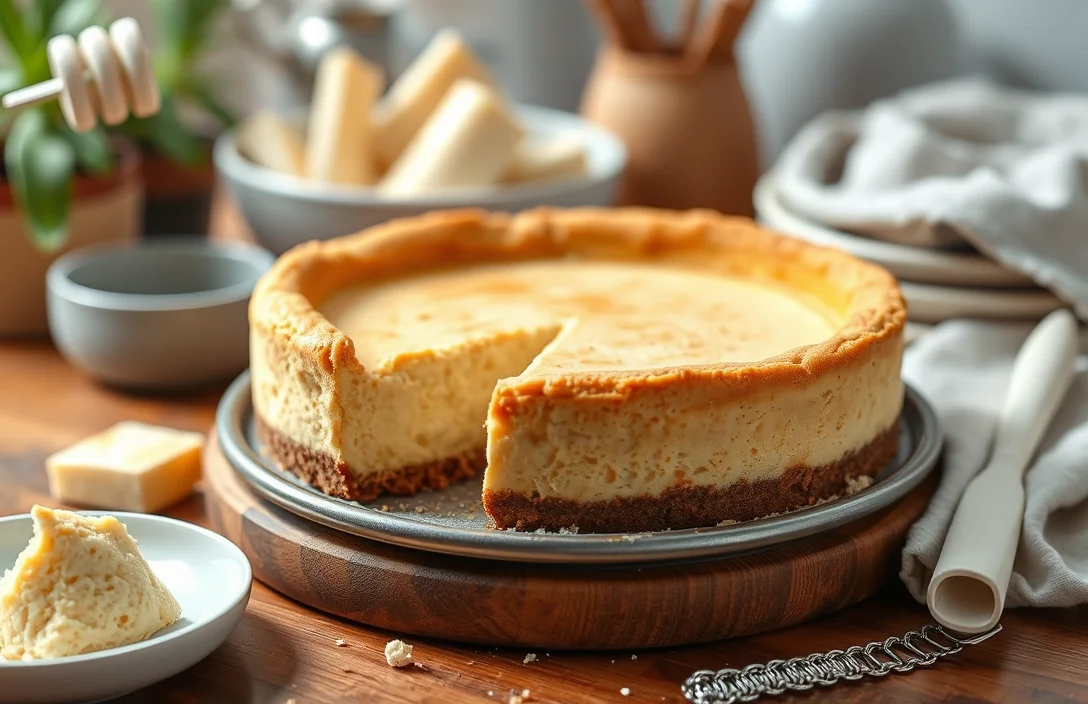
- Press into Dish: Transfer the crumb mixture into a 9-inch (23cm) pie or springform pan. Using the bottom of a measuring cup or your fingers, press the crumbs firmly and evenly across the bottom and up the sides of the pan. Aim for about ¼ inch thickness for the base, ensuring it’s compact to prevent crumbling later. Bake the crust in the preheated oven for 8-10 minutes, or until it’s lightly golden and fragrant. Be sure to let it cool completely before adding the cheesecake filling.
Pro Tips and Common Mistakes
This section shares essential tips and highlights common pitfalls to avoid when making a homemade cheesecake crust from scratch. Understanding these tips will help you achieve the perfect texture and flavor for your crust, ensuring a delicious base for your cheesecake.
Avoid Overmixing
When combining your ingredients for the crust, it’s vital to avoid overmixing. Overmixing can lead to a tough crust instead of a crumbly, melt-in-your-mouth texture. Aim for a consistency where the mixture holds together but still has a bit of texture. Here’s how to know if you’ve mixed enough:
- The mixture should resemble wet sand, easily clumping together when pressed.
- You should see small bits of butter throughout the mixture.
Chef’s tip: Stop mixing as soon as the ingredients are just combined for the best texture.
Check for Crust Thickness
The thickness of your crust can greatly impact the overall cheesecake. A crust that is too thin may crumble easily, while one that is too thick can overpower the filling. Follow these guidelines for perfect crust thickness:
- For a standard 9-inch (23 cm) springform pan, aim for a crust thickness of about ¼ inch (6 mm).
- Press the crust mixture evenly into the bottom and slightly up the sides of the pan to ensure a uniform texture.
| Crust Thickness | Result |
|---|---|
| Too Thin (< ¼ inch) | Crumbles easily, lacks support for the filling |
| Just Right (¼ inch) | Perfect balance, holds filling well |
| Too Thick (> ¼ inch) | Overpowers the cheesecake, may not bake evenly |
By keeping these tips in mind, you’ll be well on your way to crafting a delicious homemade cheesecake crust that complements your cheesecake beautifully.
Crust Variations and Substitutions
Exploring variations of your cheesecake crust can elevate your dessert and cater to different dietary preferences. Whether you want a gluten-free option or a rich chocolate base, these alternatives will enhance your cheesecake experience.
Almond Flour Crust
If you’re looking for a gluten-free crust, almond flour is a fantastic choice. This crust is nutty and pairs beautifully with a creamy cheesecake filling. Here’s how to make it:
- 1 ½ cups almond flour (150g)
- ¼ cup granulated sugar (50g)
- ¼ teaspoon salt
- 6 tablespoons unsalted butter, melted (85g)
- 1 teaspoon vanilla extract
- Preheat your oven to 350°F (175°C). Line the bottom of a 9-inch springform pan with parchment paper.
- In a mixing bowl, combine almond flour, sugar, and salt. Whisk together until well blended.
- Stir in the melted butter and vanilla extract until the mixture resembles damp sand.
- Press the mixture firmly into the bottom of the prepared pan, ensuring an even layer.
- Bake for 10-12 minutes, or until the edges are lightly golden. Let it cool before adding your cheesecake filling.
Chef’s tip: For added flavor, try mixing in a pinch of cinnamon or nutmeg with the dry ingredients.
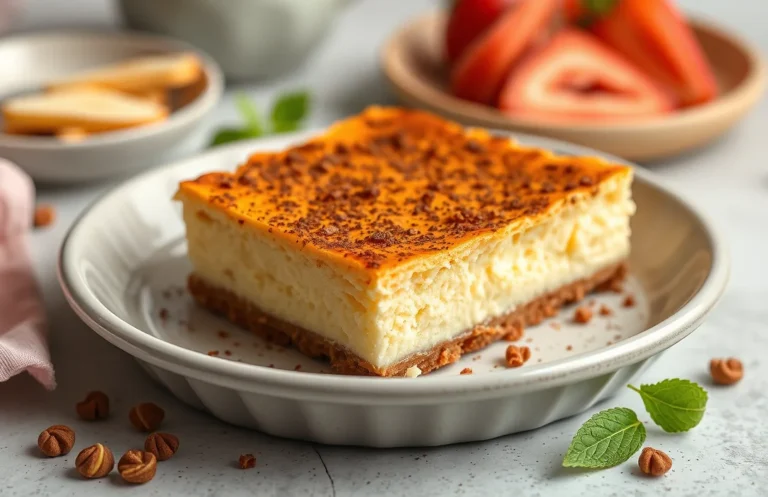
Chocolate Crust
For a decadent twist, a chocolate crust can add richness to your cheesecake. This variation is perfect for chocolate lovers!
- 1 ½ cups chocolate wafer crumbs (150g)
- ¼ cup granulated sugar (50g)
- ½ cup unsalted butter, melted (115g)
- Preheat your oven to 350°F (175°C) and line a 9-inch springform pan with parchment paper.
- In a medium bowl, mix chocolate wafer crumbs and sugar until combined.
- Pour in the melted butter and mix until the crumbs are evenly coated.
- Press the mixture into the bottom of the pan, creating a compact layer.
- Bake for 8-10 minutes, until set. Allow to cool completely before adding your cheesecake filling.
| Crust Type | Prep Time | Cook Time</th |
|---|---|---|
| Almond Flour Crust | 5 minutes | 10-12 minutes |
| Chocolate Crust | 5 minutes | 8-10 minutes |
Do not overbake the crusts; they should be just set and lightly golden to avoid a dry texture.
Serving and Pairing Ideas
Once you’ve perfected your homemade cheesecake crust, the possibilities for serving and pairing become endless! The right toppings and fillings can elevate your cheesecake experience, providing delightful contrasts in flavor and texture. Here are some ideas to enhance your cheesecake.
Fruits and Toppings
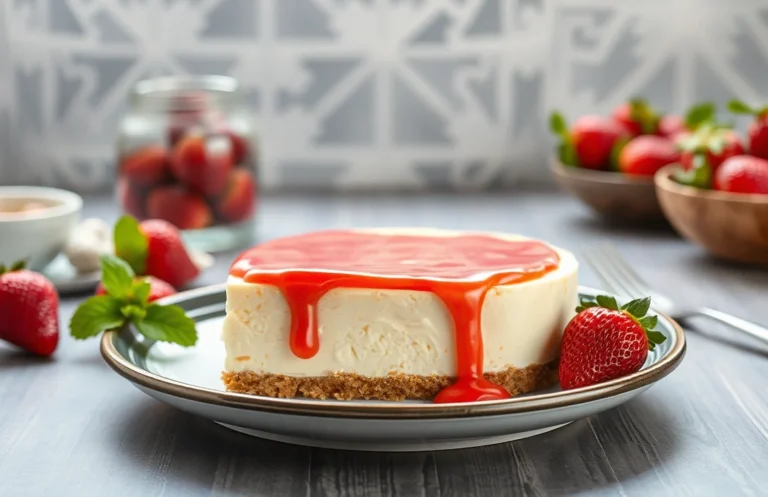
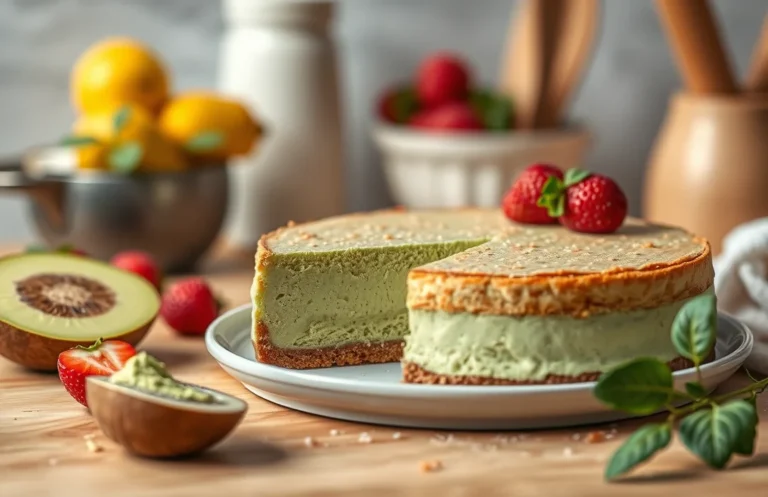
- Fresh Berries: Top your cheesecake with a mix of fresh strawberries, blueberries, and raspberries for a vibrant and refreshing taste. Aim for about 1 cup of assorted berries; wash them gently and pat dry before arranging them on top of the cheesecake.
- Caramel Sauce: Drizzle warm caramel sauce over the cheesecake for a rich and decadent complement. Use about ½ cup of store-bought or homemade caramel, warming it slightly to ensure it flows easily.
- Chocolate Ganache: For chocolate lovers, pour a chocolate ganache made from 1 cup of heavy cream and 8 ounces of chocolate over the top. Melt the chocolate in the cream over medium heat, stirring until smooth, then let it cool slightly before pouring.
Cheesecake Filling Ideas
- Classic Vanilla: A simple vanilla cheesecake filling made with 16 ounces of cream cheese, ½ cup of sugar, 2 large eggs, and 1 teaspoon of vanilla extract will allow the crust to shine. Bake at 325°F (160°C) for 50-60 minutes until the center is set yet slightly jiggly.
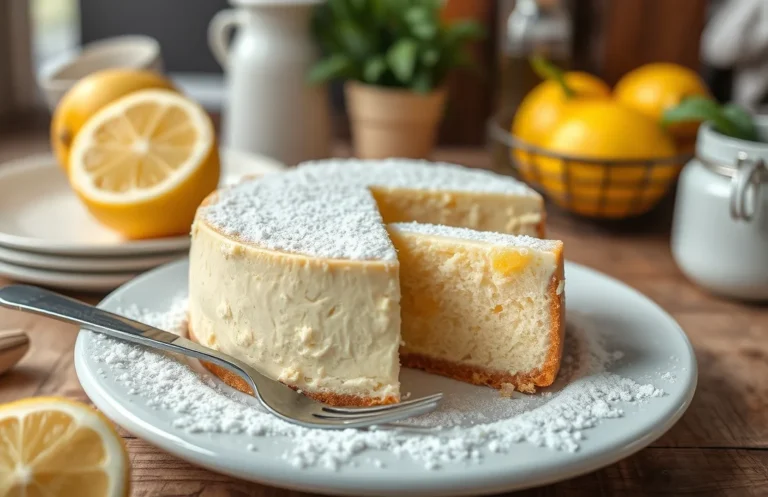
- Lemon Zest: For a zesty twist, incorporate the zest of one lemon and 2 tablespoons of lemon juice into your classic filling. This adds brightness and balance to the richness of the cheesecake.
- Chocolate: Blend in ½ cup of cocoa powder for a chocolate cheesecake variation. Ensure to adjust the sugar to ¾ cup to balance the bitterness of the cocoa.
Chef’s tip: Allow your cheesecake to chill in the refrigerator for at least 4 hours before serving to enhance the flavors and improve the texture.
Quick Summary
| Prep Time | Cook Time | Total Time | Servings |
|---|---|---|---|
| 15 mins | 10 mins | 25 mins | 8 |
- Gather ingredients: You’ll need 1 ½ cups graham cracker crumbs, ½ cup melted butter, and ¼ cup sugar.
- Mix crust ingredients: Combine crumbs, sugar, and butter in a bowl until fully incorporated.
- Press into pan: Firmly press the mixture into the bottom and up the sides of a 9-inch springform pan.
- Bake at 350°F: Bake for 8-10 minutes until lightly golden.
- Cool completely: Allow the crust to cool before adding cheesecake filling for best results.
- Tip for texture: Use finely crushed graham crackers for a smoother crust.
- Butter measurement: Ensure butter is fully melted to bind the crumbs properly.
- Cooling time: Don’t rush cooling; it helps prevent sogginess when adding filling.
Frequently Asked Questions
Can I make this ahead of time? How to store and reheat?
You can make the cheesecake crust up to 2 days in advance. Store it in an airtight container at room temperature, but avoid reheating as it’s best enjoyed fresh and crisp.
What can I substitute for graham cracker crumbs?
You can use crushed digestive biscuits or vanilla wafer cookies as a substitute for graham cracker crumbs. Just make sure to use the same measurement, which is typically about 1 ½ cups crushed for a standard crust.
How do I know when it’s done?
The crust is done when it turns a golden brown color, which usually takes about 10-12 minutes at 350°F (175°C). Let it cool for a few minutes before adding the cheesecake filling to ensure it holds its shape.
Can I freeze this? How long does it last?
Yes, you can freeze the cheesecake crust for up to 3 months. Make sure to wrap it tightly in plastic wrap and place it in a freezer-safe bag to prevent freezer burn.
What if I don’t have a food processor?
If you don’t have a food processor, you can place the graham crackers in a zip-top bag and crush them with a rolling pin until fine. Just ensure the crumbs are as fine as possible for the best texture in your crust.

- Decadent Peanut Butter No-Bake Cheesecake: Easy Recipe to Indulge - April 3, 2026
- Delicious Mango No-Bake Cheesecake: Step-by-Step Recipe - April 3, 2026
- Decadent Raspberry No-Bake Cheesecake: Easy Step-by-Step Recipe - April 3, 2026