How to Tell When Cheesecake is Perfectly Set: Key Tips & Tricks
There’s nothing quite like a perfectly baked cheesecake to make your heart sing. Creamy, velvety, and just the right amount of sweetness, it’s the ultimate dessert that brings everyone together. Whether it’s a special occasion or just a weeknight treat, this cheesecake is sure to satisfy your cravings and impress your guests.
Understanding when your cheesecake is ready is crucial for achieving that silky texture. You’ll learn to recognize the visual cues and texture tests to ensure it’s perfectly set. Get ready for a delicious result in total time: 1 hour 30 minutes, with a difficulty level: easy, serving 8 people!
| Prep Time | Cook Time | Total Time | Servings | Difficulty |
|---|---|---|---|---|
| 20 minutes | 1 hour | 1 hour 30 minutes | 8 | Easy |
Cheesecake Origins and Significance
Cheesecake holds a special place in culinary history and cultural traditions around the world. Understanding its origins and significance can enhance your appreciation of this beloved dessert, especially when mastering the art of knowing when it is perfectly cooked and ready to enjoy.
History of Cheesecake
Cheesecake has roots that trace back to ancient Greece, where it was served to athletes during the first Olympic Games. Over centuries, various cultures have adapted and transformed the basic recipe, leading to the rich variety of cheesecakes we enjoy today.
- Ancient Greece: Made with simple ingredients like cheese and honey.
- Roman Empire: Introduced the concept of baking it with a crust.
- New York Style: Cream cheese became the star ingredient in the 20th century.
Cultural Variations
Cheesecake varies significantly across cultures, each offering unique flavors and textures:
- Italian Ricotta Cheesecake: Light and fluffy, often flavored with citrus.
- Japanese Cotton Cheesecake: Light as a cloud, with a soufflé-like texture.
- German Käsekuchen: Made with quark, resulting in a denser, creamier cake.
When to Serve Cheesecake
“Cheesecake is an anytime dessert, perfect for celebrations, holidays, or simply a sweet indulgence!”
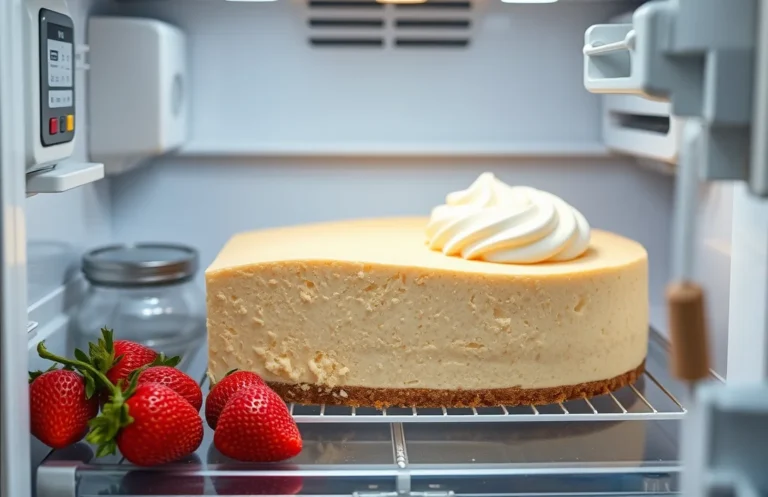
Knowing when to serve cheesecake is crucial; it should be well-chilled and set for optimal flavor and texture. Typically, it’s best to serve cheesecake after it has cooled in the fridge for at least 4 hours or overnight for the best results.
Ingredients for Perfect Cheesecake
Understanding the right ingredients is crucial for achieving a perfect cheesecake, especially when determining its readiness. The balance of creaminess, sweetness, and structure in these ingredients ultimately dictates the final texture and stability of your cheesecake.
| Item | Amount/Specification | Notes |
|---|---|---|
| Cream Cheese | 24 ounces (680g) | Softened to room temperature for easy blending. |
| Sugar | 1 cup (200g) | Granulated sugar for sweetness; can be adjusted to taste. |
| Eggs | 3 large | At room temperature; ensures even mixing. |
| Graham Cracker Crumbs | 1 ½ cups (150g) | For the crust; can substitute with gluten-free crumbs if needed. |
| Unsalted Butter | ½ cup (113g) | Melted for crust; enhances flavor. |
- Ensure cream cheese is fully softened to avoid lumps in your batter.
- For a richer taste, consider adding 1 teaspoon of vanilla extract.
- If using a springform pan, wrap the bottom with aluminum foil to prevent leaks.
- Remember to use an oven thermometer to verify your oven’s accuracy.
- Don’t overmix the batter once the eggs are added to prevent cracks.
Essential Kitchen Tools
To ensure your cheesecake is perfectly baked and ready for enjoyment, having the right kitchen tools is essential. These tools will not only help you with the baking process but also assist you in determining the doneness of your cheesecake.
| Item | Amount/Specification | Notes |
|---|---|---|
| Springform Pan | 9-inch (23 cm) | Ideal for easy release of the cheesecake without cracks. |
| Mixer | Stand or Hand Mixer | Ensure smooth batter; avoid overmixing to prevent cracks. |
| Oven Thermometer | N/A | To verify oven temperature accuracy for consistent baking results. |
- Tip: Always preheat the oven to 325°F (163°C). A consistent temperature is key for even cooking.
- Use the springform pan for easy release; it allows for a beautiful presentation without damaging the cake.
- Check the cheesecake at the minimum baking time, typically 50-60 minutes, to prevent overbaking.
- Gently shake the pan; the center should have a slight jiggle but not be liquid. This indicates it’s nearly set.
- If using a water bath, ensure it’s not too full to avoid water seeping into the cheesecake.
Cooking Steps for Cheesecake
Knowing when your cheesecake is ready is crucial for achieving that perfect creamy texture and flavor. This section will guide you through the essential steps, including preheating the oven, mixing the ingredients, baking, and cooling, ensuring your cheesecake turns out just right.
- Preheat the Oven: Start by preheating your oven to 325°F (163°C). This temperature helps the cheesecake bake evenly without cracking. Make sure to allow at least 15-20 minutes for the oven to reach the desired temperature before placing your cheesecake inside.
- Mixing Ingredients: In a large mixing bowl, combine 2 cups (450g) cream cheese (softened), 1 cup (200g) granulated sugar, and 1 teaspoon vanilla extract. Beat the mixture with an electric mixer on medium speed until it is smooth and creamy, about 2-3 minutes. The mixture should have no lumps and be fluffy in texture.
- Baking Time: Pour the cheesecake batter into a prepared 9-inch (23cm) springform pan. Bake in the preheated oven for 55-65 minutes. The edges should be set, while the center remains slightly jiggly. This slight jiggle is key, as the cheesecake will continue to firm up during the cooling process.
- Cooling Process: After baking, turn off the oven and crack the door open, allowing the cheesecake to cool slowly for about 1 hour. This step prevents sudden temperature changes that can cause cracks. Once cooled, refrigerate the cheesecake for at least 4 hours, preferably overnight, before serving. This rest period helps enhance the flavors and texture.
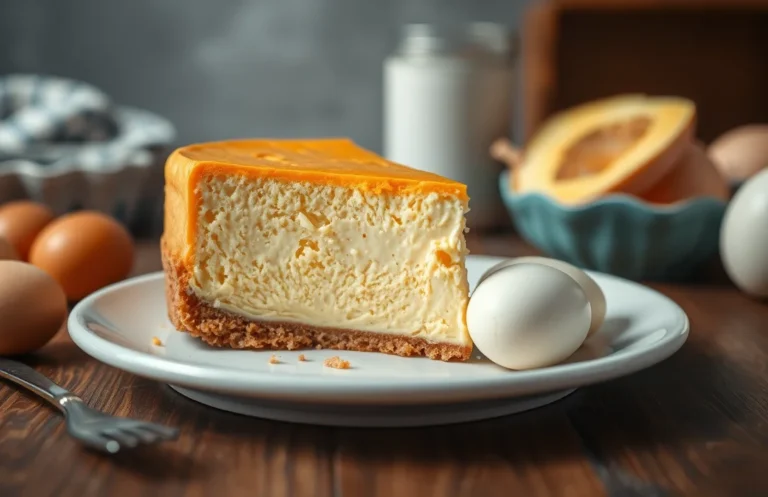
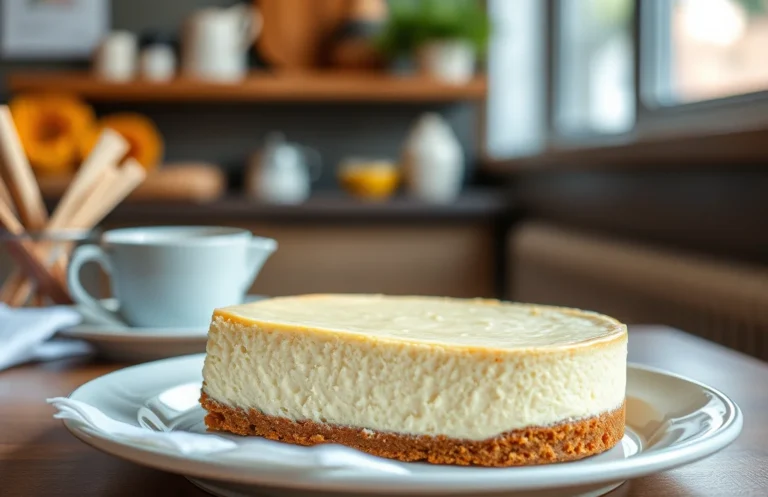
Visual and Texture Cues
Determining when a cheesecake is ready requires a careful observation of its visual and textural qualities. By following these guidelines, you can ensure your cheesecake is perfectly set, avoiding the disappointment of a runny center or overbaked edges.
- Firm Edges: As your cheesecake bakes, the edges will start to pull away slightly from the sides of the pan and appear firmer than the center. Look for a golden-brown color around the edges, which typically indicates that they are set. This usually occurs around 45-50 minutes into baking at 325°F (160°C).
- Slightly Jiggly Center: The center of the cheesecake should have a slight jiggle when you gently shake the pan. It should not be liquid but rather appear set with a soft, wobbly center. This indicates that the cheesecake will continue to firm up as it cools. Aim for a jiggle that is about the size of a quarter.
- Using a Toothpick Test: Insert a toothpick or a thin knife into the center of the cheesecake. If it comes out clean or with a few moist crumbs, your cheesecake is ready. If it comes out with wet batter, give it a few more minutes in the oven and check again. Remember, a perfectly baked cheesecake will still have a slightly moist texture in the center.
Troubleshooting Cheesecake Issues
Knowing when your cheesecake is ready can be tricky, but addressing common baking problems can help ensure a perfect result. Here are solutions for undercooked cheesecakes, overcooked cheesecakes, and cracked tops, so you can confidently bake your cheesecake to perfection.
Undercooked Cheesecake
Symptom: The center of your cheesecake is still wobbly and has a shiny surface.
Cause: The cheesecake hasn’t cooked long enough. This often occurs if the oven temperature is too low or if the cheesecake was removed from the oven too soon.
Fix: Return the cheesecake to the oven and bake for an additional 10-15 minutes at 325°F (163°C). Keep an eye on it and check for doneness by gently shaking the pan; the edges should be set while the center has a slight jiggle.
Overcooked Cheesecake
Symptom: The cheesecake has a dry, crumbly texture and may have started to brown on top.
Cause: Leaving the cheesecake in the oven for too long or cooking at a temperature that is too high can lead to overcooking.
Fix: If you notice this during baking, you can lower the temperature to 300°F (149°C) and cover the cheesecake with foil to prevent further browning. Check for doneness every 5 minutes until the edges are set and the center has a slight jiggle.
Cracked Tops
Symptom: The surface of the cheesecake has visible cracks or fissures.
Cause: Rapid temperature changes or overmixing the batter can create cracks in the cheesecake.
Fix: To prevent cracking in future bakes, allow the cheesecake to cool gradually in the oven with the door slightly ajar for about 1 hour after baking. You can also try baking in a water bath to maintain even temperature.
Cheesecake Variations and Modifications
This section highlights how to adapt your cheesecake recipe to suit different dietary preferences and flavor profiles, while still ensuring you know when it’s perfectly cooked. Whether you’re looking for gluten-free, vegan options or unique flavor variations, these modifications will help you achieve that perfect texture and doneness.
Gluten-Free Options
To make a gluten-free cheesecake, substitute the standard crust with a mixture of gluten-free cookies or almond flour. Here’s a simple crust recipe:
- 1 ½ cups gluten-free graham cracker crumbs (150g)
- ⅓ cup melted butter (75g)
- 2 tablespoons granulated sugar (25g)
Mix these ingredients together, press firmly into the bottom of your springform pan, and bake at 350°F (175°C) for 10 minutes before adding the filling. This ensures your cheesecake will be set properly and have a delightful texture.
Vegan Cheesecake
For a vegan cheesecake, you can use soaked cashews as a base instead of cream cheese. Here’s a basic recipe:
- 2 cups raw cashews, soaked for 4 hours
- ¾ cup coconut cream (180ml)
- ⅔ cup maple syrup (160ml)
- ¼ cup lemon juice (60ml)
Blend all ingredients until smooth, pour over your prepared crust, and bake at 325°F (160°C) for about 45 minutes. The center should still have a slight jiggle when you remove it from the oven.
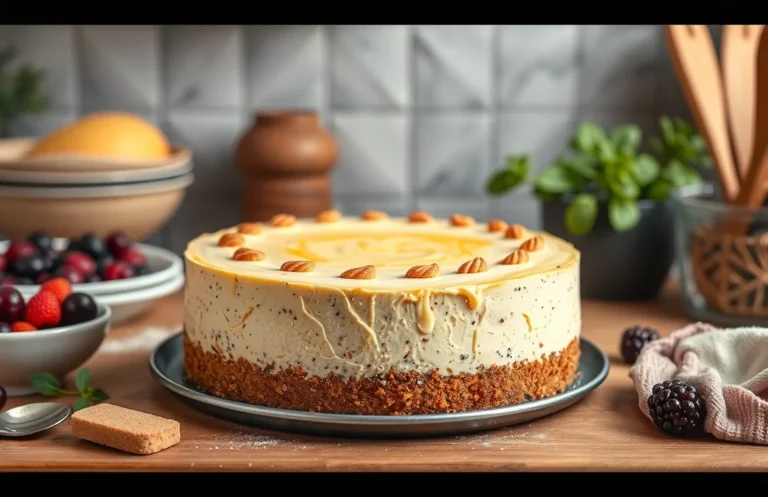
Flavor Variations
Experimenting with flavors can elevate your cheesecake. Here are some ideas:
- Chocolate: Add ½ cup melted dark chocolate (90g) to the batter.
- Fruit: Fold in 1 cup of pureed strawberries or blueberries for a fruity twist.
- Coffee: Mix in 1 tablespoon of instant coffee granules for a coffee-flavored cheesecake.
Chef’s tip: Always check for doneness by gently shaking the pan; the edges should be set while the center remains slightly wobbly.
Serving and Pairing Ideas
Knowing when your cheesecake is ready is just the beginning of the delicious experience. Once it’s perfectly baked, it’s time to think about how to serve it and what to pair with it for an unforgettable treat. Here are some ideas to elevate your cheesecake enjoyment.
Plating Techniques
Presentation is key when serving cheesecake. Here are a few tips for plating:
- Use a cake lifter to transfer slices gently to avoid cracks.
- Drizzle a sauce, like raspberry or chocolate, around the plate for a pop of color.
- Garnish with fresh fruit, mint leaves, or a dusting of powdered sugar for added flair.
Beverage Pairings
The right drink can enhance the flavors of your cheesecake. Consider these pairings:
- Coffee: A rich espresso or a smooth latte complements the creaminess.
- Wine: Pair with a sweet Riesling or a light Pinot Noir for a delightful contrast.
- Tea: A floral jasmine tea or a mint-infused herbal tea can refresh the palate.
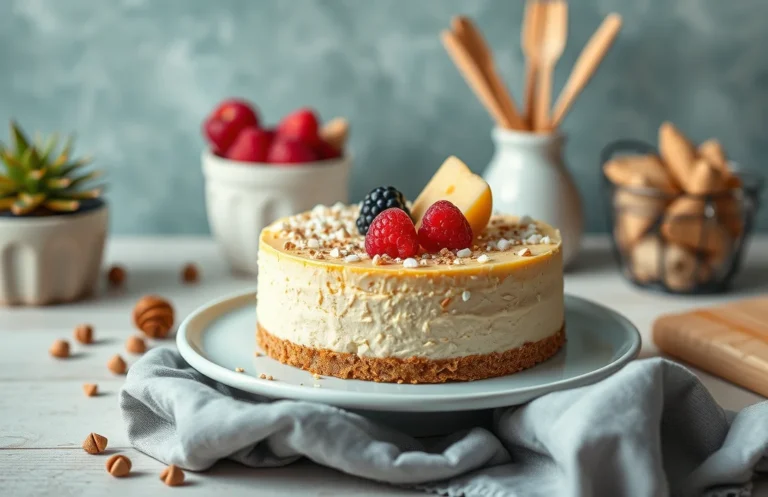
Toppings and Garnishes
Customize your cheesecake with these tasty toppings:
- Fresh berries: Strawberries, blueberries, or raspberries add a burst of flavor.
- Whipped cream: Lightly sweetened whipped cream adds a light, airy texture.
- Chocolate shavings: For chocolate lovers, sprinkle some dark chocolate shavings on top.
Tip: If your cheesecake has cracks, a fruit topping can beautifully disguise them while adding flavor!
Quick Summary
| Prep Time | Cook Time | Total Time | Servings |
|---|---|---|---|
| 15 minutes | 60 minutes | 75 minutes | 8 |
- Check the jiggle: The center should slightly jiggle when you shake the pan.
- Use a toothpick: Insert it in the edge; it should come out clean or slightly moist.
- Look for browning: The edges should be set and lightly golden.
- Cool completely: Let it cool at room temperature before refrigerating for 4 hours.
- Test temperature: The internal temperature should reach 150°F (65°C).
- Tip 1: Avoid overbaking to prevent cracks.
- Tip 2: Use room temperature ingredients for a smoother batter.
Frequently Asked Questions
Can I make this ahead of time? How to store and reheat?
You can definitely make cheesecake ahead of time; it’s best when chilled for at least 4 hours or overnight. Store it in the refrigerator covered with plastic wrap for up to 5 days, but avoid reheating it as it’s meant to be served cold.
What can I substitute for cream cheese?
You can use mascarpone cheese or a vegan cream cheese alternative for a similar texture and taste. Just keep in mind that the flavor may vary slightly, so adjust your sugar levels as needed.
How do I know when it’s done?
Your cheesecake is done when the edges are set and the center is slightly jiggly, which usually takes about 55-60 minutes at 325°F. It will firm up as it cools, so don’t overbake!
Can I freeze this? How long does it last?
Yes, you can freeze cheesecake for up to 2-3 months; just wrap it tightly in plastic wrap and then in aluminum foil. Thaw it in the refrigerator overnight before serving for the best texture.
Why did my cheesecake turn out cracked?
Your cheesecake may have cracked due to overheating or baking it too quickly; a gentle water bath can help prevent this. Remember to cool it gradually at room temperature before refrigerating to minimize cracking.

- Decadent Peanut Butter No-Bake Cheesecake: Easy Recipe to Indulge - April 3, 2026
- Delicious Mango No-Bake Cheesecake: Step-by-Step Recipe - April 3, 2026
- Decadent Raspberry No-Bake Cheesecake: Easy Step-by-Step Recipe - April 3, 2026