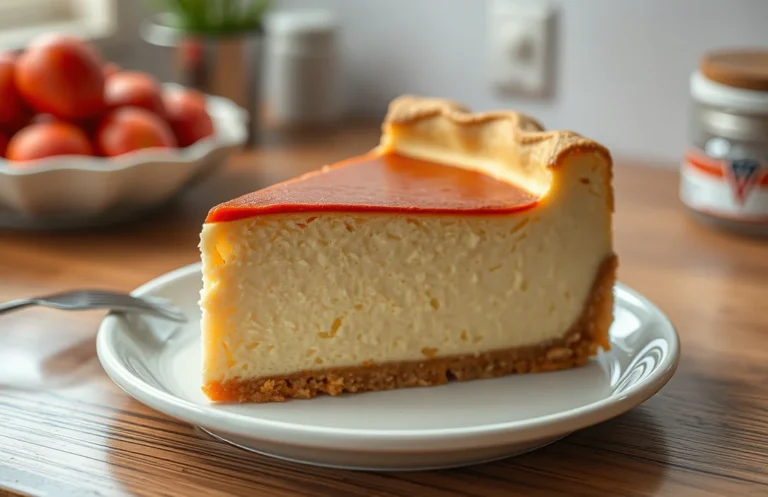
10 Creative Cheesecake Decorating Ideas for Stunning Desserts
Cheesecake is one of those desserts that feels like a warm hug after a long day. Rich, creamy, and utterly satisfying, it’s the perfect treat for any occasion. Whether you’re celebrating a birthday or just treating yourself on a weeknight, a beautifully decorated cheesecake can make your heart (and stomach) sing with joy.
Get ready to elevate your cheesecake game with 10 creative decorating ideas that are not only visually stunning but also easy to execute. Total time: 30 minutes prep, Difficulty: Easy, Servings: 8-10.
| Prep Time | Cook Time | Total Time | Servings | Difficulty |
|---|---|---|---|---|
| 30 minutes | 0 minutes | 30 minutes | 8-10 | Easy |
Cheesecake Decoration Origins
Understanding the origins of cheesecake decoration not only enriches your culinary knowledge but also inspires creativity in your own baking. Cheesecake has evolved across cultures, with each tradition bringing its own flair to decoration, adding significance to celebratory occasions.
Cultural Background
- Ancient Roots: The cheesecake dates back to ancient Greece, where it was served to athletes during the first Olympic Games in 776 B.C. It was simple, made with fresh cheese, honey, and flour, and often adorned with fruits.
- Regional Variations: Different cultures have embraced cheesecake, leading to various decorating styles. The Italian ricotta cheesecake is often topped with candied fruits, while the New York-style cheesecake features a smooth, creamy surface that can be dressed with berries or chocolate.
Celebratory Uses
- Festive Celebrations: Cheesecakes are frequently featured at weddings, birthdays, and holidays, making their decoration crucial. They often reflect the theme of the event, with embellishments such as edible flowers or colorful fruit compotes.
- Personal Touch: Home bakers often personalize their cheesecakes with unique toppings and designs, creating a sense of pride and connection. This practice not only enhances the cake’s visual appeal but also allows for creative expression.
Essential Decorating Ingredients
In this section, we’ll cover the key ingredients you’ll need for decorating your cheesecake, focusing on fruits, nuts, chocolates, and sauces. Having the right ingredients can elevate your cheesecake from simple to stunning, creating an impressive centerpiece for any occasion.
Fruits and Nuts
| Item | Amount/Specification | Notes |
|---|---|---|
| Fresh Strawberries | 1 cup (about 150g) | Halved or whole for topping |
| Blueberries | ½ cup (75g) | Fresh or thawed if frozen |
| Raspberries | ½ cup (60g) | Best used fresh for vibrant color |
| Chopped Walnuts | ¼ cup (30g) | Toasted for extra flavor |
| Shredded Coconut | ¼ cup (20g) | Unsweetened for a less sugary taste |
Chocolate and Sauces
| Item | Amount/Specification | Notes |
|---|---|---|
| Chocolate Chips (Semi-Sweet) | ½ cup (90g) | Melted for drizzling |
| Chocolate Sauce | ¼ cup (60ml) | For drizzling over the top |
| Caramel Sauce | ¼ cup (60ml) | Store-bought or homemade |
| Whipped Cream | 1 cup (240ml) | Lightly sweetened for topping |
- For best presentation, choose a variety of colors and textures.
- Wash fruits thoroughly and dry them before decorating to avoid excess moisture.
- Toast nuts in a dry skillet over medium heat for 5-7 minutes until fragrant, but keep an eye on them to prevent burning.
Tools for Decorating
Having the right tools on hand can make all the difference when it comes to decorating your cheesecake. This section will highlight essential kitchen tools that will help you achieve beautiful and professional-looking results, ensuring your cheesecake is as visually appealing as it is delicious.
| Item | Amount/Specification | Notes |
|---|---|---|
| Piping Bags | 1-2 bags (12-inch or larger) | Use for precise decorating with whipped cream, ganache, or other toppings. |
| Piping Tips | Various sizes | For creating different shapes and designs with frosting or cream. |
| Offset Spatula | 1 (10-inch) | Perfect for spreading and smoothing toppings evenly over the cheesecake. |
| Bench Scraper | 1 | Great for smoothing sides and creating a clean finish. |
| Decoration Combs | 1-2 | For creating textured designs on frosting. |
- Tip: If you don’t have a piping bag, you can use a resealable plastic bag with a corner snipped off.
- Make sure your spatulas and tools are clean and dry for the best results.
- Practice your piping techniques on parchment paper before decorating the cheesecake.
Step-by-Step Decoration Techniques
Decorating your cheesecake can elevate it from delicious to stunning. In this section, we’ll cover two delightful decorating techniques: layering fruits and drizzling chocolate. With precise steps, you’ll create a visually appealing dessert that tastes as good as it looks.
Layering Fruits
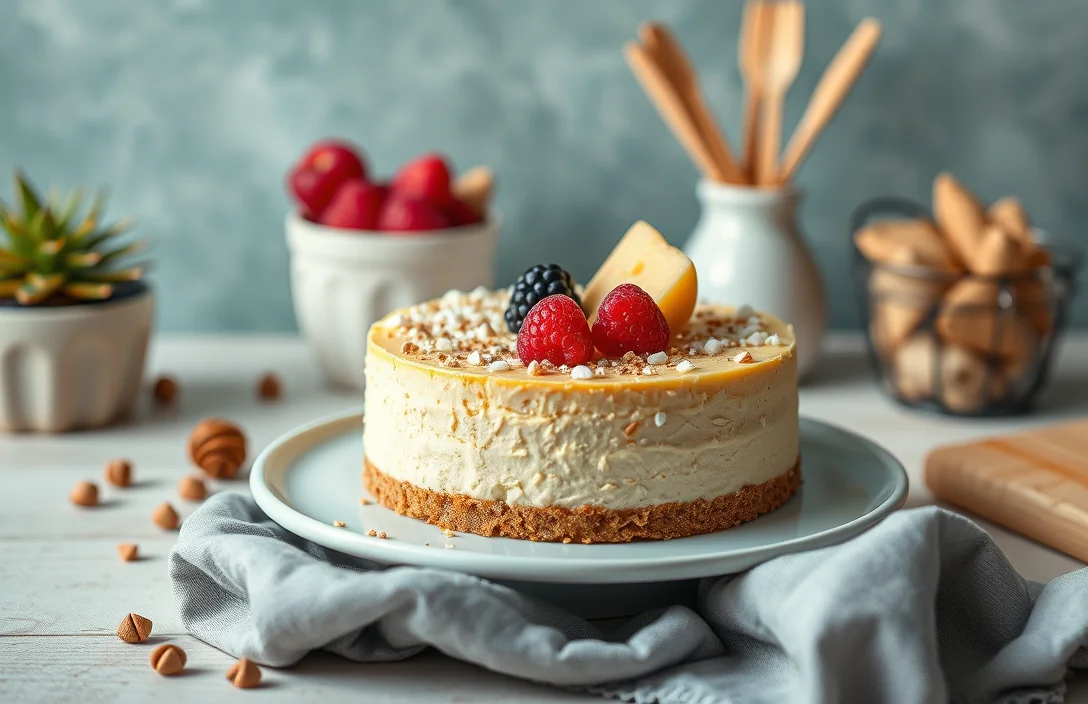
- Fruits: Choose 1 cup of fresh berries (strawberries, raspberries, blueberries) and 1 banana. Wash the berries thoroughly and slice the banana into thin rounds. This adds vibrant colors and fresh flavors to your cheesecake.
- Start by arranging a layer of berries on top of the cheesecake. Use a mix of whole berries and halved strawberries for texture. The berries should be evenly distributed, covering the top completely.
- Next, add the banana slices. Gently place the banana rounds in a circular pattern around the edge of the cheesecake. This not only enhances the visual appeal but also provides a creamy contrast to the tartness of the berries.
- For an extra touch, sprinkle 1 tablespoon of powdered sugar over the fruits for a hint of sweetness. This will create a beautiful glisten on your fruits, making them look even more appetizing.
Drizzling Chocolate
- Chocolate: Use ½ cup of semi-sweet chocolate chips and 2 tablespoons of coconut oil. The coconut oil will help the chocolate to flow easily when drizzled.
- In a microwave-safe bowl, combine the chocolate chips and coconut oil. Microwave in 30-second intervals, stirring in between, until melted and smooth, about 1-2 minutes total. The mixture should be glossy and pourable.
- Using a spoon or a piping bag, drizzle the melted chocolate over the cheesecake in a zigzag pattern. Start from one edge and move to the center, then back out to the opposite edge. This creates an enticing visual effect.
- Allow the chocolate to set for about 10-15 minutes at room temperature, or place the cheesecake in the refrigerator for 5 minutes. The chocolate should harden slightly but remain soft enough to cut through easily.
Chef’s tip: For added flair, consider using white chocolate for drizzling alongside dark chocolate for a striking contrast.
Pro Tips for Success
Decorating a cheesecake can elevate its presentation and taste, but it’s essential to avoid common pitfalls to ensure a stunning result. Here are some expert tips to help you achieve that perfect cheesecake decoration without compromising the base or the cream cheese texture.
- Avoiding Soggy Bases: To keep your cheesecake crust firm, consider pre-baking it for 10-12 minutes at 350°F (175°C). This step not only adds flavor but also creates a barrier against moisture from the filling. Once baked, allow it to cool completely before adding the cheesecake mixture.
- Keeping Cream Cheese Smooth: Always bring your cream cheese to room temperature (about 70°F or 21°C) before mixing. This prevents lumps and ensures a silky texture. If you notice lumps after mixing, pass the mixture through a fine-mesh strainer or blend it briefly with an immersion blender to achieve a creamy consistency.
Chef’s tip: If your cheesecake cracks while baking, don’t worry! A simple dollop of whipped cream or a fruit topping can hide imperfections beautifully.
Creative Variations
Thinking about dietary restrictions when decorating your cheesecake opens up a world of creative possibilities! Whether you’re looking for vegan cream cheese options or nut-free alternatives, there are plenty of ways to make your cheesecake both delicious and inclusive.
Vegan Cream Cheese Options
If you’re catering to vegan diets, you can easily substitute traditional cream cheese with plant-based alternatives. Here are some popular options:
- Vegan Cream Cheese: Brands like Tofutti or Kite Hill offer creamy textures that mimic traditional cream cheese perfectly. Use about 1 cup for a standard cheesecake.
- Coconut Cream: For a rich flavor, refrigerate a can of full-fat coconut milk overnight. Scoop out 1 cup of the solid cream for a luscious filling.
- Cashew Cream: Soak 1 cup of raw cashews in water for at least 4 hours, then blend with 2 tablespoons of lemon juice and a pinch of salt for a creamy base.
Nut-Free Alternatives
Many people are allergic to nuts, so here are some nut-free options that still offer great flavor and texture for your cheesecake decorations:
- Soy Cream Cheese: Use 1 cup of soy-based cream cheese as a direct substitute for traditional cream cheese.
- Sunflower Seed Butter: For a unique flavor, blend ½ cup of sunflower seed butter into your filling. It adds creaminess while being nut-free.
- Oat Cream: Use 1 cup of oat-based cream to achieve a smooth consistency without the nuts.
Chef’s tip: Always taste your vegan or nut-free alternatives before adding them to ensure they meet your flavor expectations!
Serving and Plating Ideas
Presenting your cheesecake beautifully can elevate its appeal and make it truly unforgettable. Here are some elegant serving and plating ideas, along with pairing suggestions that will take your cheesecake to the next level.
Plate Presentation
- Choose the right plate: A simple white or pastel-colored plate can beautifully contrast with the rich colors of your cheesecake. Opt for a wide plate that gives you ample space to arrange garnishes and sauces.
- Layer flavors: Place a slice of cheesecake in the center of the plate. For a professional touch, use a squeeze bottle to drizzle sauces like raspberry coulis or chocolate sauce around the cheesecake, creating an artistic pattern.
- Add texture: Consider adding a sprinkle of crushed graham crackers or nuts around the cheesecake for added crunch. This not only enhances the visual appeal but also adds a delightful texture contrast when served.
Pairing Suggestions
- Fruits: Fresh berries, such as strawberries, blueberries, or raspberries, complement the creamy texture of cheesecake. Arrange them artistically atop the cheesecake or alongside it for a vibrant pop of color.
- Cream: A dollop of whipped cream can add lightness and elegance. For extra flavor, whip in a teaspoon of vanilla extract or a tablespoon of powdered sugar.
- Drinks: Pair your cheesecake with a glass of dessert wine, coffee, or a fruit-infused iced tea. These beverages enhance the overall experience, bringing out the flavors of the cheesecake.
Quick Summary
| Prep Time | Cook Time | Total Time | Servings |
|---|---|---|---|
| 20 minutes | 1 hour | 1 hour 20 minutes | 8 servings |
- Choose your base: Use a plain cheesecake for maximum versatility in decoration.
- Prep toppings: Wash and slice fresh fruits like strawberries and kiwis.
- Use ganache: Melt chocolate with heavy cream for a rich drizzle.
- Chill before decorating: Ensure the cheesecake is completely cooled for better stability.
- Layer textures: Combine smooth toppings with crunchy elements like crushed nuts or cookies.
- Tip 1: Use a piping bag for clean, beautiful designs with whipped cream.
- Tip 2: Always use room temperature ingredients for even mixing.
Frequently Asked Questions
Can I make the cheesecake ahead of time? How do I store and reheat it?
You can absolutely make the cheesecake up to 3 days in advance; just store it covered in the refrigerator. For serving, let it sit at room temperature for about 30 minutes before decorating or slicing.
What can I substitute for cream cheese in the cheesecake?
You can use mascarpone or Greek yogurt as a substitute for cream cheese, but for the best texture, use a 1:1 ratio with mascarpone. If using Greek yogurt, consider adding a bit of powdered sugar to maintain creaminess.
How do I know when my cheesecake is done baking?
Your cheesecake is done when the edges are set but the center still has a slight jiggle; this usually takes about 50-60 minutes at 325°F (160°C). It will firm up as it cools, so don’t overbake it!
Can I freeze my decorated cheesecake? How long does it last?
You can freeze your cheesecake for up to 2-3 months, but it’s best to freeze it plain without decorations. Once frozen, wrap it tightly in plastic wrap and aluminum foil to prevent freezer burn.
What if I don’t have a springform pan for my cheesecake?
If you don’t have a springform pan, you can use a regular round cake pan lined with parchment paper, but you’ll need to let it cool completely before gently lifting it out. Just be careful when slicing to avoid damaging the edges!

- Top 10 Ecm Mechanika Max Espresso Machine 2026 - July 29, 2026
- Top 10 De Longhi Espresso & Cappuccino Machine 2026 - July 29, 2026
- Top 10 Best Water For Espresso Machine 2026 - July 29, 2026