Cheesecake 101: History, Types, Ingredients, and Easy Recipes
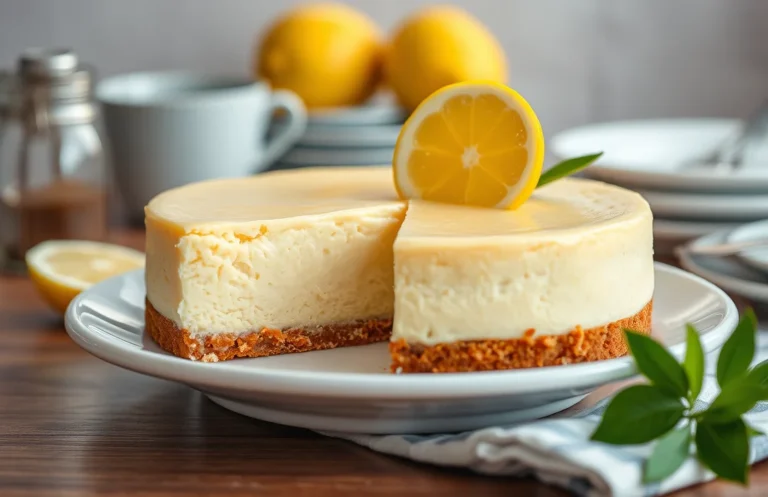
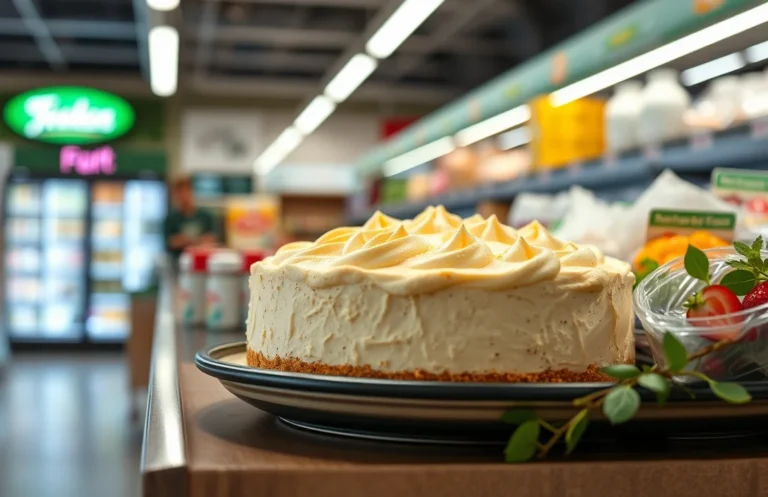
Cheesecake is that decadently creamy dessert that can make any occasion feel special. Whether it’s a holiday gathering or a cozy weeknight treat, its rich texture and sweet flavor are sure to please. Imagine a slice with a buttery graham cracker crust topped with fresh berries—just divine!
Key details: This cheesecake recipe takes about 1 hour and 30 minutes from start to finish, is rated medium in difficulty, and serves 8 people.
| Prep Time | Cook Time | Total Time | Servings | Difficulty |
|---|---|---|---|---|
| 20 minutes | 1 hour | 1 hour 30 minutes | 8 | Medium |
Cheesecake Origins
Cheesecake is a beloved dessert that has a rich history stretching back thousands of years. Understanding its origins not only highlights its significance in various cultures but also enriches our appreciation for this creamy delight.
- Ancient Beginnings: The earliest recorded cheesecake dates back to ancient Greece, where it was served to athletes during the first Olympic Games in 776 B.C. Made with simple ingredients like cheese, flour, and honey, it was considered a source of energy.
- Roman Influence: The Romans adopted and adapted the Greek cheesecake, adding their own twists. They introduced ingredients like eggs and cream, making it richer and creamier. This version spread across Europe with the expansion of the Roman Empire.
- Regional Variations: Over the centuries, different cultures have put their unique spin on cheesecake. For instance, the Italian version often features ricotta cheese, while the German style incorporates quark for a lighter texture. Each region’s cheesecake reflects local tastes and ingredients.
- Modern Popularity: Today, cheesecake is enjoyed worldwide, often served during celebrations and special occasions such as birthdays and holidays. Its versatility allows for endless flavor combinations, from classic New York-style to fruity and chocolate variations.
Essential Ingredients
To create a delicious cheesecake, you’ll need a specific set of ingredients that come together to form its rich and creamy texture. Understanding these ingredients is key to achieving the perfect balance of flavors and the right consistency, whether you’re making a classic New York-style cheesecake or experimenting with a flavored variant.
| Item | Amount/Specification | Notes |
|---|---|---|
| Graham cracker crumbs | 1 ½ cups (150g) | For the crust; can substitute with crushed cookies or biscuits. |
| Granulated sugar | ½ cup (100g) | For the crust and filling; adjust based on sweetness preference. |
| Unsalted butter | ½ cup (115g), melted | Bind the crust; can use coconut oil for a dairy-free version. |
| Cream cheese | 24 ounces (680g) | Room temperature for easy mixing; use full-fat for best flavor. |
| Sour cream | 1 cup (240g) | Adds creaminess and tang; Greek yogurt can be an alternative. |
| Vanilla extract | 1 teaspoon (5ml) | For flavor; use pure vanilla for the best taste. |
| Eggs | 3 large | Room temperature; vital for structure and richness. |
- Tip: Ensure cream cheese is softened for smooth mixing; you can microwave it for 10-15 seconds if needed.
- Common Mistake: Don’t overmix the batter once the eggs are added, as this can introduce too much air and cause cracks.
- For a flavored cheesecake, consider adding fruit purees or chocolate into the batter.
Necessary Equipment
Preparing a delicious cheesecake requires a few key tools to ensure success in the kitchen. Having the right equipment not only simplifies the process but also enhances the final product. Below is a detailed list of the essential items you’ll need for making your cheesecake.
- Springform Pan: A 9-inch (23 cm) springform pan is ideal for cheesecakes as it allows for easy removal without damaging the cake. Make sure the edges are tightly sealed to prevent leaks during baking.
- Mixing Bowls: Use a large mixing bowl (at least 4 quarts) for combining your cheesecake filling. A medium bowl will be handy for mixing the crust ingredients. Glass or stainless steel bowls work best to avoid any reaction with acidic ingredients.
- Electric Mixer: An electric hand mixer or stand mixer will save you time and effort when blending the cream cheese. Mix on medium speed until smooth and creamy, which should take about 2-3 minutes.
- Rubber Spatula: A sturdy rubber spatula is essential for scraping down the sides of your mixing bowl and folding in ingredients gently without losing air. This step is critical for achieving a light texture.
- Measuring Cups and Spoons: Accurate measurements are crucial for a successful cheesecake. Have dry measuring cups and measuring spoons ready to ensure you get the exact amounts needed for the crust and filling.
- Food Processor (optional): While not necessary, a food processor can make quick work of crushing graham crackers for the crust. Pulse until you achieve a fine crumb texture, which should take about 30 seconds.
- Oven Thermometer: To ensure your oven is at the correct temperature (typically 325°F or 160°C for baking cheesecake), an oven thermometer can help avoid undercooked or overcooked results.
Step-by-Step Instructions
This section provides a comprehensive guide to making a classic cheesecake, highlighting the essential steps, timings, and tips to ensure your dessert turns out perfectly. Follow these detailed instructions to create a delicious cheesecake that will impress your family and friends.
- Gather Your Ingredients: You will need 1 ½ cups (150g) graham cracker crumbs, ½ cup (100g) granulated sugar, ½ cup (115g) unsalted butter (melted), 4 (8 oz) packages of cream cheese (softened), 1 cup (200g) granulated sugar, 1 teaspoon vanilla extract, and 4 large eggs. For a gluten-free option, use almond flour instead of graham cracker crumbs.
- Preheat the Oven: Preheat your oven to 325°F (160°C). This temperature is ideal for baking a cheesecake, allowing it to set slowly without cracking. Make sure the oven is fully heated before placing the cheesecake inside.
- Prepare the Crust: In a mixing bowl, combine the graham cracker crumbs, ½ cup sugar, and melted butter. Mix until the crumbs are well-coated and resemble wet sand. Press this mixture firmly into the bottom of a 9-inch (23 cm) springform pan, using the back of a measuring cup to create an even layer. Bake for 10 minutes until it’s lightly golden and fragrant.
- Make the Filling: In a large mixing bowl, beat the softened cream cheese with an electric mixer until smooth and creamy, about 3-4 minutes. Gradually add 1 cup of sugar and 1 teaspoon of vanilla extract, continuing to mix until well combined. Ensure there are no lumps by scraping down the sides of the bowl.
- Add Eggs: With the mixer on low speed, add the eggs one at a time, mixing just until incorporated after each addition. This step is crucial; overmixing can incorporate too much air, leading to cracks in your cheesecake. The batter should be smooth and thick.
- Bake the Cheesecake: Pour the filling over the pre-baked crust and smooth the top with a spatula. Bake in the preheated oven for 55-60 minutes, or until the edges are set but the center still has a slight jiggle. The top should be lightly golden and the sides may pull away from the pan slightly.
- Cool and Chill: Once baked, turn off the oven and crack the door open, letting the cheesecake cool in the oven for 1 hour. This gentle cooling process helps prevent cracks. Afterward, refrigerate for at least 4 hours, preferably overnight, before removing from the springform pan.
Pro Tips & Common Mistakes
Making cheesecake can be an art form, and understanding some expert tips and common pitfalls can significantly enhance your baking experience. Here’s what to keep in mind to achieve that creamy, decadent cheesecake you’re aiming for.
- Room Temperature Ingredients: Always use room temperature cream cheese, eggs, and sour cream. This ensures a smoother batter, reducing the risk of lumps. If you’re in a hurry, microwave the cream cheese for 10-second intervals until slightly softened.
- Don’t Overmix: When incorporating eggs into your mixture, mix just until combined. Overmixing can introduce air into the batter, causing cracks during baking. Aim for a silky consistency without visible lumps.
- Water Bath Technique: Using a water bath (bain-marie) prevents the cheesecake from baking too quickly and helps maintain moisture. Wrap the outside of your springform pan in aluminum foil to prevent leaks, and bake at 325°F (160°C) for a gentle, even cook.
- Cooling Gradually: After baking, gradually cool your cheesecake in the oven with the door slightly ajar. This helps prevent sudden temperature changes that can cause cracks. Leave it in the turned-off oven for about 1 hour before transferring it to the counter.
- Chill Before Serving: Allow your cheesecake to chill in the refrigerator for at least 4 hours, preferably overnight. This enhances the flavor and texture, making it easier to slice. The cheesecake should feel firm to the touch but still have a slight jiggle in the center.
- Watch Your Baking Time: Keep an eye on the cheesecake towards the end of the baking time. It should be set around the edges with a slight wobble in the center. If it looks too firm or browned, it may be overbaked. Adjust your baking time based on your oven’s calibration.
Variations & Substitutions
Cheesecake is a versatile dessert that can be adapted to suit various tastes and dietary needs. Understanding the different types and possible ingredient substitutions can open up a world of delicious possibilities in your baking endeavors.
Types of Cheesecake
- New York Style: Creamy and dense, made with cream cheese, sour cream, and often flavored with vanilla.
- No-Bake Cheesecake: Lighter and fluffier, made with whipped cream or whipped topping for a softer texture.
- Japanese Cheesecake: Light and airy, resembling a soufflé, made with meringue and cream cheese.
- Ricotta Cheesecake: Uses ricotta cheese for a slightly grainy texture and is often flavored with citrus.
Ingredient Substitutions
For those with dietary restrictions or preferences, here are some substitutions you can use without sacrificing flavor:
- For gluten-free crust: Use 1 ½ cups almond flour or gluten-free cookie crumbs instead of graham crackers.
- For dairy-free cheesecake: Substitute cream cheese with 1 cup of cashew cream or coconut cream.
- For lower fat: Use low-fat cream cheese and Greek yogurt instead of sour cream for a lighter filling.
Chef’s tip: If using a no-bake cheesecake, ensure your cream cheese is at room temperature for a smooth mixture.
| Ingredient | Substitution |
|---|---|
| Graham cracker crust | Almond flour or gluten-free crumbs |
| Sour cream | Greek yogurt |
| Cream cheese | Cashew cream or coconut cream |
Experimenting with these variations and substitutions will help you create a cheesecake that not only meets your taste preferences but also accommodates any dietary restrictions. Happy baking!
Serving Suggestions
Serving cheesecake can elevate your dessert experience, making it not only delicious but also visually appealing. Here are some great ways to present and pair your cheesecake to delight your guests and enhance the flavors.
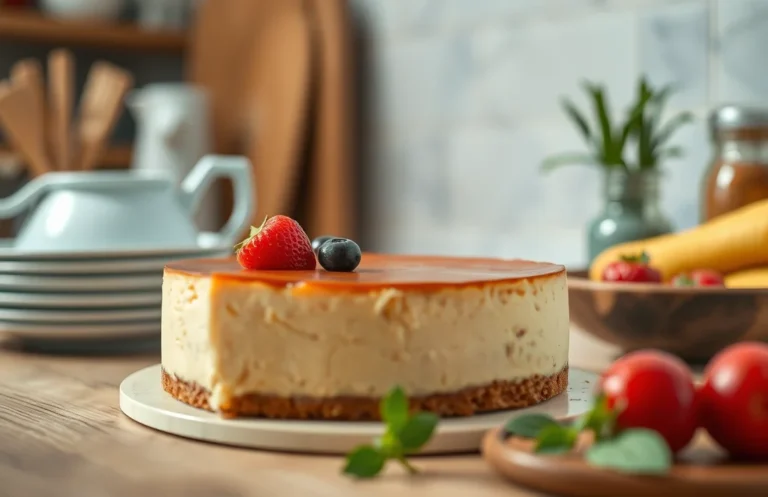
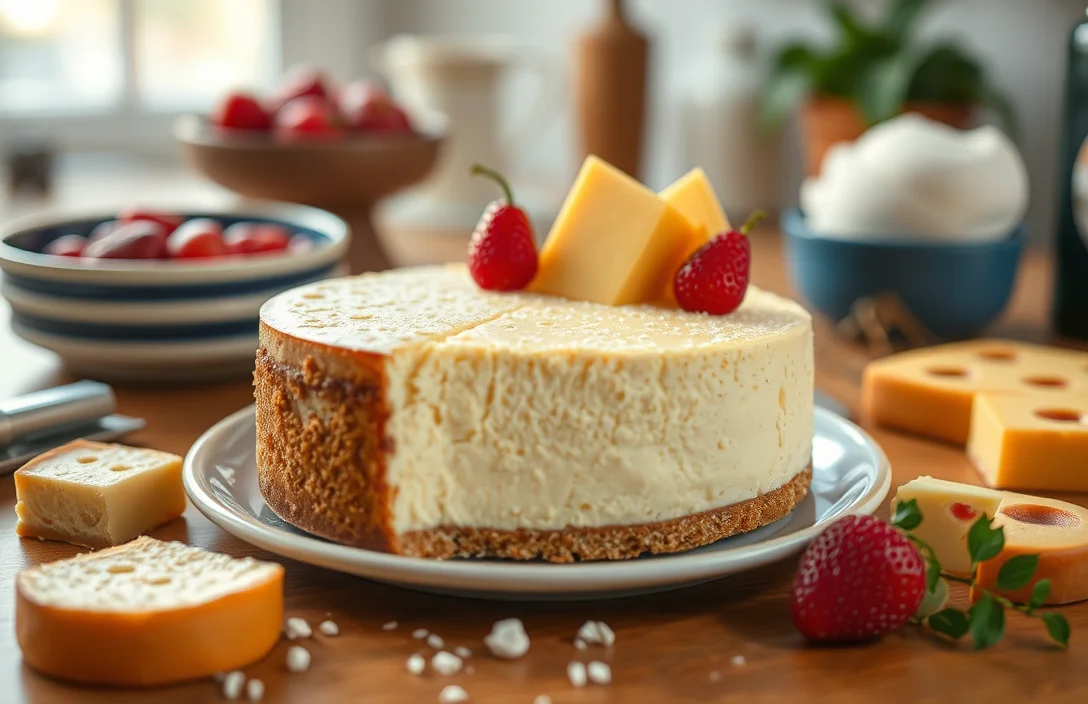
- Classic Garnish: Top your cheesecake with fresh berries such as strawberries, blueberries, or raspberries. Use about 1 cup of mixed berries for a vibrant look. The tartness of the berries perfectly balances the rich creaminess of the cheesecake.
- Chocolate Drizzle: Melt ½ cup of semi-sweet chocolate chips in a microwave-safe bowl for about 30-60 seconds. Stir until smooth, then drizzle over the cheesecake for a decadent touch. This adds a beautiful contrast and a rich flavor that many love.
- Creamy Topping: Whip 1 cup of heavy cream with 2 tablespoons of powdered sugar and 1 teaspoon of vanilla extract until soft peaks form. Spread or dollop this on top of the cheesecake just before serving. This adds a light and airy texture that complements the denser cheesecake.
- Fruit Compote: Cook down 1 cup of your favorite fruit (like peaches, cherries, or apricots) with 2 tablespoons of sugar and a splash of lemon juice over medium heat until it thickens, approximately 5-7 minutes. Spoon this warm compote over each slice for a delightful burst of flavor.
- Serve with Coffee or Tea: Pair slices of cheesecake with a cup of freshly brewed coffee or a nice herbal tea. The warmth of the beverage contrasts beautifully with the chilled cheesecake, making for a comforting dessert experience.
Chef’s tip: Always let your cheesecake chill in the refrigerator for at least 4 hours before serving. This helps it set properly and enhances the flavors.
Quick Summary
| Prep Time | Cook Time | Total Time | Servings |
|---|---|---|---|
| 20 minutes | 60 minutes | 3 hours (including chilling) | 8 |
- Prepare the crust: Mix graham cracker crumbs with melted butter and press into the pan.
- Blend the filling: Combine cream cheese, sugar, and eggs until smooth.
- Bake the cheesecake: Cook in a water bath at 325°F (163°C) for 60 minutes.
- Cool gradually: Let it cool in the oven with the door ajar to prevent cracks.
- Chill before serving: Refrigerate for at least 2 hours for the best texture.
- Tip: Use room temperature cream cheese for a lump-free batter.
- Tip: Avoid overbeating to keep the texture creamy.
- Tip: Always bake in a water bath to maintain moisture and avoid cracks.
Frequently Asked Questions
Can I make this cheesecake ahead of time? How do I store and reheat it?
You can absolutely make cheesecake ahead of time; in fact, it’s often better to let it chill in the fridge for at least 4-6 hours or overnight. Store it covered in the refrigerator, and you don’t need to reheat it—just serve it cold!
What can I substitute for cream cheese?
If you’re looking to substitute cream cheese, you can use ricotta cheese or blended cottage cheese for a lighter version, but the texture and flavor will differ slightly. Another option is using vegan cream cheese if you’re aiming for a dairy-free cheesecake.
How do I know when my cheesecake is done?
Your cheesecake is done when the edges are set but the center still has a slight jiggle, which typically takes about 55-70 minutes at 325°F (163°C). It will continue to firm up as it cools, so don’t overbake!
Can I freeze cheesecake? How long does it last?
Yes, you can freeze cheesecake for up to 2-3 months. Make sure to wrap it tightly in plastic wrap and foil before freezing to prevent freezer burn.
What if I don’t have a springform pan?
If you don’t have a springform pan, you can use a regular round cake pan, but you’ll need to line it with parchment paper to help with release after baking. Just be cautious when removing it, as it may not come out as neatly as in a springform pan.

- Decadent Peanut Butter No-Bake Cheesecake: Easy Recipe to Indulge - April 3, 2026
- Delicious Mango No-Bake Cheesecake: Step-by-Step Recipe - April 3, 2026
- Decadent Raspberry No-Bake Cheesecake: Easy Step-by-Step Recipe - April 3, 2026