Decadent Chocolate Cake Recipe: Step-by-Step from Preppy Kitchen
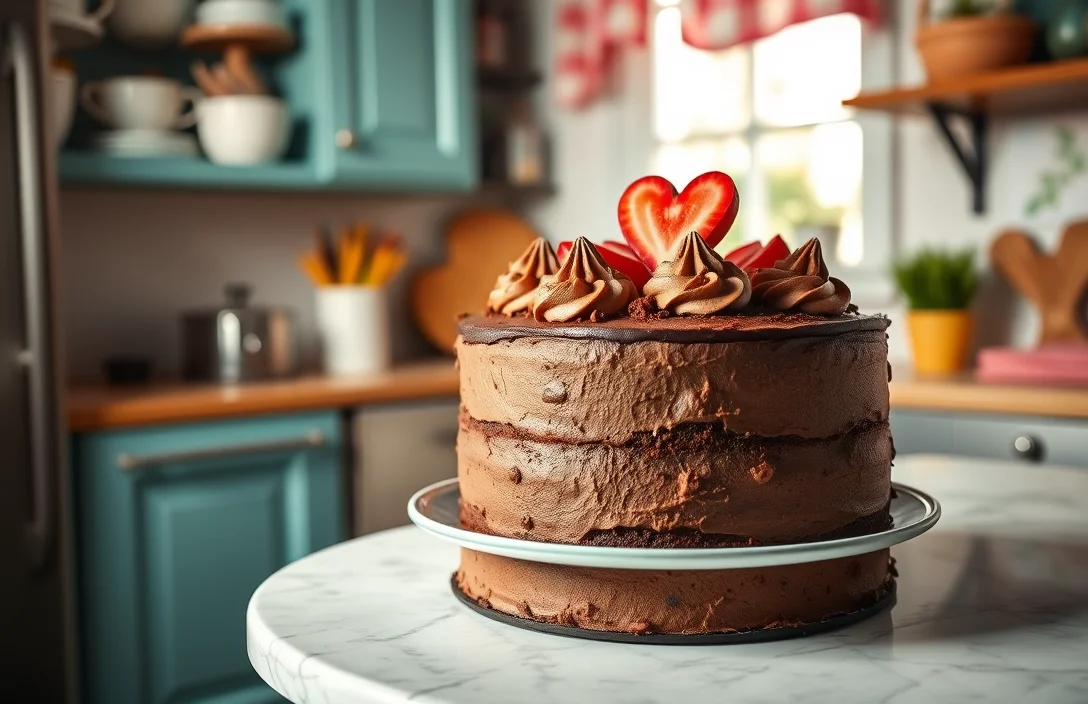
There’s something magical about a homemade chocolate cake that just brings joy to any occasion — whether it’s a weekday pick-me-up or a celebration with friends. Rich, velvety chocolate layers and a luscious frosting make this cake a true crowd-pleaser that’s sure to impress everyone at the table.
This recipe is perfect for home cooks who crave a delicious chocolate cake that’s easy to follow. Expect a total time of 1 hour, with a medium difficulty level, serving 8-10 people.
| Prep Time | Cook Time | Total Time | Servings | Difficulty |
|---|---|---|---|---|
| 20 minutes | 30 minutes | 1 hour | 8-10 | Medium |
Story Behind Chocolate Cake
Chocolate cake has a rich history and a special place in our hearts, often serving as the centerpiece of celebrations and gatherings. Its combination of rich cocoa flavor and moist texture makes it a beloved choice for everything from birthdays to anniversaries. This cake is not just dessert; it’s an experience that evokes joy and nostalgia.
- Historical significance: The origins of chocolate cake date back to the 18th century when chocolate was first introduced into cakes. It has since evolved into various forms, including layered, flourless, and sheet cakes, each with its unique charm.
- Perfect for celebrations: Whether it’s a wedding, a birthday, or a cozy gathering with friends, chocolate cake is universally loved. Its decadent flavor and versatility make it suitable for any special occasion.
- Personal touch: A chocolate cake prepared with care can become a family tradition, passed down through generations. Each baker adds their twist, whether through frosting, fillings, or special ingredients, making it a unique creation every time.
- A comfort food classic: There’s something incredibly comforting about a slice of chocolate cake, especially when paired with a cold glass of milk or a scoop of ice cream. It’s a dessert that brings people together, often evoking sweet memories of childhood.
Ingredients for Chocolate Cake
Creating the perfect chocolate cake requires the right balance of ingredients, each contributing to the rich flavor and moist texture that makes this dessert unforgettable. Below, you will find a complete list of everything you need to whip up a delicious chocolate cake, along with notes on substitutions and tips to ensure your cake turns out flawlessly.
| Item | Amount/Specification | Notes |
|---|---|---|
| All-purpose flour | 1 ¾ cups (220g) | Sifted for better texture |
| Cocoa powder | ¾ cup (65g) | Unsweetened is best |
| Granulated sugar | 2 cups (400g) | For sweetness and moisture |
| Baking powder | 1 ½ teaspoons | For leavening |
| Baking soda | 1 ½ teaspoons | For extra lift |
| Salt | ½ teaspoon | Enhances flavor |
| Eggs | 2 large | Room temperature for better mixing |
| Whole milk | 1 cup (240ml) | Can substitute with almond or soy milk |
| Vegetable oil | ½ cup (120ml) | Keeps cake moist |
| Vanilla extract | 2 teaspoons | For added flavor |
| Boiling water | 1 cup (240ml) | Enhances the cocoa flavor |
- For gluten-free options, substitute all-purpose flour with a gluten-free blend.
- If you’re out of eggs, you can use ½ cup of unsweetened applesauce per egg as a substitute.
- Ensure all ingredients are at room temperature for the best mixing and texture.
Essential Kitchen Tools
To create the perfect chocolate cake from Preppy Kitchen, having the right tools on hand can make all the difference. These essentials will help you achieve consistent results and ensure that your baking process is smooth and enjoyable.
- Mixing Bowls: You will need at least two medium-sized mixing bowls, preferably glass or stainless steel, for combining your dry and wet ingredients. The transparency of glass allows you to see the mixture’s consistency and color as you combine.
- Measuring Cups and Spoons: Accurate measurements are crucial for baking success. Use a set of standard measuring cups for dry ingredients (flour, sugar) and a liquid measuring cup for wet ingredients (milk, oil). Make sure to level off dry ingredients for precision.
- Whisk: A sturdy whisk is essential for mixing your batter smoothly and incorporating air for a lighter texture. Whisk together the dry ingredients thoroughly to avoid clumping.
- Spatula: A silicone or rubber spatula is perfect for folding ingredients together gently without overmixing. This tool helps scrape the sides of the bowl, ensuring no flour or batter is left behind.
- Stand Mixer or Hand Mixer: A stand mixer makes beating butter and sugar a breeze, but a hand mixer also works well. Aim for a creamy texture when creaming the butter and sugar, which should take about 3-5 minutes on medium speed.
- 9-inch Round Cake Pans: Two 9-inch round cake pans are ideal for baking the layers. Grease them with butter and dust with flour to prevent sticking. After baking, the edges should pull away slightly from the sides of the pan.
- Cooling Rack: A cooling rack is necessary for letting your cakes cool evenly after baking, which helps maintain their structure. Allow the cakes to cool in the pans for about 10 minutes before transferring to the rack.
Step-by-Step Baking Instructions
In this section, we’ll guide you through the precise steps to bake a delicious chocolate cake from Preppy Kitchen. Following these instructions closely will ensure that your cake turns out moist, rich, and perfect every time.
- Prep the Oven and Pans: Preheat your oven to 350°F (175°C). While the oven heats, prepare two 9-inch round cake pans by greasing them with butter and dusting with cocoa powder to prevent sticking.
- Mix the Dry Ingredients: In a medium bowl, whisk together 1 ¾ cups (220g) all-purpose flour, 1 ¾ cups (350g) granulated sugar, ¾ cup (65g) unsweetened cocoa powder, 1 ½ teaspoons baking powder, 1 ½ teaspoons baking soda, and 1 teaspoon salt. The mixture should be well combined and free of lumps.
- Combine the Wet Ingredients: In a large mixing bowl, combine 2 large eggs, 1 cup (240ml) whole milk, ½ cup (120ml) vegetable oil, and 2 teaspoons vanilla extract. Beat with a hand mixer on medium speed for about 2 minutes until the mixture is smooth and frothy.
- Incorporate the Dry Ingredients: Gradually add the dry ingredient mixture into the wet ingredients, mixing on low speed until just combined. Be careful not to overmix; the batter should be slightly lumpy but well incorporated.
- Add Boiling Water: Carefully stir in 1 cup (240ml) boiling water into the batter. This will thin the batter, which is normal. It should be smooth and glossy, with a rich chocolate aroma filling your kitchen.
- Pour and Bake: Divide the batter evenly between the prepared cake pans. Bake in the preheated oven for 30-35 minutes. The cakes are done when a toothpick inserted into the center comes out clean or with a few moist crumbs.
- Cool the Cakes: Once baked, remove the cakes from the oven and let them cool in the pans for 10 minutes. Then, carefully run a knife around the edges, invert onto wire racks, and allow to cool completely. This step is crucial; if you frost the cakes while warm, the icing may melt.
Chef’s tip: For a deeper chocolate flavor, you can substitute half of the all-purpose flour with cake flour.
Pro Tips for Perfect Cake
Baking the perfect chocolate cake requires attention to detail and a few insider tips that can make all the difference. Here are some essential pointers to help you avoid common pitfalls and ensure your cake is moist, rich, and utterly delicious.
- Measure Accurately: Use a kitchen scale for precise measurements. For example, sift 1¾ cups (220g) of all-purpose flour to avoid a dense cake.
- Room Temperature Ingredients: Ensure your eggs, butter, and milk are at room temperature. This helps achieve a uniformly mixed batter, allowing for better rise and a fluffier texture.
- Don’t Overmix: When combining wet and dry ingredients, mix just until you no longer see flour. Overmixing can lead to a tough cake.
- Check Your Oven Temperature: Use an oven thermometer to ensure accuracy. If your oven runs hot, your cake may bake too quickly, leading to a dome shape or cracked top.
Chef’s tip: Rotate your cake halfway through baking to promote even cooking.
Common Mistakes to Avoid
- Underbaking: Always perform the toothpick test. Insert a toothpick into the center; it should come out with a few moist crumbs, not wet batter.
- Cooling: Allow the cake to cool in the pan for 10 minutes, then transfer it to a wire rack. This prevents sogginess.
| Ingredient | Amount |
|---|---|
| All-Purpose Flour | 1¾ cups (220g) |
| Cocoa Powder | ¾ cup (75g) |
| Sugar | 2 cups (400g) |
By following these tips, you’re setting yourself up for success with your chocolate cake. Happy baking!
Variations and Substitutions
If you or your guests have dietary restrictions, don’t worry! The Preppy Kitchen chocolate cake can be adapted to accommodate gluten-free or vegan diets without sacrificing flavor or texture. Here’s how you can make those modifications.
Gluten-Free Chocolate Cake
To make this chocolate cake gluten-free, substitute the all-purpose flour with a gluten-free flour blend. Look for a mix that contains xanthan gum, as this will help mimic the texture of traditional flour.
- 1 ¾ cups gluten-free flour blend (210g)
- 1 teaspoon xanthan gum (if not included in the blend)
Keep an eye on the baking time, as gluten-free cakes may require an extra 5-10 minutes in the oven. The cake is ready when a toothpick inserted in the center comes out clean.
Vegan Chocolate Cake
For a vegan version, you can replace the eggs and dairy with plant-based alternatives. Here’s what to use:
- 1 cup unsweetened applesauce (240g) for 2 eggs
- ½ cup almond milk (120ml) or any plant-based milk
- ½ cup vegetable oil (120ml) instead of butter
Mix the wet ingredients well before incorporating them into the dry ingredients. The batter should be smooth and slightly thick. Bake at the same temperature (350°F or 175°C) and check for doneness in the same way.
Chef’s tip: Allow your gluten-free or vegan cake to cool in the pan for 10 minutes before transferring it to a wire rack to prevent it from breaking apart.
| Ingredient | Standard | Gluten-Free | Vegan |
|---|---|---|---|
| All-purpose flour | 1 ¾ cups (210g) | 1 ¾ cups gluten-free blend (210g) | 1 ¾ cups (210g) – no change |
| Eggs | 2 large | 2 (omit) | 2 (replace with 1 cup applesauce) |
| Butter | ½ cup (115g) | ½ cup (115g) – no change | ½ cup vegetable oil (120ml) |
Serving and Plating Ideas
Once your chocolate cake from Preppy Kitchen is baked and cooled, it’s time to think about presentation. Serving and plating are crucial in elevating your dessert from simple to spectacular, making it an inviting centerpiece for any occasion. Here are some delightful ideas to enhance your chocolate cake experience.
Plating Suggestions
- Dust the top of the cake with powdered sugar or cocoa powder for a simple yet elegant touch.
- Drizzle warm chocolate ganache over the top, allowing it to cascade down the sides for a dramatic effect.
- Garnish with fresh berries such as raspberries or strawberries for a pop of color and tartness that complements the rich chocolate flavor.
- Add a dollop of freshly whipped cream on the side or on top for a creamy contrast.
Flavor Pairings
To enhance the overall flavor profile of your chocolate cake, consider serving it with:
- Vanilla ice cream (1 scoop per slice) for a classic combination.
- Coconut whipped cream for a tropical twist.
- Espresso or coffee for a complementary bitter note that balances the sweetness.
- Mint leaves for a refreshing garnish that adds an aromatic element.
Chef’s tip: Serve the cake slightly warmed for an indulgent experience, especially if you’re pairing it with ice cream!
With these serving and plating ideas, your chocolate cake will not only taste divine but also look stunning on any dessert table. Enjoy every slice!
Quick Summary
| Prep Time | Cook Time | Total Time | Servings |
|---|---|---|---|
| 20 minutes | 30 minutes | 50 minutes | 8 servings |
- Preheat the oven to 350°F (175°C) for optimal baking.
- Mix dry ingredients separately from wet ingredients for a smooth batter.
- Bake for exactly 30 minutes for a perfect rise.
- Cool the cake in the pan for 10 minutes before transferring to a wire rack.
- Frost once completely cooled to prevent melting.
- Tip: Use room temperature eggs for better emulsification.
- Tip: Sift cocoa powder to avoid lumps in the batter.
Frequently Asked Questions
Can I make this chocolate cake ahead of time? How to store and reheat?
You can absolutely make this chocolate cake ahead of time! Store it in an airtight container at room temperature for up to 3 days, or refrigerate it for up to a week; just reheat slices in the microwave for about 10-15 seconds when you’re ready to enjoy.
What can I substitute for the all-purpose flour in this recipe?
You can use gluten-free all-purpose flour as a 1:1 substitute if you’re looking for a gluten-free option. Just make sure it contains xanthan gum for the best texture!
How do I know when the chocolate cake is done baking?
Your chocolate cake is done when a toothpick inserted in the center comes out clean or with a few moist crumbs, which usually takes about 30-35 minutes at 350°F (175°C). The edges should start to pull away from the pan slightly, giving you a visual cue as well!
Can I freeze this chocolate cake? How long does it last?
Yes, you can freeze the chocolate cake for up to 3 months! Wrap it tightly in plastic wrap and then aluminum foil to prevent freezer burn.
What if I don’t have a 9-inch round cake pan?
If you don’t have a 9-inch round cake pan, you can use an 8-inch round pan; just keep an eye on the baking time as it may need an extra 5-10 minutes. Alternatively, you can use a 9×13-inch baking dish and adjust the baking time accordingly, checking for doneness at about 25-30 minutes.

- Decadent Peanut Butter No-Bake Cheesecake: Easy Recipe to Indulge - April 3, 2026
- Delicious Mango No-Bake Cheesecake: Step-by-Step Recipe - April 3, 2026
- Decadent Raspberry No-Bake Cheesecake: Easy Step-by-Step Recipe - April 3, 2026